INSTALLATION OF THE FRONT GRILLE
Depending upon the location of the AC outlet, route the AC cord to either the left or right side while installing the front grille.
This figure shows the AC cord routed to the left side.

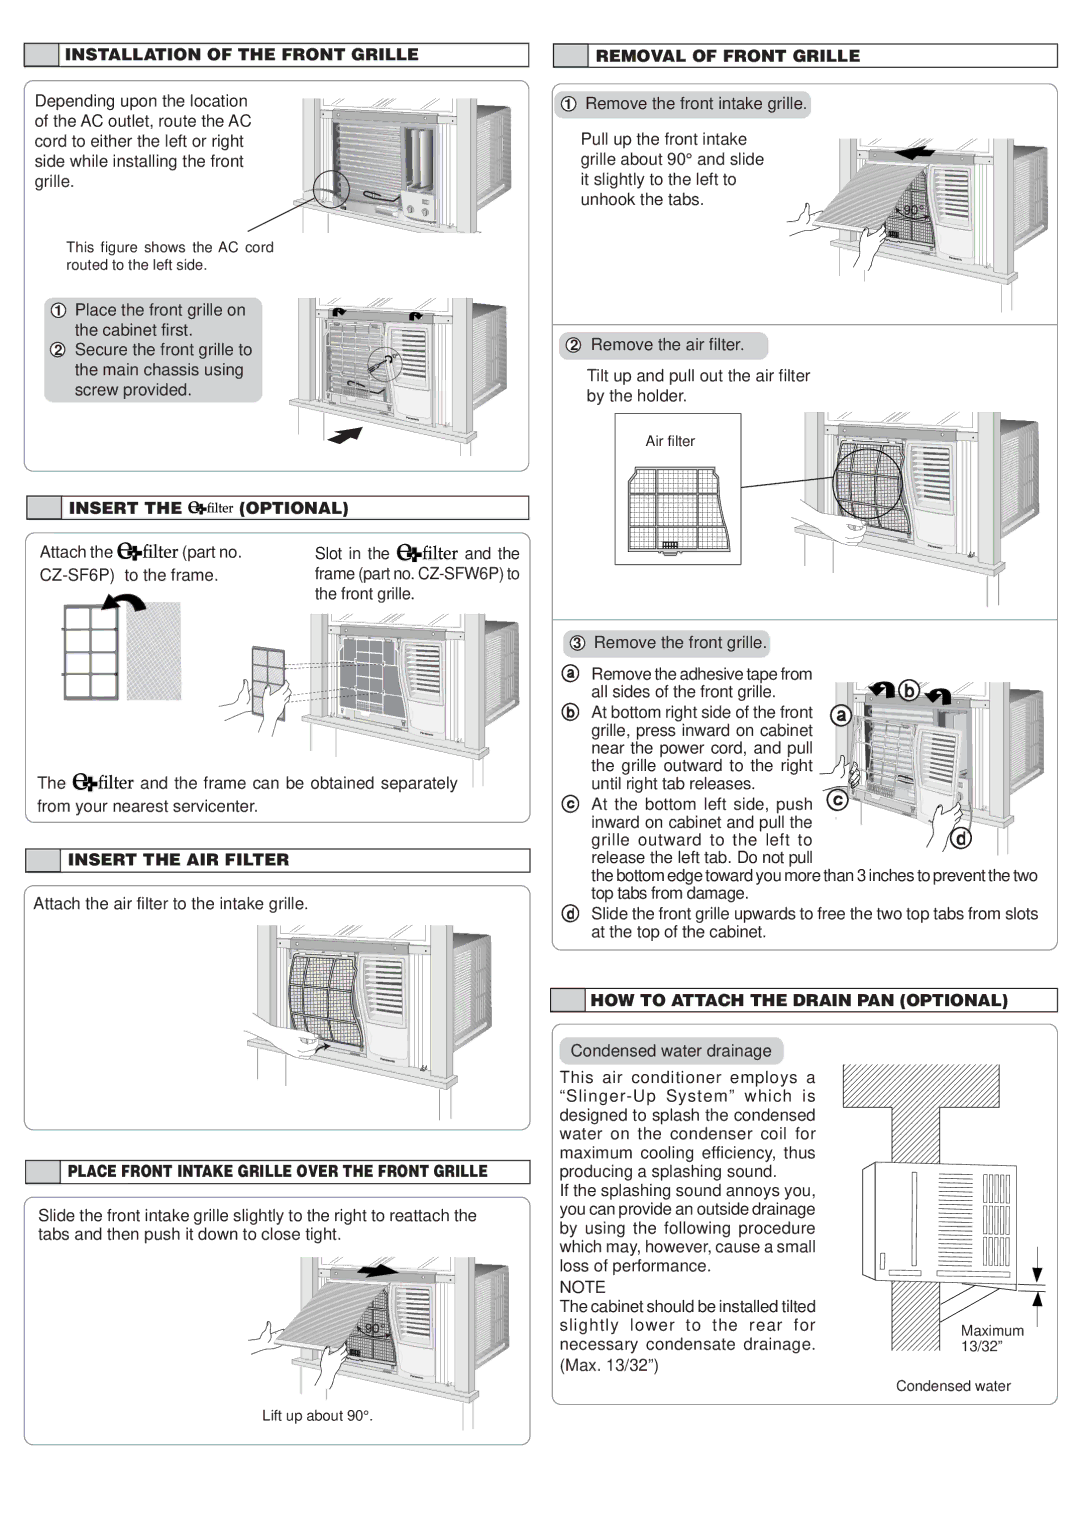
 REMOVAL OF FRONT GRILLE
1Remove the front intake grille.
Pull up the front intake grille about 90° and slide it slightly to the left to unhook the tabs.
Wireless
1 Place the front grille on |
|
| ||
the cabinet first. |
|
| 2 Remove the air filter. | |
2 Secure the front grille to |
| |||
|
| |||
the main chassis using |
| Tilt up and pull out the air filter | ||
screw provided. |
|
| ||
|
| by the holder. | ||
|
|
|
| |
|
|
|
| Air filter |
INSERT THE | (OPTIONAL) |
| ||
Attach the | (part no. | Slot in the | and the | |
| to the frame. |
| frame (part no. | |
|
|
| the front grille. |
|
The ![]()
![]()
![]()
![]() and the frame can be obtained separately from your nearest servicenter.
and the frame can be obtained separately from your nearest servicenter.

 INSERT THE AIR FILTER
Attach the air filter to the intake grille.
3Remove the front grille.
a Remove the adhesive tape from | b |
all sides of the front grille. | |
b At bottom right side of the front | a |
grille, press inward on cabinet |
|
near the power cord, and pull |
|
the grille outward to the right |
|
until right tab releases. | c |
c At the bottom left side, push | |
inward on cabinet and pull the | d |
grille outward to the left to | |
release the left tab. Do not pull |
|
the bottom edge toward you more than 3 inches to prevent the two | |
top tabs from damage. |
|
dSlide the front grille upwards to free the two top tabs from slots at the top of the cabinet.

 HOW TO ATTACH THE DRAIN PAN (OPTIONAL)
Wireless

 PLACE FRONT INTAKE GRILLE OVER THE FRONT GRILLE
Slide the front intake grille slightly to the right to reattach the tabs and then push it down to close tight.
Wireless
Lift up about 90°.
Condensed water drainage
This air conditioner employs a
If the splashing sound annoys you, you can provide an outside drainage by using the following procedure which may, however, cause a small loss of performance.
NOTE
The cabinet should be installed tilted slightly lower to the rear for necessary condensate drainage.
(Max. 13/32”)
Maximum |
13/32” |
Condensed water