DVD Recorder
Table of contents
Safety Precautions
Guide
DVB-T
Before you start
Setting up the remote control
Remote Control
Child protection
Operating a television
Direct entry using the number buttons
DVD/VHS Standby/on switch
Select Drive Select
DVD/HDD Time Slip = Select
Displays
Front Panel
Optical
Rear Panel
Hdmi AV OUT
Video OUT
Connections
Connecting to a television only
Connection with 21-pin Scart cable not provided
Use of the supplied RF coaxial cables
Automatic setup of the unit
Auto Setup
DVB Auto-Setup Tuning digital channels
Auto-Setup Tuning analogue channels
For Q Link functions
Connecting to a television and satellite receiver
AC 220 V to 240 V, 50 Hz
Satellite receiver’s rear panel
View / record satellite programmes
Connection of Set Top Box or satellite receiver
Audio/Video cable included AC mains lead
Connection with Audio/Video cableC
Video Yellow White
Included
AC mains lead Audio cable Video cable RF coaxial cable
Connection with S Video cable
Audio Video
To household Mains socket AC mains lead Included
Connection with Hdmi cable not included
Connect only after all other connections are complete
Control via Q Link and Hdmi Hdavi Control
For all connections described
External units
Connection to AV3 e.g. camcorder
Connection to DV input
Component Video OUT terminal
Connecting a TV with Component Video input terminals
Progressive television picture
Progressive-compatible televisions PAL
Creating new profiles
Profiles
Edit profile
Screen information
Status displays
VHS screen information
Banner
Station with an encrypted signal
Change Category
Hard disk
HDD
Playback and recording discs
Disc formats
DVD-RAM
DVD-R/+R/-R DL/+R DL
Handling discs
Playback discs
SD Card
DVD-VSUB MENU, DVD-ADIRECT NAVIGATOR, VCD Return
Playback
Manual Skip
DVD Play HDD Play
JET REW Time Slip
REC
JET REW
Manual tracking
Before recording
Recording
For recording
Recording time for E-240 cassettes
Record
Pause the recording
DVD/HDD recording of TV programmes
Recording in dual-channel audio
Timer Recording with the television set
Specifying a time as the recording duration
Recording from an external unit, e.g. a camera
SLOW/SEARCH Time Slip
Enter
Entering a title or disc name using the menu
Symbols
Entering text
Top Menu Preview
Playback
Table Display/Thumbnail Display Switching the Title View
Overview of Direct Navigator
Title View
Editing titles in the SUB Menu
Confirm Playback with Enter Select the desired title with
Editing chapters in the SUB Menu
Delete Chapter
Create Chapter
DVD/VHS, Stop ., Skip , SLOW/SEARCH
Starting playback
Playback MP3 playback
SUB Menu during picture playback
JPEG/TIFFplayback from DVD-RAM/SD
Select the required option with and press Enter to confirm
Rotate pictures
Album View
Dpof
Folder
JPEG/TIFF playback from CD/DVD-R
DVDJPEG, Cdjpeg
Landscape view
Recording TV Guide
Moving in the Landscape view
Changing station in the Landscape view
Moving in the Portrait view
Recording TV Guide Portrait view
Changing station in the Portrait view
Prog. Typ Display according to topic areas
Timer Recording menu for digital stations
Recording TV Guide Programming the timer in the TV Guide
Timer Recording menu for analogue stations a
Deleting a Timer Recording
Set up Protection/Cancel Protection of pictures or albums
Set up Protection/Cancel Protection of titles
Table View/Album View
Delete Deleting titles
Automatic SP/LP switching during a VHS recording
Timer Recording Manual programming
Backup recording
Change Profile
Timer Off/On
Check the settings and correct them if necessary
Press PROG/CHECK Checking or changing
Stop Recording
ShowView Record
Timer Recording via external units
Advanced Copy HDD Information about high speed copying
Recording and playback while copying in High Speed Mode
SUB Menu in Create List menu
Copy titles and playlists with a copy list
To Others
Copying in High Speed Mode
Advanced Copy SUB Menu in the copy list
Start Copying
Duration of the copying can be
Advanced Copy Time-triggered copying
Determined
Copy Time
Functions To Others Advanced Copy
Copy pictures
Copying
On the front of the unit
To Others Playlists
Creating a playlist
Creating a Source Chapter
Inserting a chapter into the playlist
Editing playlists in the SUB Menu
Launching the Playlists menu
Press SUB Menu Delete
Create
Move Chapter
Add Chapter
Playlist View
Playlists
Select Copy All Pictures with and confirm with Enter
Copy All Pictures Copying all pictures of an SD card
Automatic detection of an SD card
Select Folder
Displaying the available recording time
Flexible Rec Flexible recording mode FR
DV Auto Rec Automatic detection of a camcorder at DV
Recording via DV input
Tuning Edit Profiles
SetupETUP Setup menu overview Press Functions
Tuning Auto-Setup Restart
Tuning Add New DVB Services
Tuning Download from TV
SetupETUP Tuning Manual
Entering a new television station
Changing the name of the television station
Option
SetupETUP Disc Setting
Still Mode Automatic Field Frame
SetupETUP Picture Setting
Comb Filter On Off
Seamless Play
Display Setting
SetupETUP Sound Setting
AV-Link function
SetupETUP Connection Setting
Not Ntsc
RGB / Video, S Video, Ext Link 1, Ext Link
SetupETUP Connection
SetupETUP Others Setting
Software Update in Standby On Off
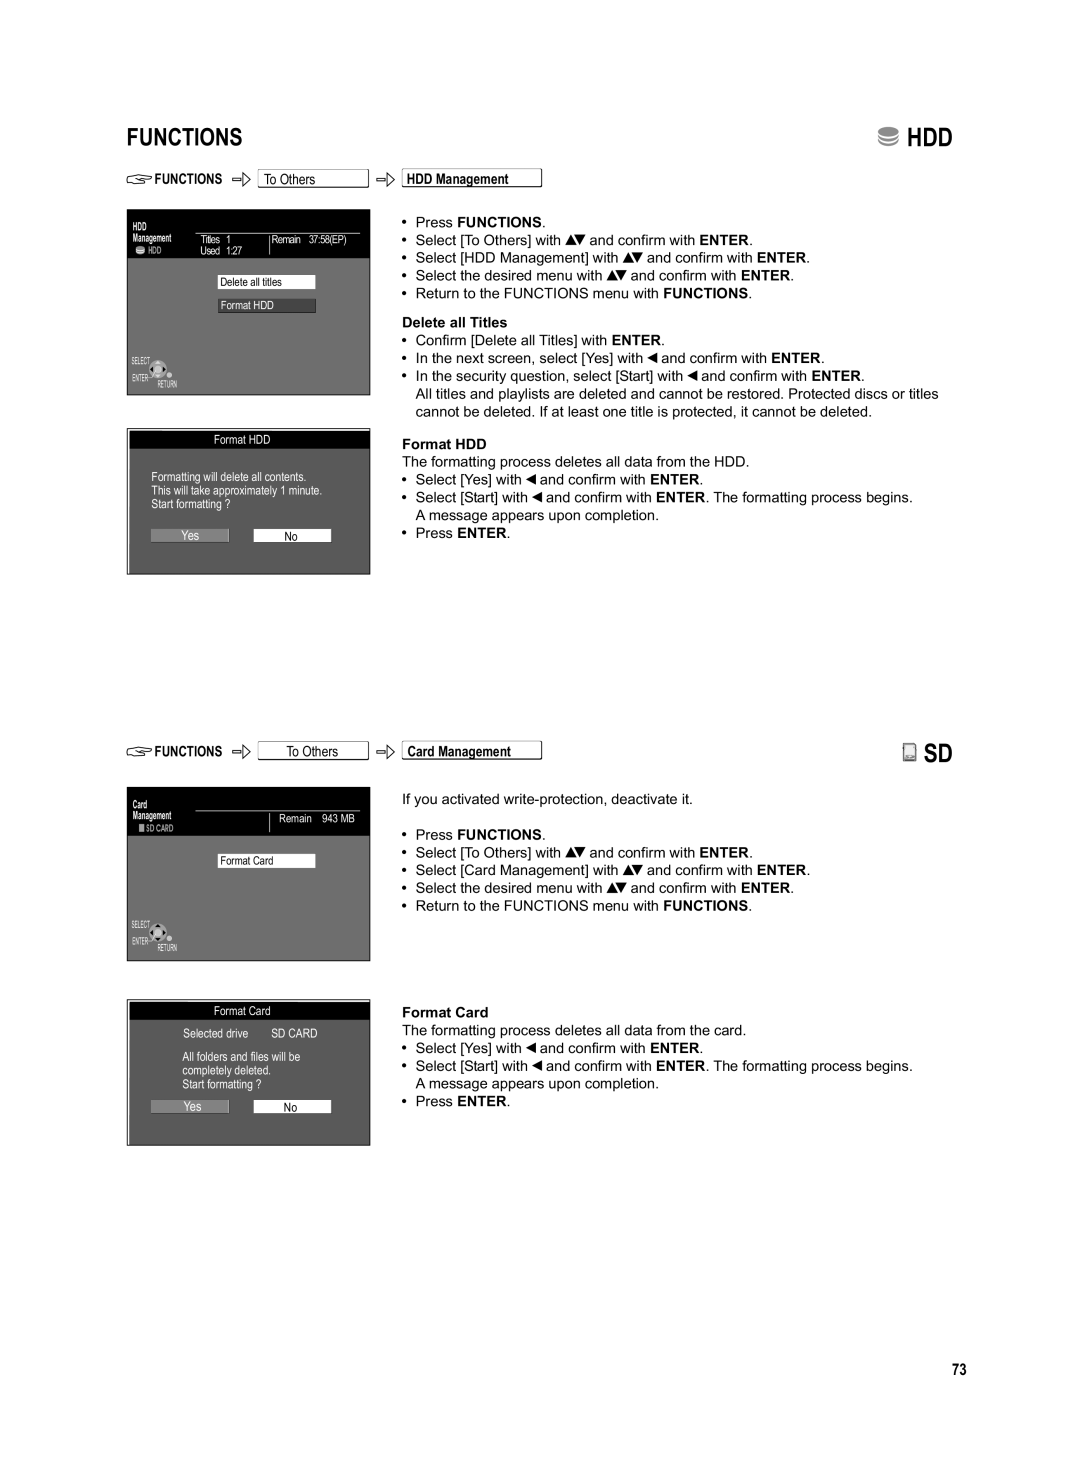
Delete all Titles
HDD Management Press Functions
Format HDD
Format Card
DVD
Disc Name
Auto-Play Select
DVD Management Top Menu
Finalize
Create Top Menu
PBC
Picture and sound settings
Repeat Play On Off
Play
Playback NR On Off
Progressive On Off
Hard ERR
If you need help
Volume set to quiet
When the unit is connected
No picture
There is picture interference
Language selected in the Setup
No reaction when Play is
You forgot your security password
Cannot be cancelled
After the auto setup, there arent
Incomplete after switching on
Displayed during auto setup
Displayed information is
Hdmi
Specifications
Index