English | Replacing the system outer foil and the inner | |||
blades |
|
|
| |
|
| system outer foil | once every year | |
|
|
| inner blade | once every two years |
| 1Replacing the system outer foil | |||
|
|
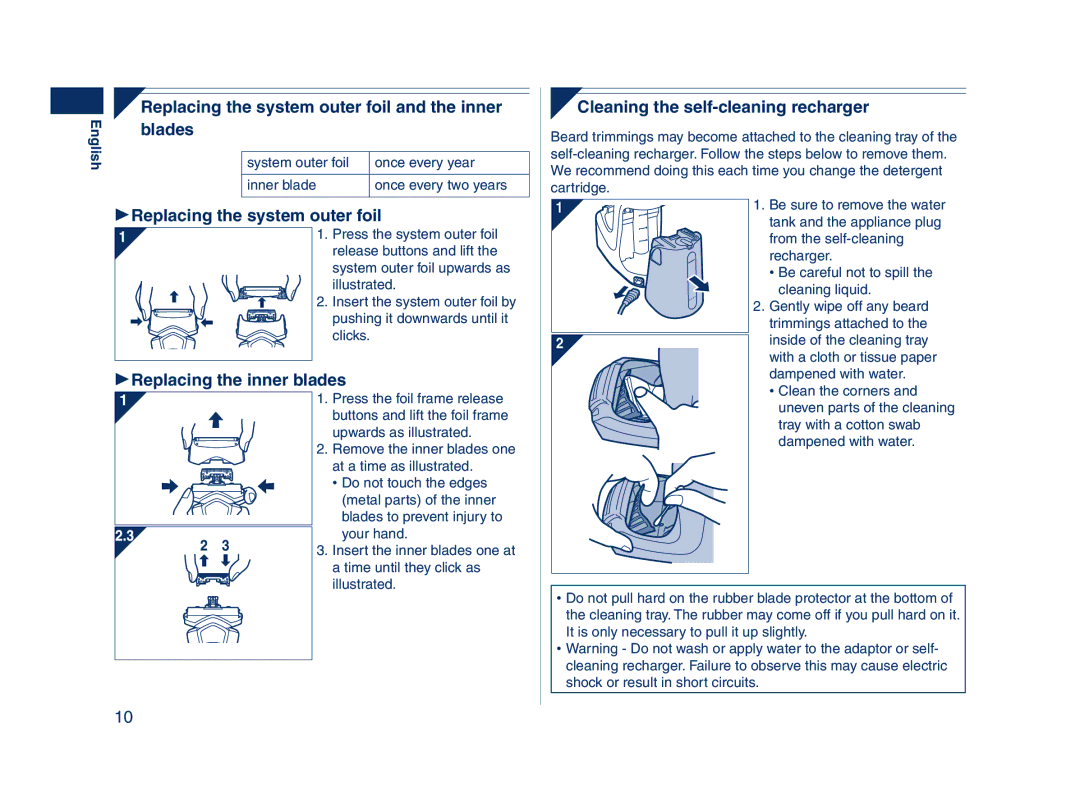
| 1. Press the system outer foil | |
|
|
| release buttons and lift the | |
|
|
| system outer foil upwards as | |
|
|
| illustrated. | |
|
|
| 2. Insert the system outer foil by | |
|
|
| pushing it downwards until it | |
|
|
| clicks. |
|
| 1Replacing the inner blades |
| ||
|
|
| 1. Press the foil frame release | |
|
|
| buttons and lift the foil frame | |
|
|
| upwards as illustrated. | |
|
|
| 2. Remove the inner blades one | |
|
|
| at a time as illustrated. | |
|
|
| • Do not touch the edges | |
|
|
| (metal parts) of the inner | |
|
|
| blades to prevent injury to | |
| 2 | 3 | your hand. | |
| 3. Insert the inner blades one at | |||
|
|
| ||
|
|
| a time until they click as | |
|
|
| illustrated. | |
10
Cleaning the self-cleaning recharger
Beard trimmings may become attached to the cleaning tray of the
1 | 1. Be sure to remove the water |
| tank and the appliance plug |
| from the |
| recharger. |
| • Be careful not to spill the |
| cleaning liquid. |
| 2. Gently wipe off any beard |
| trimmings attached to the |
2 | inside of the cleaning tray |
| with a cloth or tissue paper |
| dampened with water. |
| • Clean the corners and |
| uneven parts of the cleaning |
| tray with a cotton swab |
| dampened with water. |
•Do not pull hard on the rubber blade protector at the bottom of the cleaning tray. The rubber may come off if you pull hard on it. It is only necessary to pull it up slightly.
•Warning - Do not wash or apply water to the adaptor or self- cleaning recharger. Failure to observe this may cause electric shock or result in short circuits.
