Wall Mounting
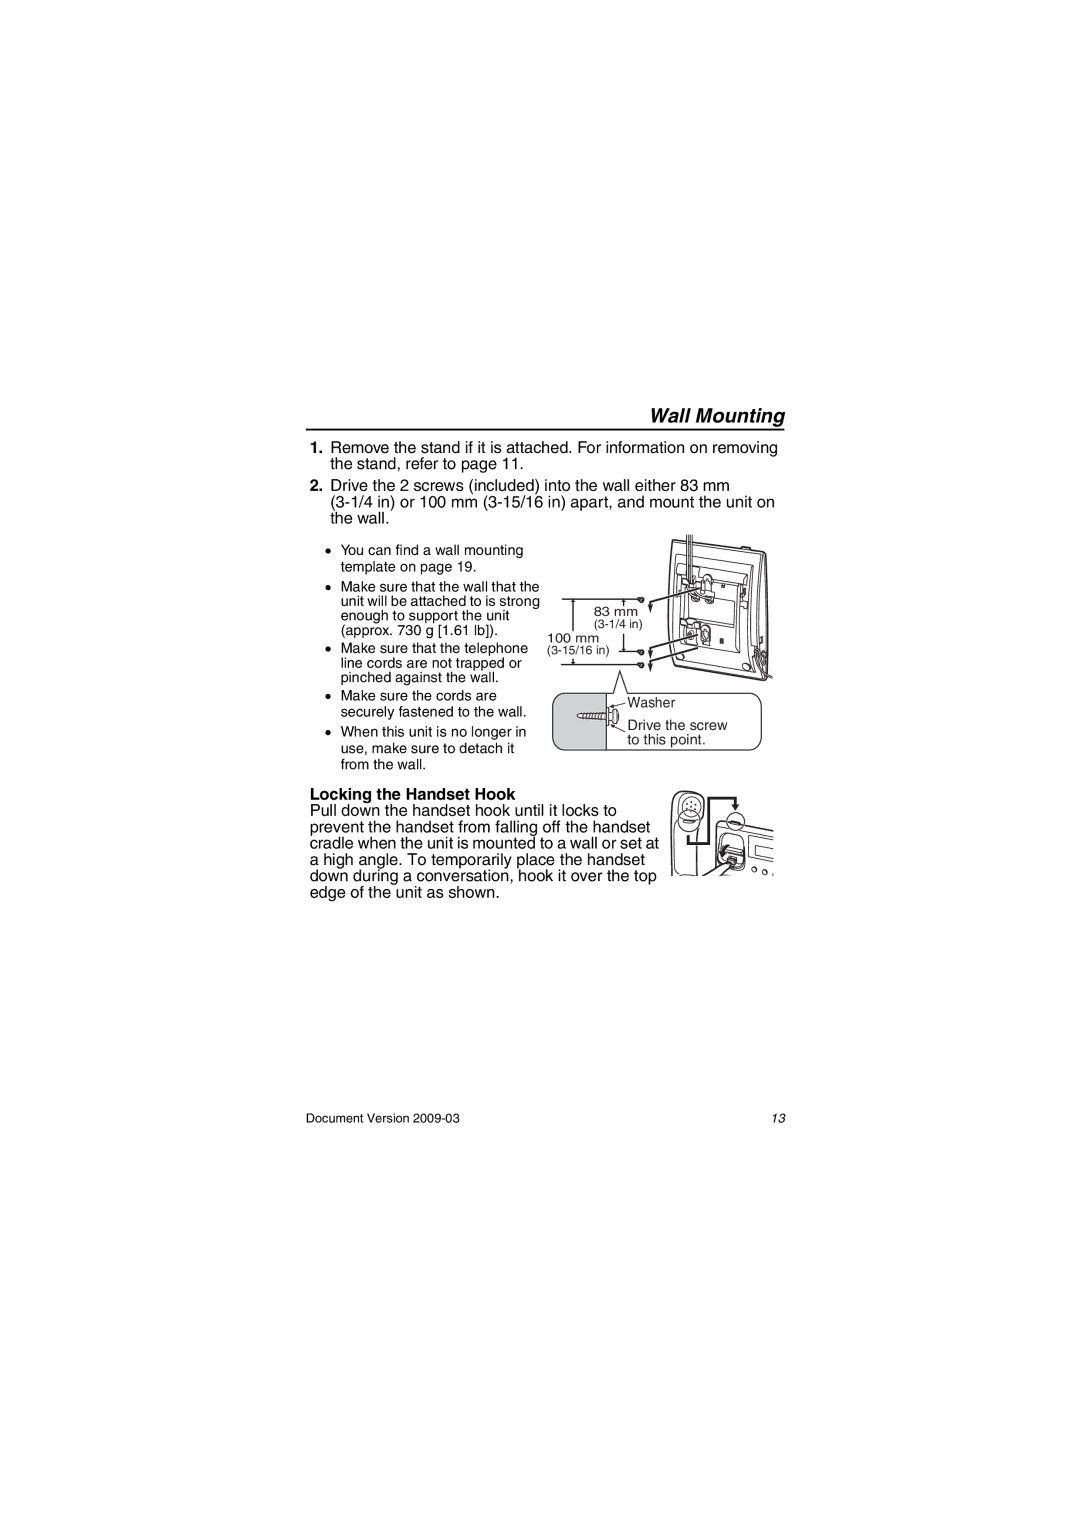
1.Remove the stand if it is attached. For information on removing the stand, refer to page 11.
2.Drive the 2 screws (included) into the wall either 83 mm
• You can find a wall mounting template on page 19.
• Make sure that the wall that the |
| ||
| unit will be attached to is strong | 83 mm | |
| enough to support the unit | ||
| (approx. 730 g [1.61 lb]). | ||
| 100 mm | ||
• | Make sure that the telephone | ||
| line cords are not trapped or |
| |
| pinched against the wall. |
| |
• | Make sure the cords are | Washer | |
| securely fastened to the wall. | ||
| Drive the screw | ||
• | When this unit is no longer in | ||
to this point. | |||
| use, make sure to detach it | ||
|
| ||
| from the wall. |
|
Locking the Handset Hook
Pull down the handset hook until it locks to prevent the handset from falling off the handset cradle when the unit is mounted to a wall or set at a high angle. To temporarily place the handset down during a conversation, hook it over the top edge of the unit as shown.
Document Version | 13 |
