Using the hand scanner
Scanning a document
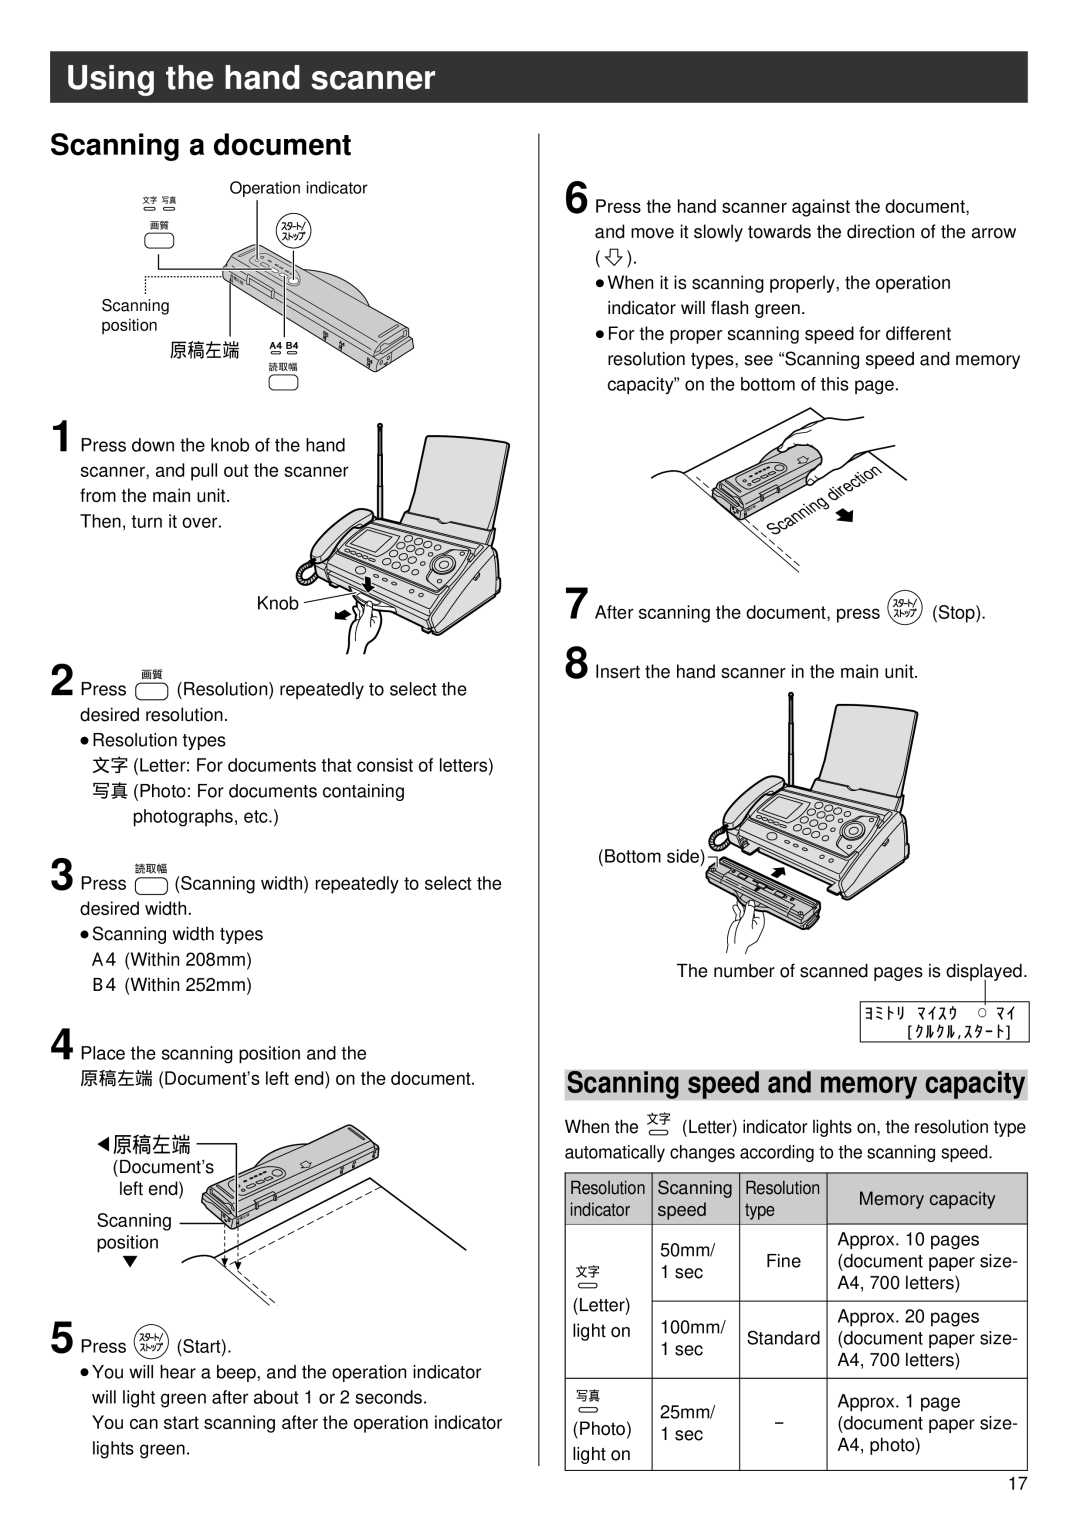
Operation indicator
文字 写真
画質
Scanning position
原稿左端�
読取幅
1 Press down the knob of the hand scanner, and pull out the scanner from the main unit.
Then, turn it over.
Knob ![]()
![]()
![]()
2 Press | 画質� |
(Resolution) repeatedly to select the |
desired resolution.
●Resolution types
文字 (Letter: For documents that consist of letters)
写真 (Photo: For documents containing photographs, etc.)
3 Press | 読取幅� |
(Scanning width) repeatedly to select the |
desired width.
●Scanning width types A4 (Within 208mm) B4 (Within 252mm)
4 Place the scanning position and the
原稿左端 (Document’s left end) on the document.
原稿左端� |
(Document’s |
left end) |
Scanning |
position |
5 Press ![]() (Start).
(Start).
●You will hear a beep, and the operation indicator will light green after about 1 or 2 seconds.
You can start scanning after the operation indicator lights green.
6 Press the hand scanner against the document, and move it slowly towards the direction of the arrow ( ![]() ).
).
●When it is scanning properly, the operation indicator will flash green.
●For the proper scanning speed for different resolution types, see “Scanning speed and memory capacity” on the bottom of this page.
7 After scanning the document, press ![]() (Stop).
(Stop).
8 Insert the hand scanner in the main unit.
(Bottom side) ![]()
The number of scanned pages is displayed.
ヨ ミ ト リ ア マ イ ス ウ ア ◯ マ イ
ア ア ア ア [ ク ル ク ル , ス タ ー ト ]
Scanning speed and memory capacity
When the 文字� (Letter) indicator lights on, the resolution type automatically changes according to the scanning speed.
Resolution | Scanning | Resolution | Memory capacity | |
indicator | speed | type | ||
| ||||
| 50mm/ |
| Approx. 10 pages | |
| Fine | (document paper size- | ||
文字� | 1 sec | |||
| A4, 700 letters) | |||
|
|
| ||
(Letter) |
|
|
| |
100mm/ |
| Approx. 20 pages | ||
light on |
| |||
Standard | (document paper size- | |||
| 1 sec | |||
|
| A4, 700 letters) | ||
|
|
| ||
|
|
|
| |
写真� | 25mm/ |
| Approx. 1 page | |
(Photo) | - | (document paper size- | ||
1 sec | ||||
light on |
| A4, photo) | ||
|
| |||
|
|
| ||
|
|
|
|
17