Using the hand scanner
Scanning a document
F2
ストップ スタート 画 質
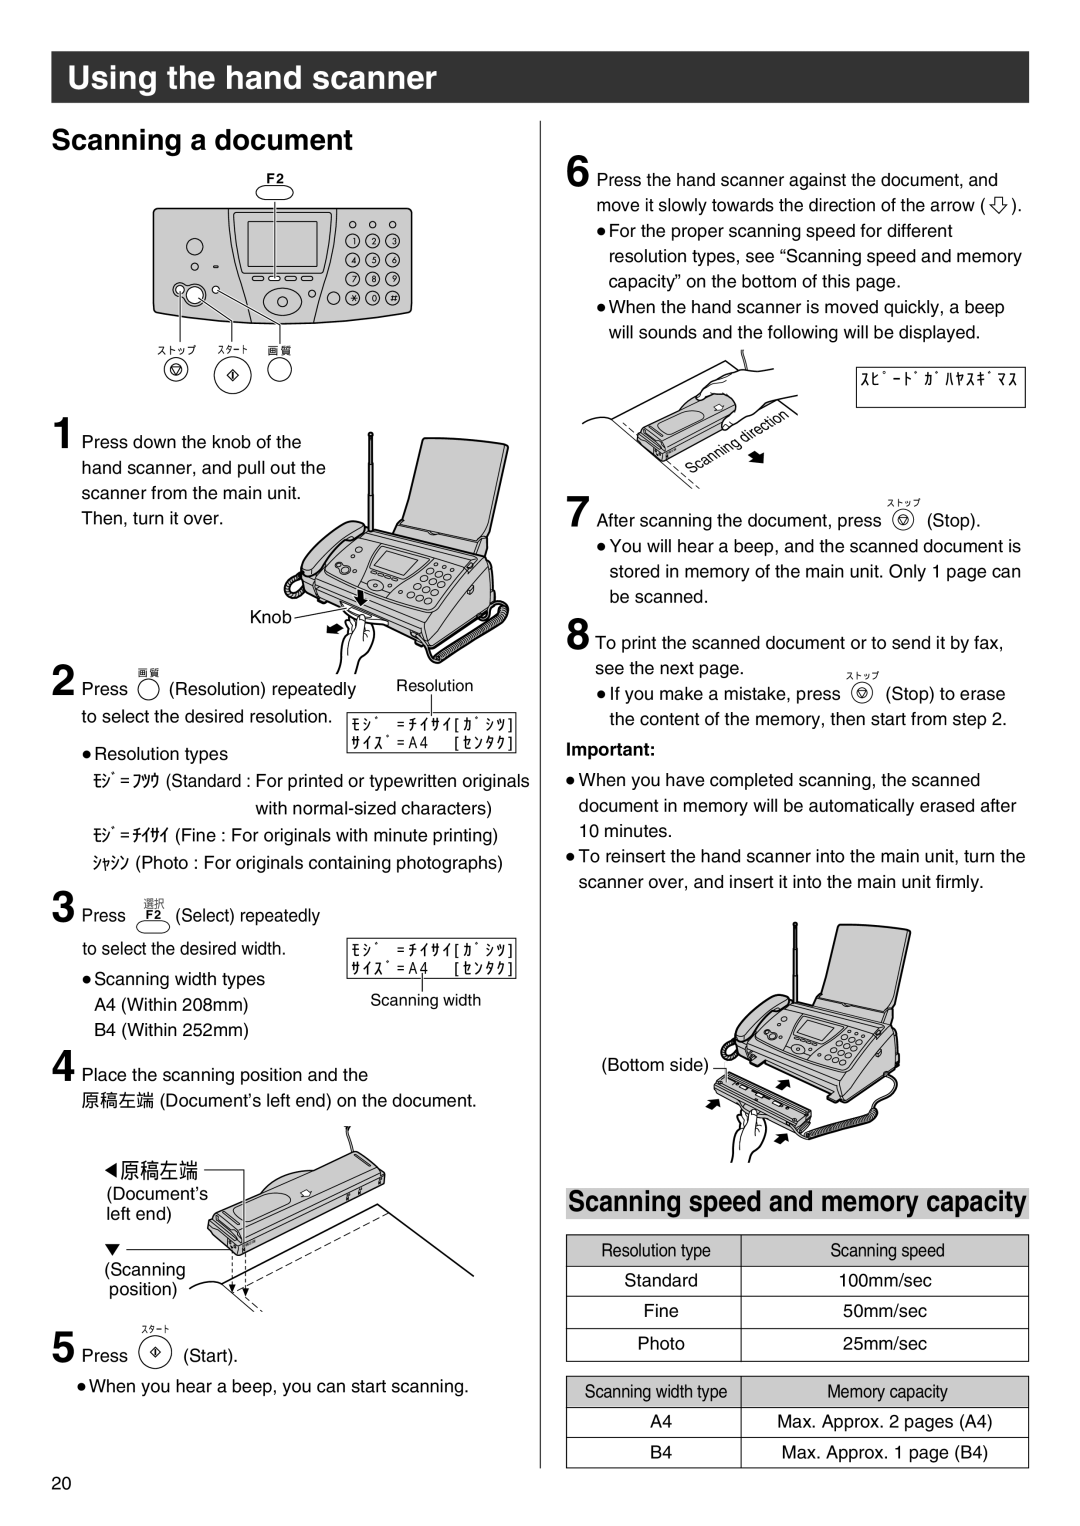
1 Press down the knob of the hand scanner, and pull out the scanner from the main unit. Then, turn it over.
| Knob |
| |
2 Press | 画 質 � | Resolution | |
(Resolution) repeatedly | |||
| |||
to select the desired resolution. モ シ ゙ ス = チ イ サ イ [ カ ゙ シ ツ ] | |||
| サ イ ス ゙ = A4セ セ [ セ ン タ ク ] | ||
● Resolution types |
| ||
モジ=フツウ (Standard : For printed or typewritten originals | |||
| with | ||
モジ=チイサイ (Fine : For originals with minute printing) | |||
シャシン (Photo : For originals containing photographs) | |||
6 Press the hand scanner against the document, and move it slowly towards the direction of the arrow ( ![]() ).
).
●For the proper scanning speed for different resolution types, see “Scanning speed and memory capacity” on the bottom of this page.
●When the hand scanner is moved quickly, a beep will sounds and the following will be displayed.
ス ヒ ゚ ー ト ゙ カ ゙ ハ ヤ ス キ ゙ マ ス
7 After scanning the document, press | ストップ� |
(Stop). |
●You will hear a beep, and the scanned document is stored in memory of the main unit. Only 1 page can be scanned.
8 To print the scanned document or to send it by fax, see the next page.
●If you make a mistake, press ![]() (Stop) to erase the content of the memory, then start from step 2.
(Stop) to erase the content of the memory, then start from step 2.
Important:
●When you have completed scanning, the scanned document in memory will be automatically erased after 10 minutes.
●To reinsert the hand scanner into the main unit, turn the scanner over, and insert it into the main unit firmly.
3 Press 選択 (Select) repeatedly
F2
to select the desired width.
●Scanning width types A4 (Within 208mm) B4 (Within 252mm)
モ シ ゙ ス = チ イ サ イ [ カ ゙ シ ツ ] サ イ ス ゙ = A4セ セ [ セ ン タ ク ]
Scanning width
4 Place the scanning position and the
原稿左端 (Document’s left end) on the document.
原稿左端� |
(Document’s |
left end) |
(Scanning
position)
スタート�
5 Press ![]() (Start).
(Start).
●When you hear a beep, you can start scanning.
(Bottom side) ![]()
Scanning speed and memory capacity
Resolution type | Scanning speed |
Standard | 100mm/sec |
|
|
Fine | 50mm/sec |
|
|
Photo | 25mm/sec |
|
|
|
|
Scanning width type | Memory capacity |
A4 | Max. Approx. 2 pages (A4) |
|
|
B4 | Max. Approx. 1 page (B4) |
|
|
20