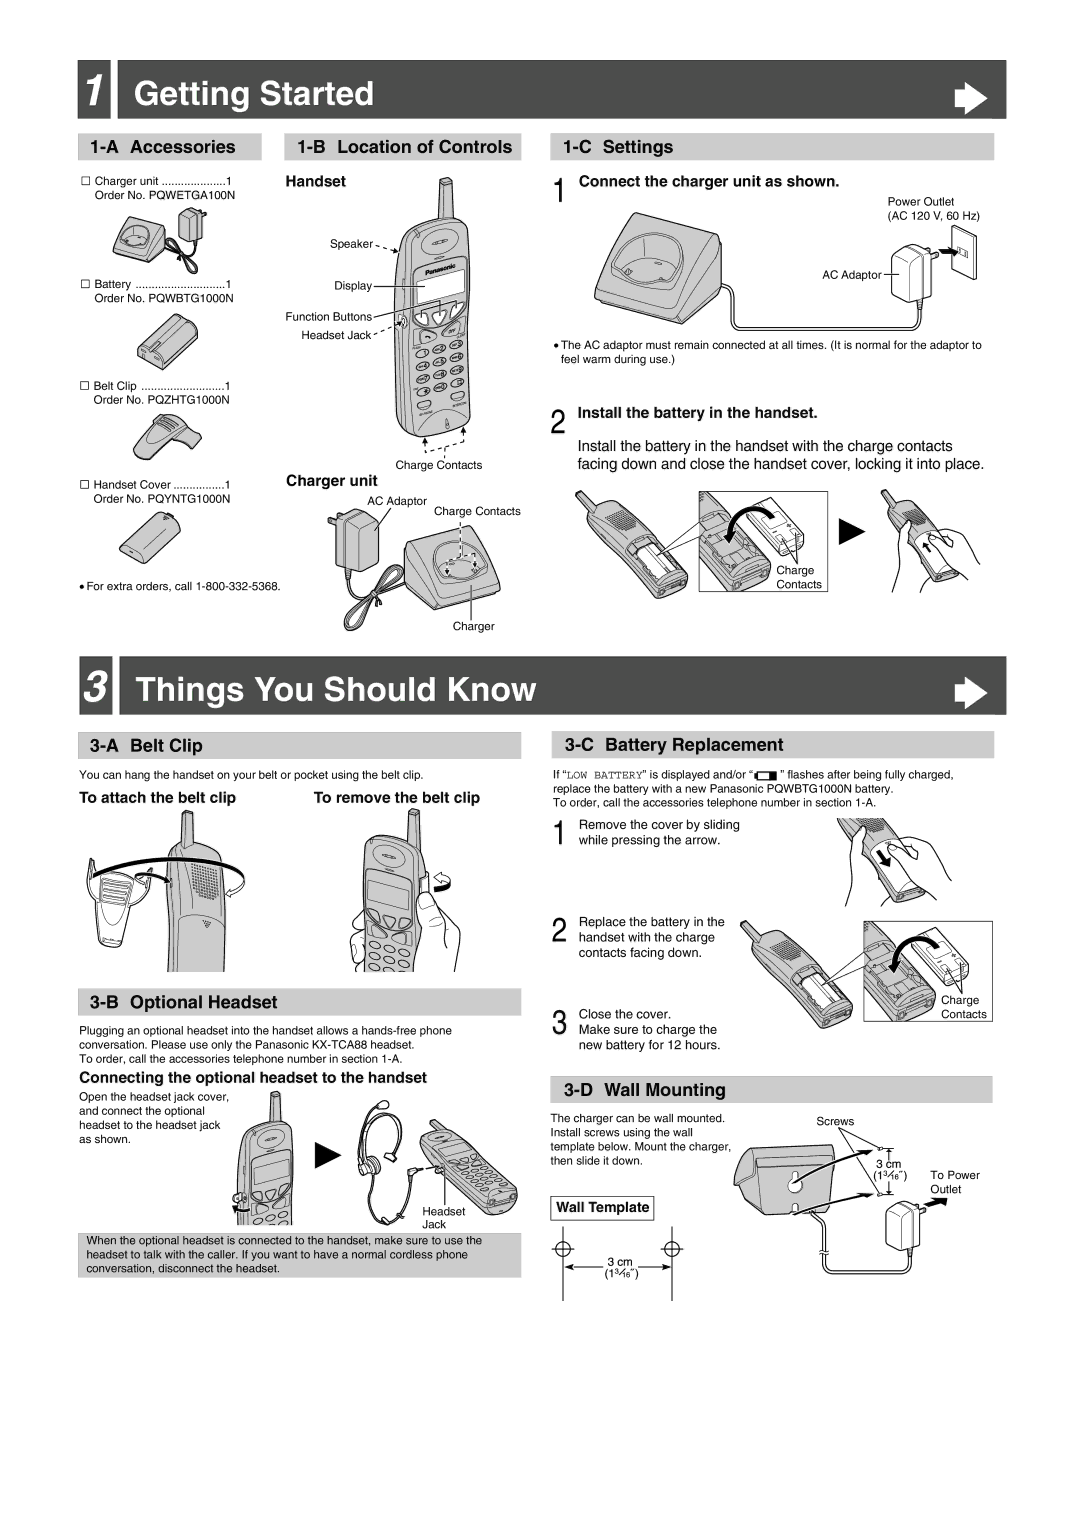
1 Getting Started | ||
Charger unit | 1 | Handset |
Order No. PQWETGA100N |
| |
|
| Speaker |
1-C Settings
1 Connect the charger unit as shown.
Power Outlet
(AC 120 V, 60 Hz)
Battery | 1 | Display |
|
Order No. PQWBTG1000N |
|
| |
|
| Function Buttons |
|
|
| Headset Jack | 3 |
|
|
| |
|
| 1 | 2 |
|
| 6 | |
|
|
| |
|
| 4 | 5 |
|
| 9 | |
|
|
| |
|
| 7 | 8 |
Belt Clip | 1 |
| |
| 0 | ||
|
| ||
Order No. PQZHTG1000N |
|
| |
|
| Charge Contacts | |
Handset Cover | 1 | Charger unit |
|
Order No. PQYNTG1000N | AC Adaptor |
| |
Charge Contacts
•For extra orders, call
Charger
AC Adaptor
•The AC adaptor must remain connected at all times. (It is normal for the adaptor to feel warm during use.)
2 Install the battery in the handset.
Install the battery in the handset with the charge contacts facing down and close the handset cover, locking it into place.
H ![]()
Charge
Contacts
3 
 Things You Should Know
3-A Belt Clip
You can hang the handset on your belt or pocket using the belt clip.
To attach the belt clip | To remove the belt clip |
3-B Optional Headset
Plugging an optional headset into the handset allows a
To order, call the accessories telephone number in section
3-C Battery Replacement
If “LOW BATTERY” is displayed and/or “ | ” flashes after being fully charged, |
replace the battery with a new Panasonic PQWBTG1000N battery. To order, call the accessories telephone number in section
1 Remove the cover by sliding while pressing the arrow.
| Replace the battery in the |
|
2 handset with the charge |
| |
| contacts facing down. |
|
3 |
| Charge |
Close the cover. | Contacts | |
Make sure to charge the |
| |
new battery for 12 hours.
Connecting the optional headset to the handset
Open the headset jack cover, and connect the optional headset to the headset jack as shown.
 H
H ![]()
Headset
Jack
When the optional headset is connected to the handset, make sure to use the headset to talk with the caller. If you want to have a normal cordless phone conversation, disconnect the headset.
3-D Wall Mounting
The charger can be wall mounted. | Screws |
Install screws using the wall |
|
template below. Mount the charger, |
|
then slide it down. |
|
To Power
Outlet
Wall Template