Note:
LUse only the supplied Panasonic AC adaptor PQLV219.
LThe AC adaptor must remain connected at all times. (It is normal for the adaptor to feel warm during use.)
LMake sure that the wall is strong enough to support the weight of the unit.
Battery installation/Battery charge
Important:
LUse the supplied rechargeable batteries. For replacement, we recommend using the Panasonic rechargeable batteries noted on page 2.
LWipe the battery ends (S, T) with a dry cloth.
LAvoid touching the battery ends (S, T) or the unit contacts. LConfirm correct polarities (S, T).
LUSE ONLY
LDo NOT use
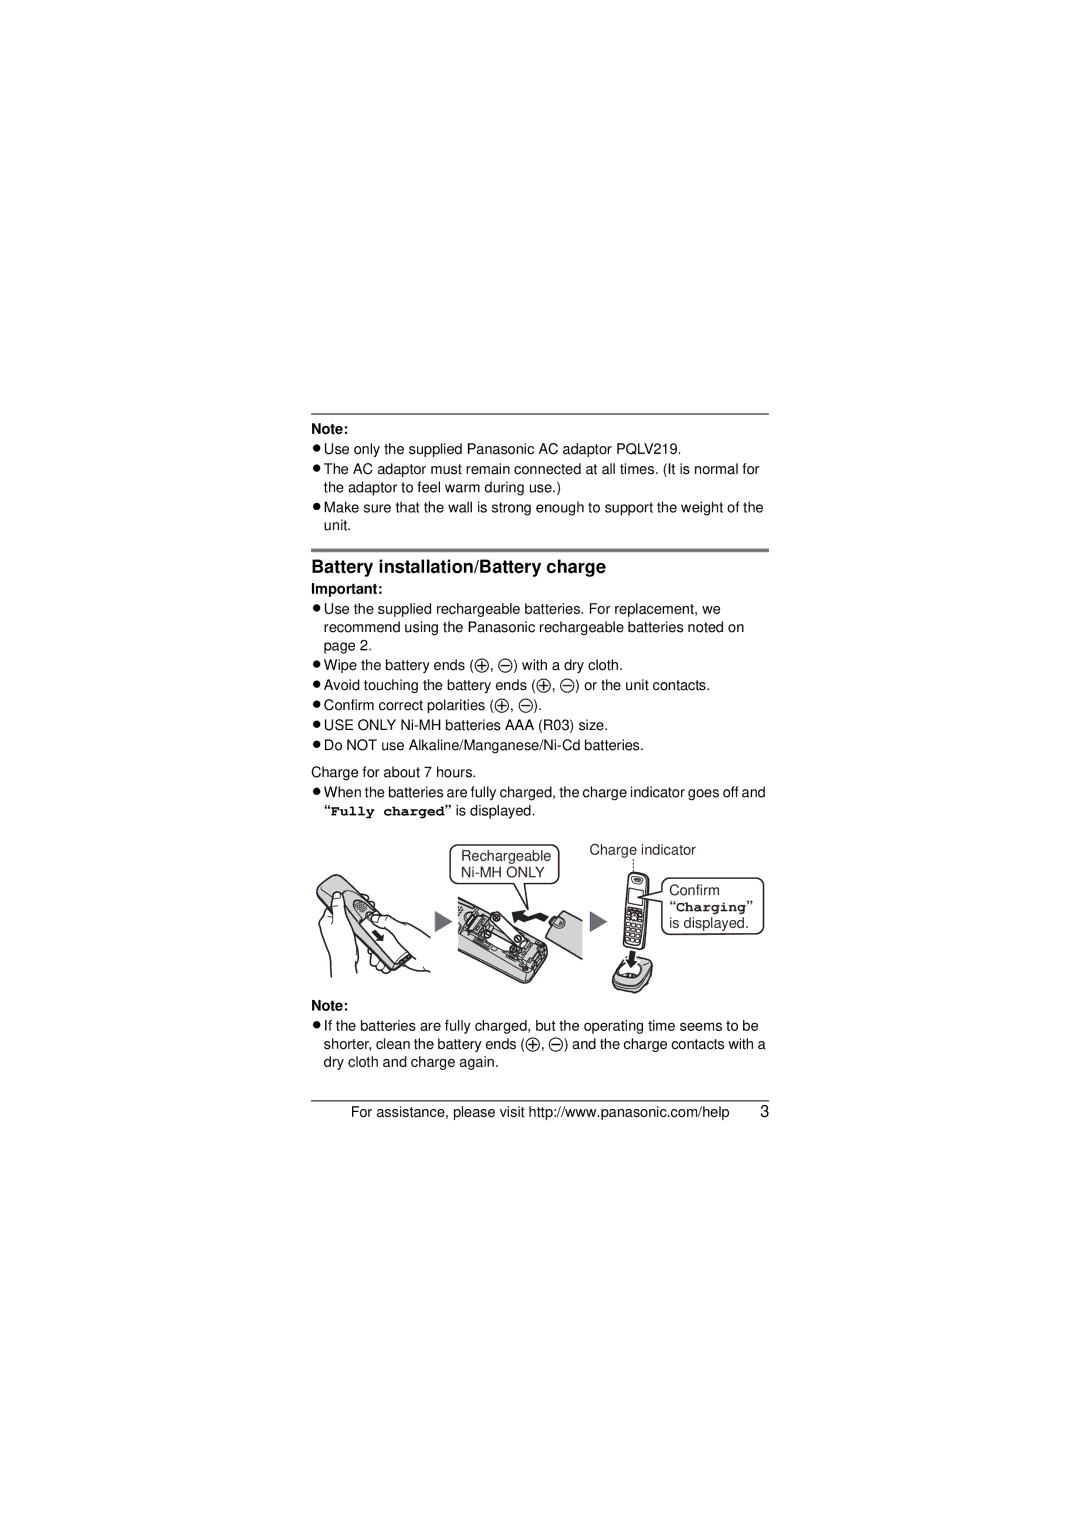
Charge for about 7 hours.
LWhen the batteries are fully charged, the charge indicator goes off and “Fully charged” is displayed.
Rechargeable | Charge indicator |
| |
|
Confirm
“Charging”
is displayed.
Note:
LIf the batteries are fully charged, but the operating time seems to be shorter, clean the battery ends (S, T) and the charge contacts with a dry cloth and charge again.
For assistance, please visit http://www.panasonic.com/help | 3 |