Connections
Notes on connections
BRead the instruction manual for each system component carefully before connecting it.
BTurn off the power supply for all components before making any connections.
BIf the cables necessary for connecting a component to the system are not included with the component or available as an option, you may need to fashion a cable to suit the component concerned.
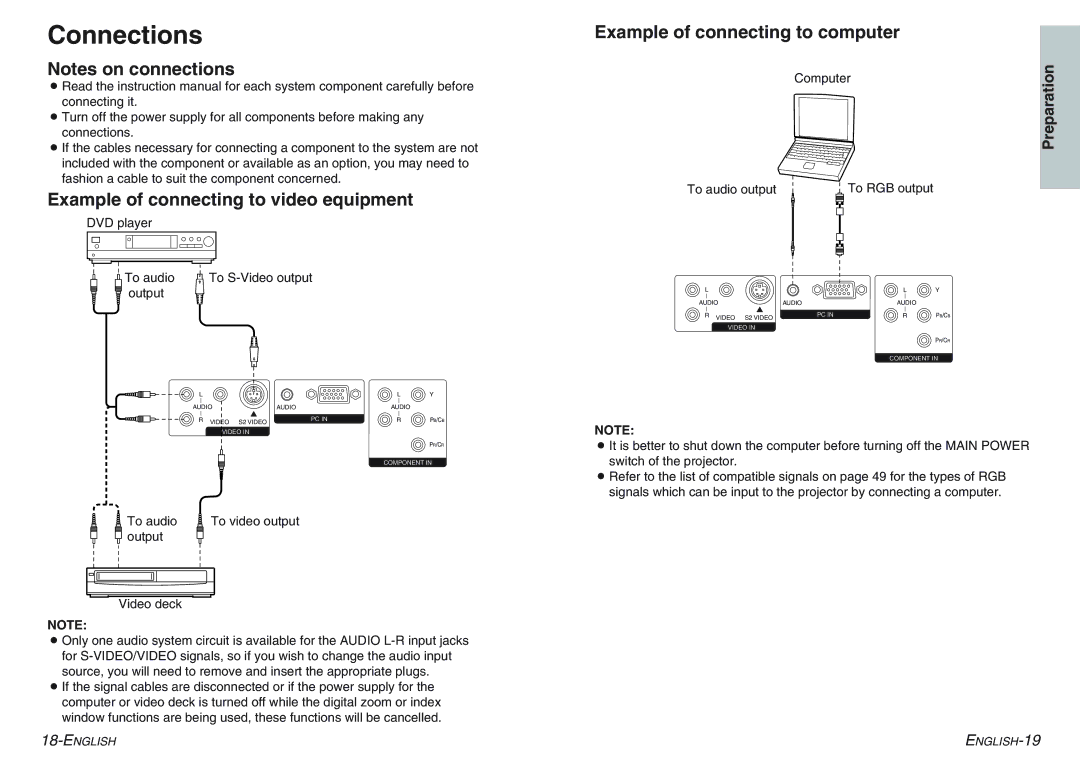
Example of connecting to video equipment
DVD player
To audio | To |
output |
|
L |
|
|
| L | Y |
|
|
|
| ||
AUDIO |
| AUDIO | AUDIO |
| |
|
| PC IN |
| ||
R | VIDEO | S2 VIDEO | R | PB/CB | |
|
|
|
| ||
VIDEO IN
PR/CR
COMPONENT IN
To audio | To video output |
output |
|
Video deck
NOTE:
BOnly one audio system circuit is available for the AUDIO
BIf the signal cables are disconnected or if the power supply for the computer or video deck is turned off while the digital zoom or index window functions are being used, these functions will be cancelled.
Example of connecting to computer
| Computer | Preparation |
|
| |
To audio output | To RGB output |
|
L |
|
|
| L | Y |
|
|
|
| ||
AUDIO |
| AUDIO | AUDIO |
| |
|
| PC IN |
| ||
R | VIDEO | S2 VIDEO | R | PB/CB | |
|
|
|
| ||
VIDEO IN
PR/CR
COMPONENT IN
NOTE:
BIt is better to shut down the computer before turning off the MAIN POWER switch of the projector.
BRefer to the list of compatible signals on page 49 for the types of RGB signals which can be input to the projector by connecting a computer.