About Your Projector
Preparation
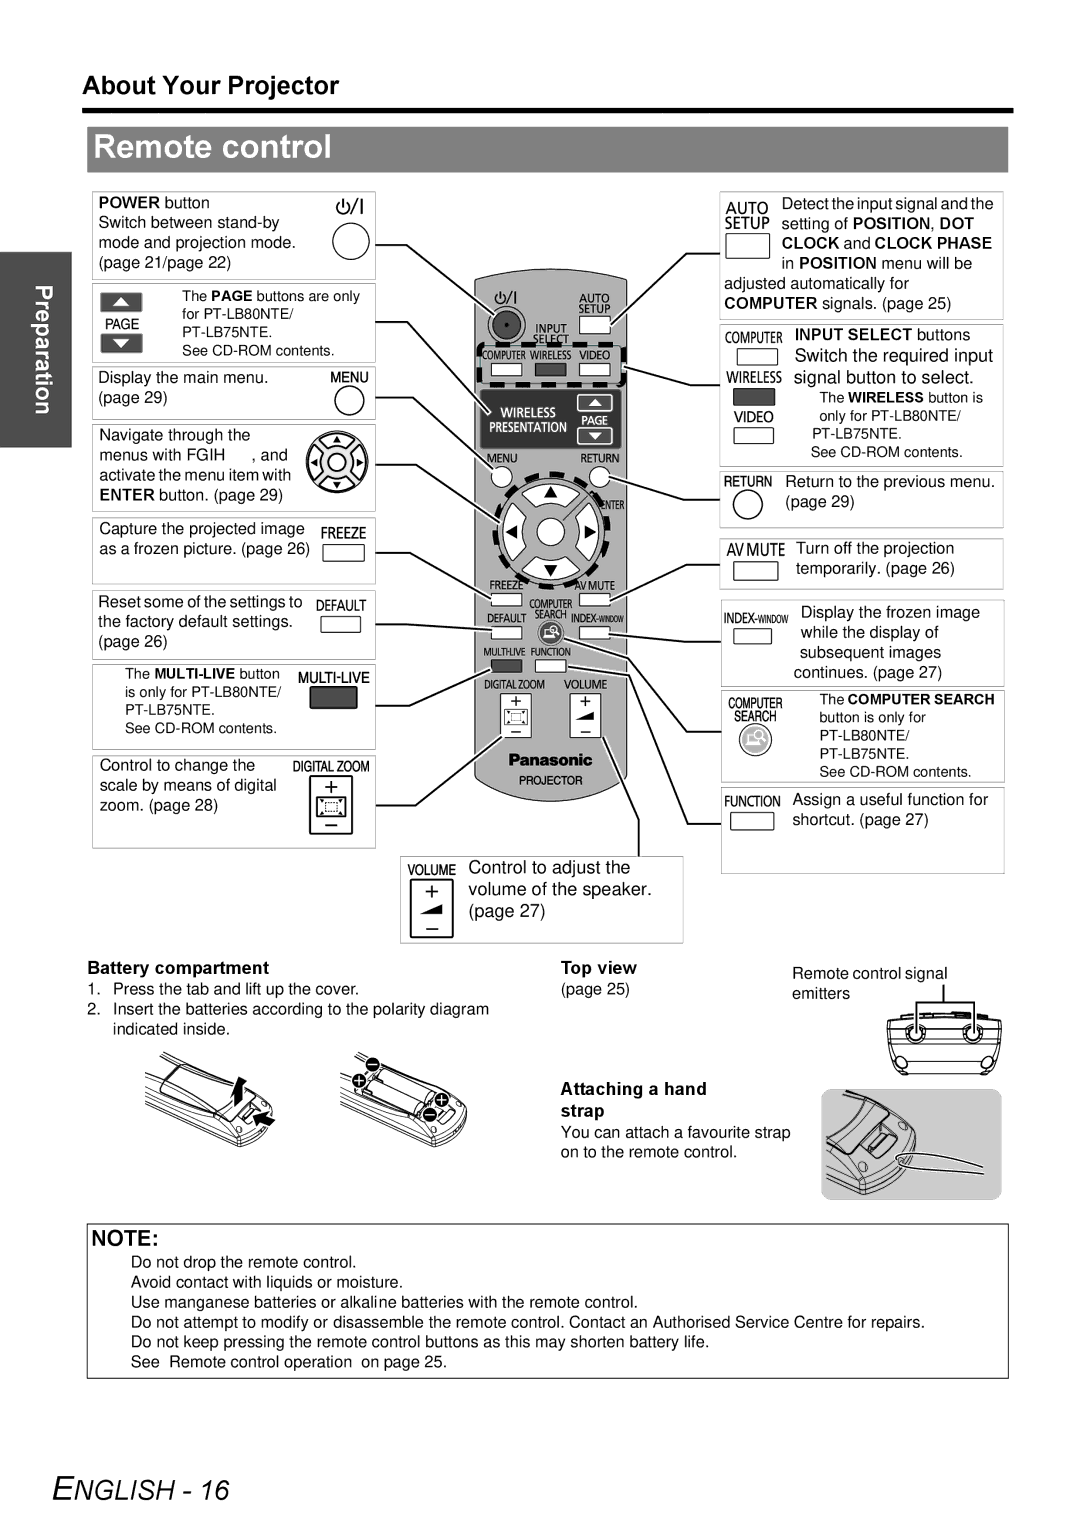
Remote control
POWER button
Switch between
The PAGE buttons are only for
See
Display the main menu. (page 29)
Navigate through the menus with FGIH, and activate the menu item with ENTER button. (page 29)
Capture the projected image as a frozen picture. (page 26)
Reset some of the settings to the factory default settings. (page 26)
The
See
Control to change the scale by means of digital zoom. (page 28)
Control to adjust the volume of the speaker. (page 27)
Detect the input signal and the
setting of POSITION, DOT CLOCK and CLOCK PHASE in POSITION menu will be
adjusted automatically for COMPUTER signals. (page 25)
INPUT SELECT buttons
Switch the required input signal button to select.
The WIRELESS button is only for
See
Return to the previous menu. (page 29)
Turn off the projection temporarily. (page 26)
Display the frozen image while the display of subsequent images continues. (page 27)
The COMPUTER SEARCH button is only for
See
Assign a useful function for shortcut. (page 27)
Battery compartment | Top view | Remote control signal | |
1. | Press the tab and lift up the cover. | (page 25) | emitters |
2. | Insert the batteries according to the polarity diagram |
|
|
| indicated inside. |
|
|
Attaching a hand strap
You can attach a favourite strap on to the remote control.
NOTE:
•Do not drop the remote control.
•Avoid contact with liquids or moisture.
•Use manganese batteries or alkaline batteries with the remote control.
•Do not attempt to modify or disassemble the remote control. Contact an Authorised Service Centre for repairs.
•Do not keep pressing the remote control buttons as this may shorten battery life.
•See “Remote control operation” on page 25.