Copying Your Tapes (Dubbing)
Special VCR Features
•
Before Requesting Service
ResetLanguage,Channels,Clock,VCR’sOutputChannel
•
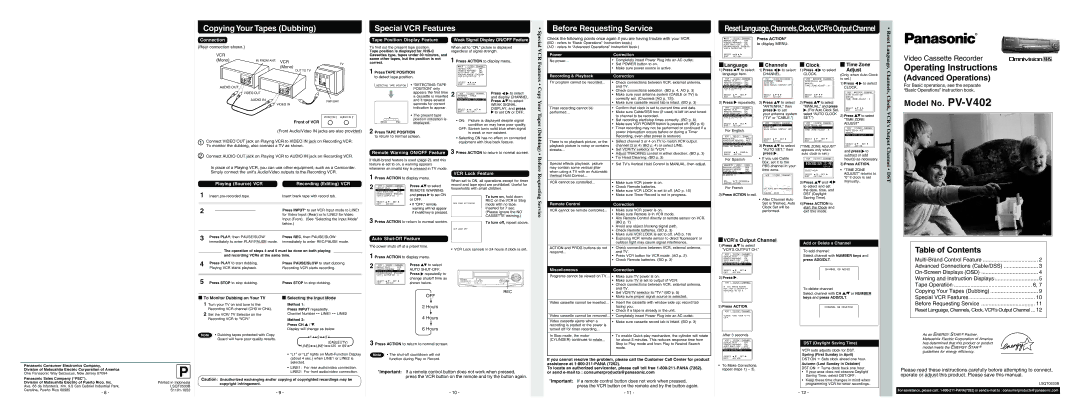
Connection
Tape Position Display Feature | Weak Signal Display ON/OFF Feature |
Special
Check the following points once again if you are having trouble with your VCR.
(BO : refers to “Basic Operations” Instruction book.)
VCR |
| CLOCK |
|
| CHANNEL | Press ACTION* |
REPEAT PLAY | :OFF | |||||
REMOTE WARNING | :ON | to display MENU. | ||||
AUTO SHUT- OFF | :OFF | |||||
Reset
(Rear connection shown.)
VCR
To find out the present tape position.
Tape position is displayed for
When set to “ON,” picture is displayed regardless of signal strength.
VCR
(AO : refers to “Advanced Operations” Instruction book.)
Power | Correction |
|
|
IDIOMA/LANGUE : ENGLISH | |
VCR’ S OUTPUT CH :3 | |
SELECT | : |
EXIT | : ACT I ON |
Language,
(Mono) | IN FROM ANT. | VCR |
|
| |
|
| (Mono) |
OUT TO TV
R
L
TV
some other tapes, but the position is not correct.
1 Press TAPE POSITION
to detect tape position.
1 Press ACTION to display menu.
VCR |
| CLOCK |
|
| CHANNEL |
REPEAT PLAY | :OFF | ||||
REMOTE WARNING | :ON | ||||
AUTO SHUT- OFF | :OFF | ||||
IDIOMA/LANGUE : ENGLISH | |||||
VCR’ S OUTPUT CH | :3 | ||||
SELECT | : |
|
|
| |
Features
No power… | • Completely insert Power Plug into an AC outlet. | |
| • | Set POWER button to on. |
| • | Make sure power source is active. |
Recording & Playback | Correction |
TV program cannot be recorded... | • Check connections between VCR, external antenna, |
| Language |
| Channels | ||||||||||
1) Press | to select | 1) Press | to select | ||||||||||
language item. | CHANNEL. |
|
| ||||||||||
|
|
|
|
|
|
|
|
|
|
|
|
|
|
| VCR |
| CLOCK | CHANNEL |
|
| VCR | CLOCK |
| CHANNEL | |||
| REPEAT PLAY | :OFF |
|
|
| ||||||||
|
| ANTENNA : CABLE | |||||||||||
| REMOTE WARNING :ON |
| AUTO SET |
|
| ||||||||
![]()
![]() Clock
Clock
1)Press ![]()
![]() to select
to select
CLOCK.
VCR ![]()
 CLOCK CHANNEL
AUTO CLOCK SET
MANUAL
![]()
![]() Time Zone
Time Zone
Adjust
(Only when Auto Clock is set.)
1) Press | to select |
Channels,
Video Cassette Recorder
Operating Instructions
(Advanced Operations)
AUDIO OUT
![]() VIDEO OUT
VIDEO OUT
AUDIO IN
DETECTING TAPE POSITION
• “DETECTING TAPE |
POSITION” only |
appears the first time |
a cassette is inserted |
and it takes several |
2
EXIT | : ACT I ON |
| VCR |
| CLOCK |
| CHANNEL |
ANTENNA : CABLE AUTO SET
WEAK SIGNAL DISPLAY : OFF
Press ![]()
![]() to select and display CHANNEL.
to select and display CHANNEL.
• Copy
| and TV. |
• | Check connections selection. (BO p. 4, AO p. 3) |
• | Make sure your antenna system (CABLE or TV) is |
| correctly set. (Channels [AO p. 12]) |
AUTO SHUT- OFF | :OFF |
|
| WEAK SIGNAL DISPLAY : OFF | |||||||
IDIOMA/LANGUE : ENGLISH |
|
|
|
|
|
|
| ||||
VCR’ S OUTPUT CH | :3 |
|
|
|
|
|
|
| |||
SELECT : | SET : |
|
| SELECT | : |
| |||||
EXIT | : ACT I ON |
|
|
| EXIT |
| : ACT I ON | ||||
|
|
|
|
|
|
|
|
|
|
|
|
|
|
|
|
|
|
|
|
|
|
|
|
TIME ZONE ADJUST : 0
SELECT | : |
EXIT | : ACT I ON |
CLOCK. |
VCR ![]()
 CLOCK CHANNEL AUTO CLOCK SET MANUAL
TIME ZONE ADJUST : 0
For Basic operations, see the separate “Basic Operations” instruction book.
VIDEO IN
VHF/UHF
VIDEO IN 2 AUDIO IN 2
seconds for correct |
indication to appear. |
• The present tape |
position indication is |
|
|
|
|
|
|
|
|
|
SELECT : | SET : | |
EXIT | : ACT I ON | |
Press to select
WEAK SIGNAL DISPLAY, and press
![]() to set ON or OFF.
to set ON or OFF.
Your
| • | Make sure cassette record tab is intact. (BO p. 3) |
Timer recording cannot be | • Confirm that clock is set to current time and date. | |
performed… | • | Make sure Cable/DSS box (if used) is left on and tuned |
|
| to channel to be recorded. |
2) Press | repeatedly. | ||||
|
|
| CLOCK | CHANNEL |
|
| VCR | ||||
| REPEAT PLAY | :OFF | |||
| REMOTE WARNING | :ON | |||
| AUTO SHUT- OFF | :OFF | |||
| IDIOMA/LANGUE : ENGLISH |
| |||
| VCR’ S OUTPUT CH | :3 |
| ||
2)Press ![]()
![]() to select “ANTENNA,” then
to select “ANTENNA,” then
press ![]() to set
to set
your antenna system (“TV” or “CABLE.”)
2)Press ![]()
![]() to select
to select
“MANUAL,” and press ![]() . (For Auto Clock Set, select “AUTO CLOCK SET.”)
. (For Auto Clock Set, select “AUTO CLOCK SET.”)
SELECT | : |
EXIT | : ACT I ON |
2) Press | to select |
“TIME ZONE | |
Clock, VCR’s
Model No. PV-V402
Front of VCR
BEGIN END
displayed. |
•ON: Picture is displayed despite signal condition an may have poor quality.
Tapes
• | Set recording start/stop times correctly. (BO p. 6) |
• | Make sure VCR POWER button is pressed off. (BO p. 6) |
SELECT : | SET : | |
EXIT | : ACT I ON | |
VCR CLOCK CHANNEL ANTENNA : CABLE
VCR |
| CLOCK |
| CHANNEL |
AUTO CLOCK SET
ADJUST” |
(Front Audio/Video IN jacks are also provided)
1Connect VIDEO OUT jack on Playing VCR to VIDEO IN jack on Recording VCR. To monitor the dubbing, also connect a TV as shown.
2Connect AUDIO OUT jack on Playing VCR to AUDIO IN jack on Recording VCR.
In place of a Playing VCR, you can use other equipment, such as a Camcorder.
2 Press TAPE POSITION
to return to normal screen.
Remote Warning ON/OFF Feature
If
OFF: Screen turns solid blue when signal is weak or
•Selecting ON has no effect on connected equipment with blue back feature.
3 Press ACTION to return to normal screen.
(Dubbing) • Before
| • | Timer recording may not be performed or continued if a |
|
| power interruption occurs before or during a Timer |
|
| Recording, even after power is restored. |
|
|
|
There is no playback picture, or the | • | Select channel 3 or 4 on TV to match VCR output |
playback picture is noisy or contains |
| channel (3 or 4) (BO p. 4) or select LINE. |
streaks... | • | Set VCR/TV selector to “VCR.” |
| • | Adjust TRACKING control in either direction. (BO p. 3) |
| • | Try Head Cleaning. (BO p. 3) |
|
|
|
Special effects playback, picture | • | Set TV’s Vertical Hold Control to MANUAL, then adjust. |
may contain some vertical jitter |
|
|
when using a TV with an Automatic |
|
|
For English |
| ||||||||
|
|
|
|
| |||||
VCR |
| RELOJ |
| CANAL | |||||
REPETICION | :INACT | ||||||||
AVISO/CONT.REMOTO | :ACT | ||||||||
APAGADO AUTOMATICO :INACT | |||||||||
LANGUE/LANGUAGE:ESPAÑOL | |||||||||
CANAL DE SALIDA :3 |
| ||||||||
ELEGIR | : |
| FIJAR : | ||||||
SAL I R |
| : ACT I ON |
| ||||||
For Spanish | |||||||||
|
|
|
|
|
|
|
|
|
|
MAGNETO. |
| HORL. |
|
| CANAL | ||||
REPRISE LECTURE | : NON | ||||||||
MESSAGE D’ | ERREUR | : OUI | |||||||
COUPURE AUTO | : NON | ||||||||
AUTO SET
WEAK SIGNAL DISPLAY : OFF
SELECT : | SET : | |
EXIT | : ACT I ON | |
3)Press 
![]() to select “AUTO SET,” then press
to select “AUTO SET,” then press  .
.
•If you use Cable Box, set it to the PBS channel in your time zone.
MANUAL
TIME ZONE ADJUST : 0
SELECT : | SET : | |
EXIT | : ACT I ON | |
(“TIME ZONE ADJUST” appears only when auto clock is set.)
VCR |
| CLOCK |
| CHANNEL |
9/29/ 2002 SUN 2 : --PM
DST:ON |
SELECT HOUR |
VCR CLOCK CHANNEL
AUTO CLOCK SET
MANUAL
TIME ZONE ADJUST : 0
SELECT : | SET : | |
EXIT | : ACT I ON | |
and press  to subtract or add hour(s) as necessary.
3)Press ACTION.
• “TIME ZONE |
Output Channel •
Simply connect the unit’s Audio/Video outputs to the Recording VCR.
|
| Playing (Source) VCR | Recording (Editing) VCR | |
1 | Insert | Insert blank tape with record tab. | ||
|
|
|
|
|
2 |
|
|
| Press INPUT* to set VCR Input mode to LINE1 |
|
|
| ||
|
|
| for Video Input (Rear) or to LINE2 for Video | |
|
|
|
| |
|
|
|
| Input (Front). (See “Selecting the Input Mode” |
|
|
|
| below.) |
|
|
|
|
|
| Press PLAY, then PAUSE/SLOW | Press REC, then PAUSE/SLOW | ||
1 Press ACTION to display menu.
2 | VCR |
|
| CLOCK |
| CHANNEL |
| Press | to select |
|
|
|
| ||||||
REPEAT PLAY | :OFF | REMOTE WARNING | |||||||
REMOTE WARNING | :ON | ||||||||
| AUTO SHUT- OFF | :OFF | and press | to set ON | |||||
| IDIOMA/LANGUE : ENGLISH | ||||||||
| VCR’ S OUTPUT CH | :3 |
| ||||||
| SELECT : | SET : | or OFF. |
| |||||
| • If “OFF,” remote | ||||||||
| EXIT : ACT I ON |
|
| ||||||
|
|
|
|
| |||||
|
|
|
|
|
|
|
| warning will not appear | |
|
|
|
|
|
|
|
| if invalid key is pressed. | |
3 Press ACTION to return to normal screen.
VCR Lock Feature
When set to ON, all operations except for timer record and tape eject are prohibited. Useful for households with small children.
To turn on, hold down
REC on the VCR in Stop
VCR LOCK ACT I VATEDmode with no tape
inserted for 7 sec. (Please ignore the NO CASSETTE warning.)
To turn off, repeat above.
VCR LOCK OFF
Requesting Service
Vertical Hold Control... |
|
|
|
|
|
VCR cannot be controlled... | • | Make sure VCR power is on. |
| • | Check Remote batteries. |
| • | Make sure VCR LOCK is set to off. (AO p. 10) |
| • | Make sure Timer Record is not in progress. |
Remote Control | Correction |
VCR cannot be remote controlled... • | Make sure VCR power is on. |
• | Make sure Remote is in VCR mode. |
• | Aim Remote Control directly at remote sensor on VCR. |
| (BO p. 7) |
• | Avoid any object blocking signal path. |
• | Check Remote batteries. (BO p. 3) |
• | Make sure VCR LOCK is set to off. (AO p. 10) |
LANGUAGE/IDIOMA : FRANÇAIS | |
CA SORTIE : 3 |
|
SEL. : | REGLER: |
QUITTER : ACT I ON | |
For French | |
3)Press ACTION to exit.
VCR | CLOCK | CHANNEL |
CH AUTO SET PROCEEDING | ||
CANCEL | : STOP |
|
•After Channel Auto Set is finished, Auto Clock Set will be performed.
SELECT : | SET : | |
EXIT | : ACT I ON | |
3)Press 
![]() and
and 
 to select and set the date, time, and DST (Daylight Saving Time).
4)Press ACTION to start the Clock and exit this mode.
ADJUST” returns to |
“0” if clock is set |
manually. |
DST
3 | immediately to enter PLAY/PAUSE mode. | immediately to enter REC/PAUSE mode. | ||
|
| The operation of steps 4 and 5 must be done on both playing |
| |
|
| and recording VCRs at the same time. |
| |
4 | Press PLAY to start dubbing. | Press PAUSE/SLOW to start dubbing. | ||
| Playing VCR starts playback. | Recording VCR starts recording. | ||
|
|
| ||
5 | Press STOP to stop dubbing. | Press STOP to stop dubbing. | ||
Auto Shut-Off Feature
The power shuts off at a preset time.
1 Press ACTION to display menu.
2 |
|
|
|
|
|
| Press | to select |
| VCR |
|
| CLOCK |
| CHANNEL | ||
| REPEAT PLAY | :OFF | AUTO | |||||
| REMOTE WARNING | :ON | ||||||
| AUTO SHUT- OFF | :OFF | Press | repeatedly to | ||||
| IDIOMA/LANGUE : ENGLISH | |||||||
| VCR’ S OUTPUT CH | :3 | ||||||
| SELECT : | SET : | change shutoff time as | |||||
| shown below. | |||||||
| EXIT : ACT I ON |
| ||||||
•VCR Lock cancels in 24 hours if clock is set.
REC
• | Exposing VCR remote sensor to direct fluorescent or |
| outdoor light may cause signal interference. |
|
|
ACTION and PROG buttons do not • | Check connections between VCR, external antenna, |
respond... | and TV. |
• | Press VCR button for VCR mode. (AO p. 2) |
• | Check Remote batteries. (BO p. 3) |
Miscellaneous | Correction |
Programs cannot be viewed on TV... • | Make sure TV power is on. |
• | Make sure TV is set to output of VCR. |
• | Check connections between VCR, external antenna, |
| and TV. |
• | Set VCR/TV selector to “TV.” (BO p. 5) |

 VCR’s Output Channel
1)Press ![]()
![]() to select
to select
“VCR’S OUTPUT CH.”
VCR |
|
| CLOCK |
| CHANNEL |
REPEAT PLAY | :OFF | ||||
REMOTE WARNING | :ON | ||||
AUTO SHUT- OFF | :OFF | ||||
IDIOMA/LANGUE : ENGLISH | |||||
VCR’ S OUTPUT CH | :3 | ||||
SELECT : | SET : | ||||
EXIT | : ACT I ON |
| |||
2)Press ![]() .
.
VCR |
| CLOCK | CHANNEL |
IF YOU PRESS ACTION
KEY, VCR ’ S OUTPUT CH
SWITCHES TO CH 4.
Add or Delete a Channel
To add channel:
Select channel with NUMBER keys and press ADD/DLT.
CHANNEL 08 ADDED
To delete channel:
Select channel with CH / or NUMBER
Table of Contents |
|
2 | |
Advanced Connections (Cable/DSS) | 3 |
4 | |
Warning and Instruction Displays | 5 |
Tape Operation | 6, 7 |
Copying Your Tapes (Dubbing) | 9 |
Panasonic Consumer Electronics Company,
Division of Matsushita Electric Corporation of America One Panasonic Way Secaucus, New Jersey 07094
P

 To Monitor Dubbing on Your TV
1Turn your TV on and tune to the Recording VCR channel (CH3 or CH4).
2Set the VCR/ TV Selector on the Recording VCR to “VCR.”
Note • Dubbing tapes protected with Copy Guard will have poor quality results.

 Selecting the Input Mode
Method 1:
Press INPUT repeatedly.
Channel Number ↔ LINE1 ↔ LINE2
Method 2:
Press CH  /
/  .
.
Display will change as below.
 1
1
![]() 2
2![]()
![]() 3
3
(CABLE) (TV)  LINE2
LINE2
 LINE1
LINE1
 125 or 69
•“L1” or “L2” lights on
•LINE1: For rear audio/video connection.
LINE2: For front audio/video connection.
| OFF | |
|
|
|
2 | Hours | |
|
|
|
4 | Hours | |
|
|
|
6 | Hours | |
3 Press ACTION to return to normal screen.
Note • The
*Important: If a remote control button does not work when pressed, press the VCR button on the remote and try the button again.
| • | Make sure proper signal source is selected. |
Video cassette cannot be inserted... | • | Insert the cassette with window side up; record tab |
|
| facing you. |
| • | Check if a tape is already in the unit. |
|
| |
Video cassette cannot be removed... • | Completely insert Power Plug into an AC outlet. | |
|
|
|
Video cassette ejects when a | • | Make sure cassette record tab is intact. (BO p. 3) |
recording is started or the power is |
|
|
turned off for timer recording... |
|
|
|
|
|
In Stop mode, the motor | • | To enable Quick play mechanism, the cylinder will rotate |
(CYLINDER) continues to rotate... |
| for about 3 minutes. This reduces response time from |
|
| Stop to Play mode and from Play to Rewind Search |
|
| mode. |
If you cannot resolve the problem, please call the Customer Call Center for product assistance at
To locate an authorized servicenter, please call toll free
3)Press ACTION.
VCR |
| CLOCK | CHANNEL |
PLEASE TUNE YOUR TV TO
CH 4.
After 3 seconds
VCR |
|
| CLOCK |
| CHANNEL |
REPEAT PLAY | :OFF | ||||
REMOTE WARNING | :ON | ||||
AUTO SHUT- OFF | :OFF | ||||
IDIOMA/LANGUE : ENGLISH | |||||
VCR’ S OUTPUT CH | :4 | ||||
SELECT : | SET : | ||||
EXIT | : ACT I ON |
| |||
•To Make Corrections, repeat steps 1) ~ 3).
keys and press ADD/DLT.
CHANNEL 08 DELE TED
DST (Daylight Saving Time)
VCR auto adjusts clock for DST.
Spring (First Sunday in April)
DST:ON ➛ Sets clock ahead one hour.
Autumn (Last Sunday in October)
DST:ON ➛ Turns clock back one hour.
• If your area does not observe Daylight |
Saving Time, select DST:OFF. |
Special VCR Features | 10 |
Before Requesting Service | 11 |
Reset Language, Channels, Clock, VCR’s Output Channel ... | 12 |
As an ENERGY STAR ® Partner, Matsushita Electric Corporation of America has determined that this product or product model meets the ENERGY STAR ® guidelines for energy efficiency.
Please read these instructions carefully before attempting to connect, operate or adjust this product. Please save this manual.
Panasonic Sales Company (“PSC”),
Division of Matsushita Electric of Puerto Rico, Inc. Ave. 65 de Infantería. Km. 9.5 San Gabriel Industrial Park,
Carolina, Puerto Rico 00985
- 8 -
Printed in Indonesia LSQT0533B
Caution : Unauthorized exchanging and/or copying of copyrighted recordings may be copyright infringement.
- 9 - | - 10 - |
*Important: If a remote control button does not work when pressed, press the VCR button on the remote and try the button again.
- 11 -
• Keep these time changes in mind when |
programming VCR for timer recordings. |
- 12 - |
LSQT0533B
For assistance, please call :