Other Play Methods
The letters such as A in the illustrations refer to the descriptions in the “Location of Controls” section (See page 3.).
Skip play |
| Program play |
| Repeat play/Random play |
The disc plays from the selected track through to the last track, then play stops automatically.
Preparation: Put unit in stop mode.
1 Select the desired track.
Main unit
G
Remote control
A
Up to 24 tracks can be entered in the program. Preparation: Put unit in stop mode.
1 Select the desired track.
Main unit
G
Remote control
A
EQ MODE MEMORY
Remote control only
Press during play or stop mode.
H
EQ MODE MEMORY
(Beep)
The setting switches as shown below each time you
press the button. |
|
] | |
One track is repeated. | |
v | |
2
EQ MODE MEMORY
(Beep Beep Beep) | (Beep Beep) |
Main unit
(Beep Beep Beep) | (Beep Beep) |
2 Register in sequence.
(The indication “M” and the programmed se- quence appear on the display.)
All the tracks on the disc are repeated.
v | |
Random (RANDOM) | |
The tracks play once each in random | |
order and then play stops. | |
|
E
Remote control
C
EQ MODE MEMORY
(Beep)
Changing the sound quality
Remote control only
Press during play or stop mode.
G
EQ MODE MEMORY
(Beep)
The setting switches as shown below each time you press the button.
^
Select this setting to boost the low frequency range re- sponse.
TRAIN:
Select this setting to avoid annoying other passengers with noise from your stereo earphones while riding on the train, or to reduce fatigue when listening for a long period of time.
LIVE:
Select this setting for a live concert effect.
Note!
The setting returns to
Remote control only
I
EQ MODE MEMORY
(Beep)
3 Repeat steps 1 and 2 to program all the desired tracks.
4 Main unit
E
Remote control
C
EQ MODE MEMORY
(Beep)
∫To program the same track in the se-
quence more than once
After step 2, press [MEMORY] (remote control) the de- sired number of times.
∫If “'” is displayed
No more tracks may be programmed.
∫To confirm the contents of the program
Press [MEMORY] (remote control) while the disc is playing. (The numbers of the programmed tracks ap- pear on the display in sequence. The display stays lit as long as the tracks continue to be displayed.)
∫To delete the entire program
Press [∫] (main unit) or [1/∫] (remote control).
Note!
The repeat and random play modes are canceled after steps 1 and 2.
v |
Random repeat (`RANDOM)
The tracks play repeatedly in random | |
order. | |
v | |
Cancel (no indicator is shown) | } |
When pressed during program play
The setting switches as shown below each time you
press the button. |
|
] | |
One track is repeated. | |
v | |
Memory repeat (`M) |
The programmed tracks are repeated.
v | |
Cancel (M) | } |
Note!
≥You can select the first track to play in random play and random repeat play by pressing [9] while the disc is stopped. All the tracks are played.
≥You cannot select random play or random repeat play during program play.
≥The resume function does not work when random or random repeat are on.
≥When [MODE] is pressed, the sound will be interrupt- ed for an instant. This is normal and not indicative of a malfunction.
≥The mode is canceled when you disconnect the power source.
Using the Unit with Optional Accessories
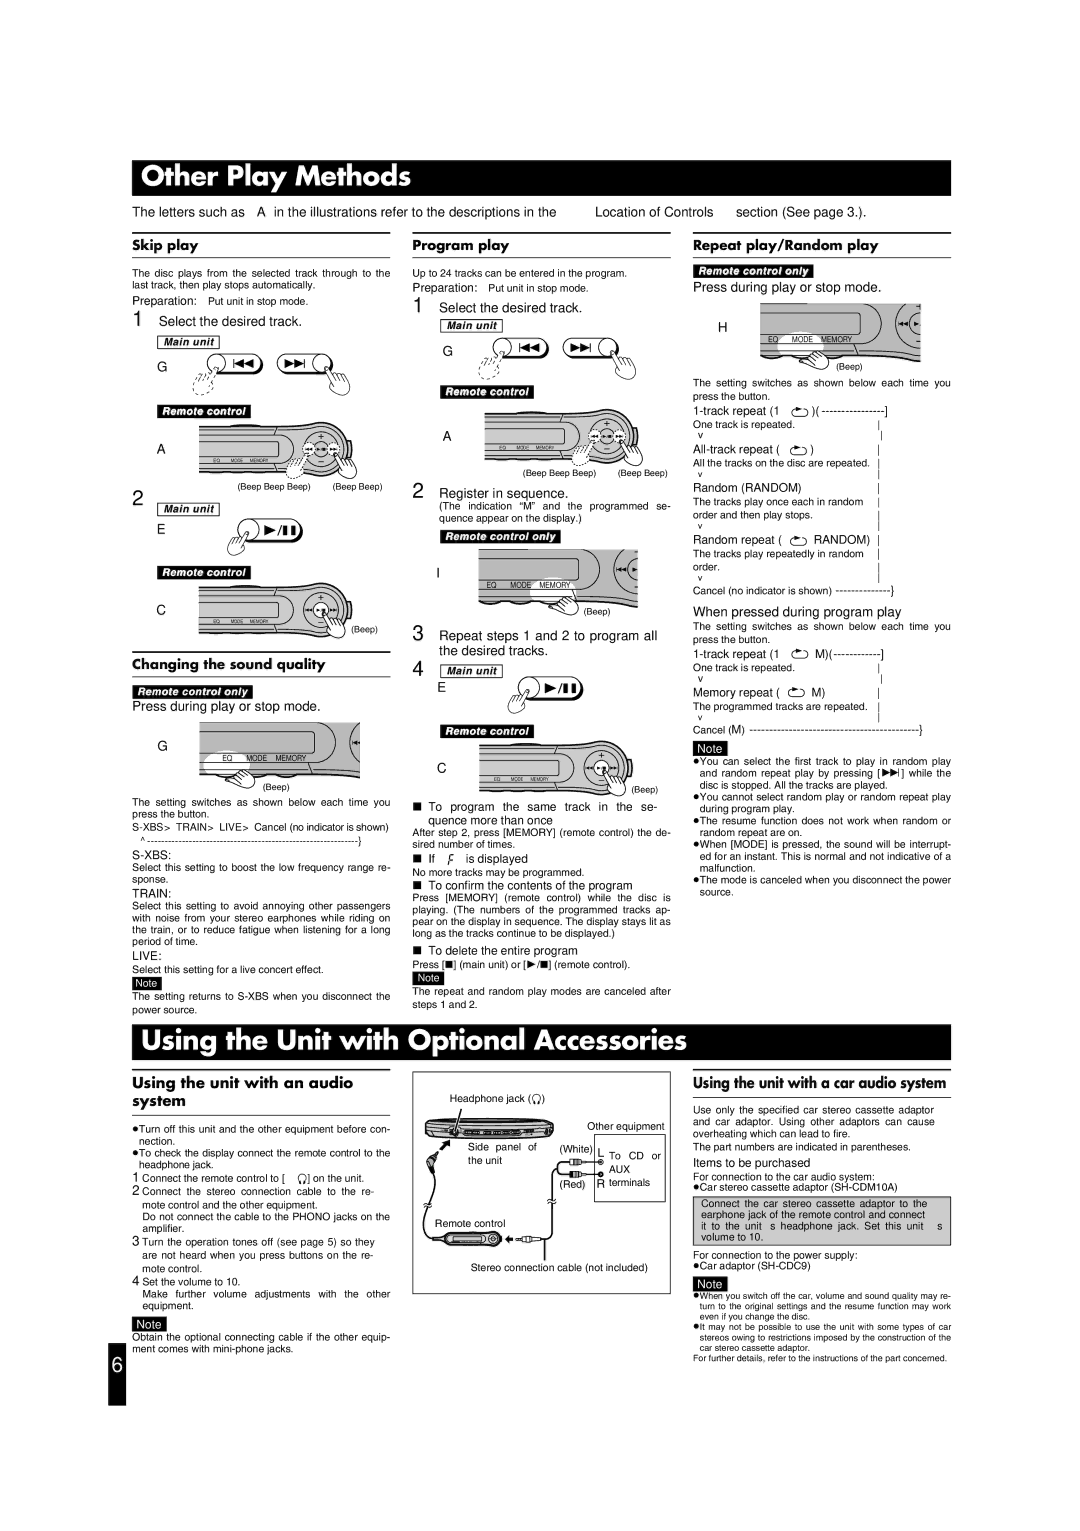
Using the unit with an audio system
≥Turn off this unit and the other equipment before con- nection.
≥To check the display connect the remote control to the headphone jack.
1 Connect the remote control to [Ë] on the unit.
2 Connect the stereo connection cable to the re- mote control and the other equipment.
Do not connect the cable to the PHONO jacks on the amplifier.
3 Turn the operation tones off (see page 5) so they are not heard when you press buttons on the re- mote control.
4 Set the volume to 10.
Make further volume adjustments with the other equipment.
Note!
Obtain the optional connecting cable if the other equip- ment comes with
6
Headphone jack (Ë)
CHG | VOL |
| Other equipment |
|
| HOLD |
|
| Side panel | of | (White) L To CD or |
| the unit |
|
AUX
(Red) R terminals
Remote control
Stereo connection cable (not included)
Using the unit with a car audio system
Use only the specified car stereo cassette adaptor and car adaptor. Using other adaptors can cause overheating which can lead to fire.
The part numbers are indicated in parentheses.
Items to be purchased
For connection to the car audio system:
≥Car stereo cassette adaptor
Connect the car stereo cassette adaptor to the earphone jack of the remote control and connect it to the unit’s headphone jack. Set this unit’s volume to 10.
For connection to the power supply: ≥Car adaptor
Note!
≥When you switch off the car, volume and sound quality may re- turn to the original settings and the resume function may work even if you change the disc.
≥It may not be possible to use the unit with some types of car stereos owing to restrictions imposed by the construction of the car stereo cassette adaptor.
For further details, refer to the instructions of the part concerned.