Manuals
/
Panasonic
/
TV and Video
/
CRT Television
Panasonic
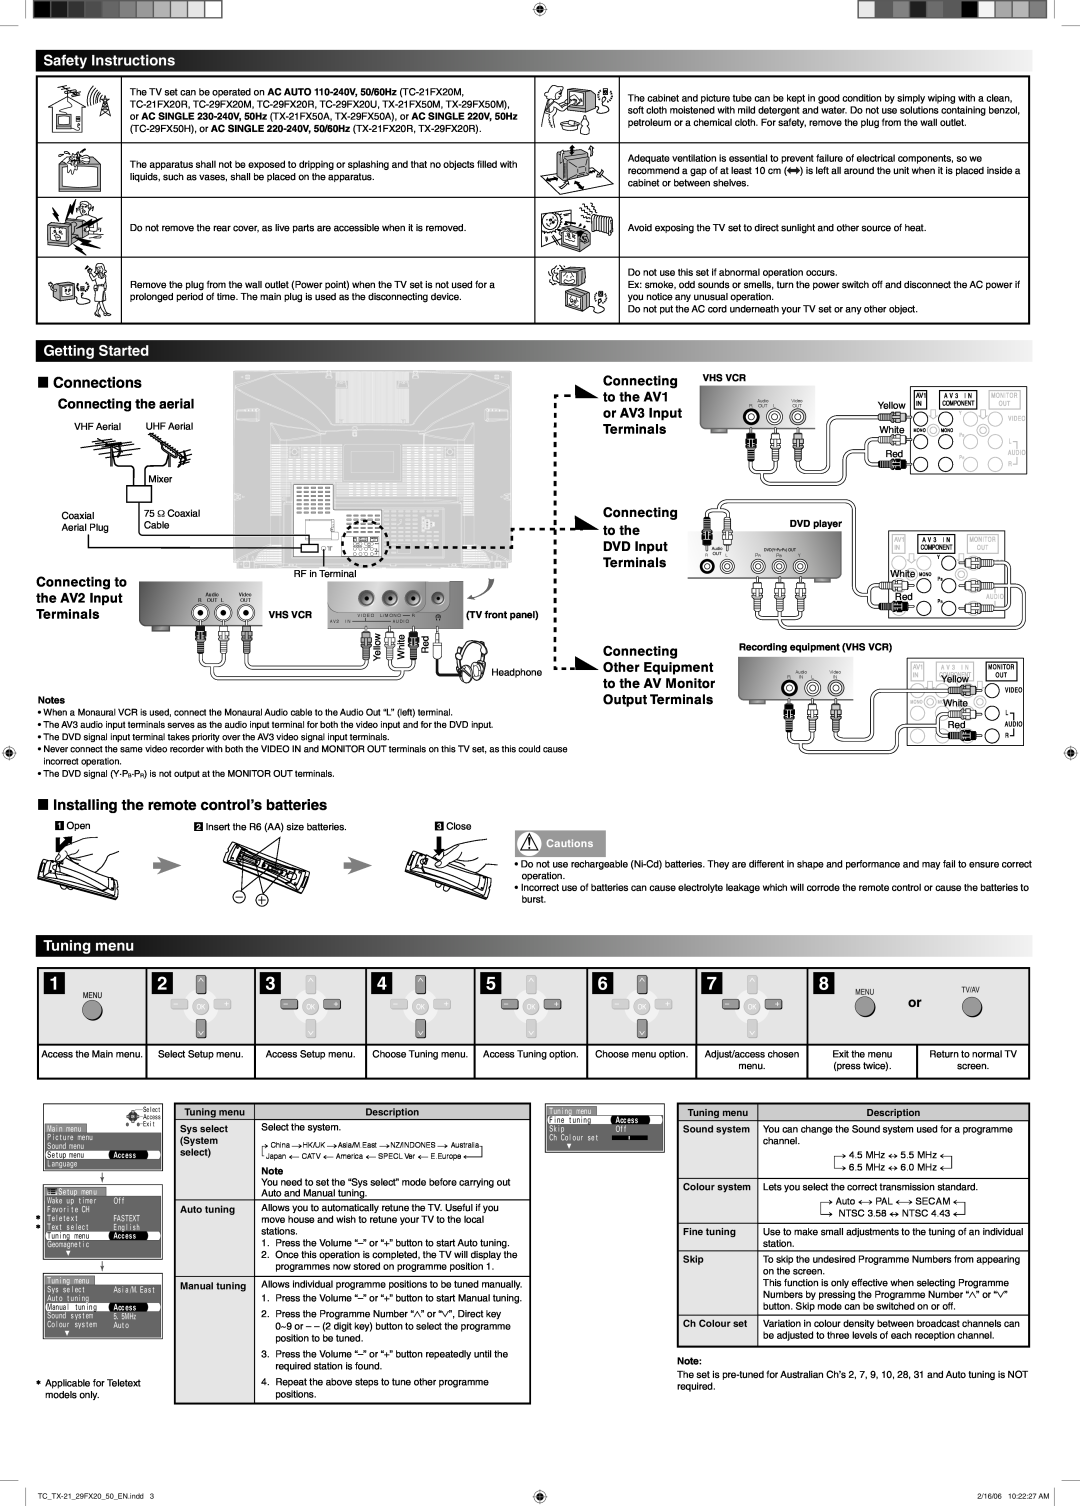
TC-29FX20 Series Safety Instructions, Getting Started, L Connections, Tuning menu
Models:
TC-29FX50 Series
TC-29FX20 Series
TX-21FX20 Series
TX-21FX50 Series
TX-29FX20 Series
TX-29FX50 Series
TC-21FX20 Series
1
1
2
3
4
4
Download
4 pages
15.83 Kb
1
2
3
4
Troubleshooting
Connecting the aerial
L Sub Coded Page Access
L Setup menu
Page 2
Image 2
Page 1
Page 3
Page 2
Image 2
Page 1
Page 3
Contents
Control Overview
Troubleshooting
Model No
Specifications
Tuning menu
Safety Instructions
L Installing the remote control’s batteries
Getting Started
MENU Operation
L Setup menu
To Watch TV Programme
L Picture menu L Sound menu
Stereo/Bilingual Sound Selection
Remote Control Operation for VCRs and DVD Players
Teletext Operation
L Sub Coded Page Access
Top
Page
Image
Contents