Watching content from external devices
With the connected equipment turned On
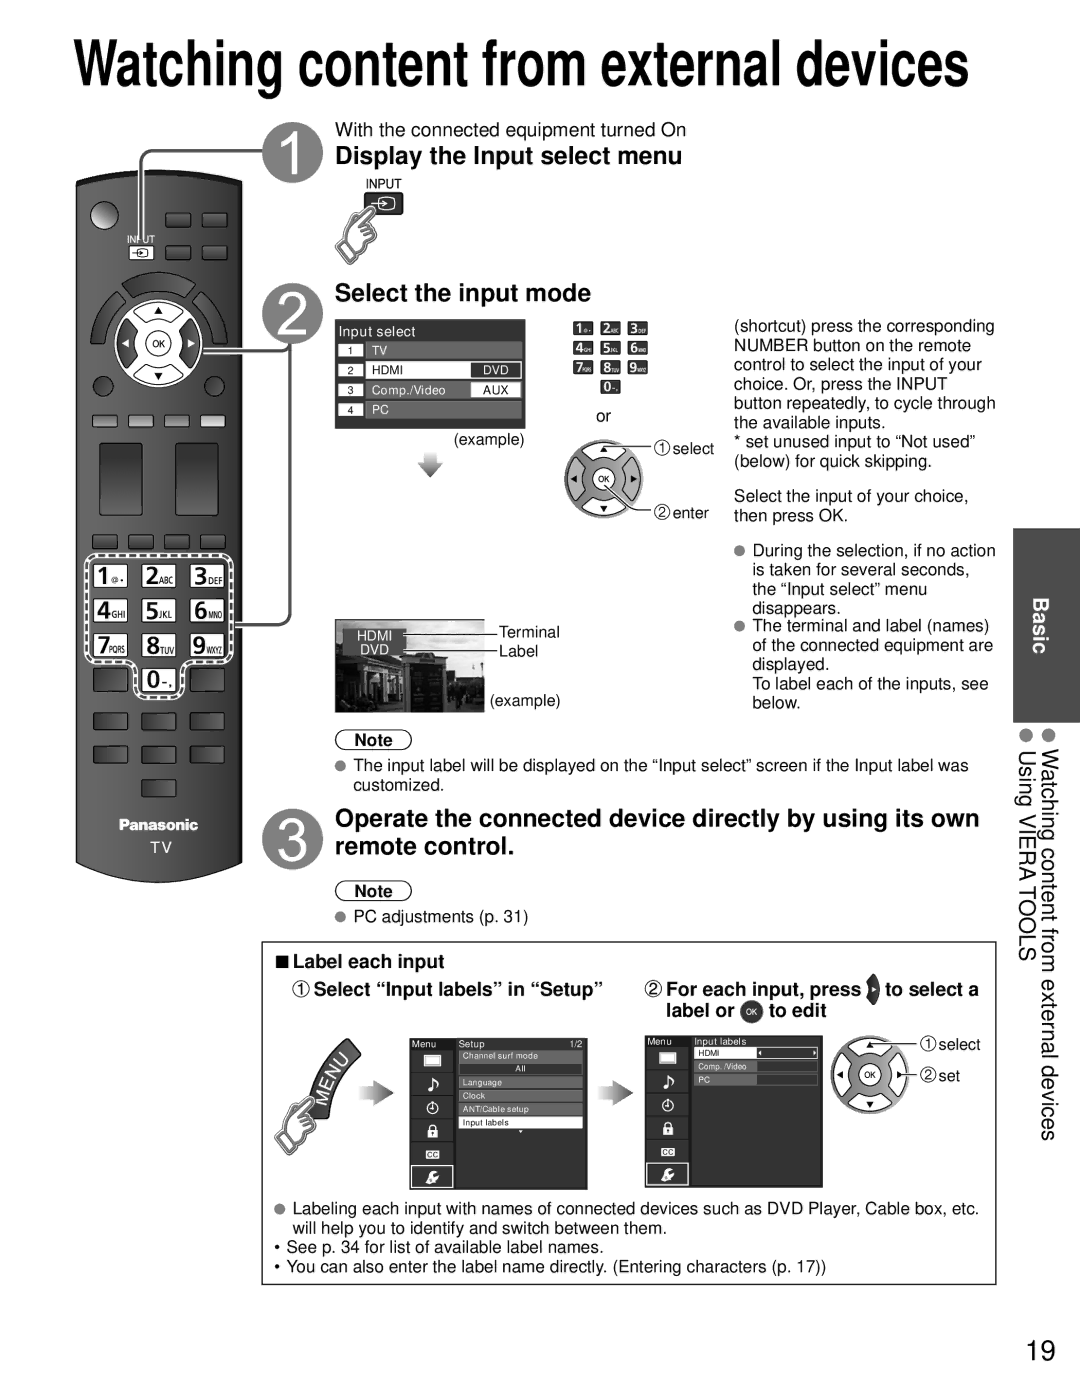
Display the Input select menu
Select the input mode
Input select
1 | TV |
|
2 | HDMI | DVD |
3 | Comp./Video | AUX |
4 | PC | or |
|
|
(example) | select |
| |
| enter |
|
| Terminal |
HDMI |
| |
DVD |
| Label |
|
| |
| (example) | |
Note
(shortcut) press the corresponding NUMBER button on the remote control to select the input of your choice. Or, press the INPUT button repeatedly, to cycle through the available inputs.
*set unused input to “Not used” (below) for quick skipping.
Select the input of your choice, then press OK.
![]() During the selection, if no action is taken for several seconds, the “Input select” menu disappears.
During the selection, if no action is taken for several seconds, the “Input select” menu disappears.
![]() The terminal and label (names) of the connected equipment are displayed.
The terminal and label (names) of the connected equipment are displayed.
To label each of the inputs, see below.
Basic
The input label will be displayed on the “Input select” screen if the Input label was customized.
Operate the connected device directly by using its own remote control.
Note
PC adjustments (p. 31)
Watching content Using VIERA TOOLS
■Label each input
 Select “Input labels” in “Setup”
Menu | Setup | 1/2 |
Channel surf mode
All
Language
Clock
ANT/Cable setup
Input labels
 For each input, press
  to select a label or
  to edit
Menu | Input labels | select |
| ||
| HDMI |
|
| Comp. /Video | set |
| PC |
from external devices
![]() Labeling each input with names of connected devices such as DVD Player, Cable box, etc. will help you to identify and switch between them.
Labeling each input with names of connected devices such as DVD Player, Cable box, etc. will help you to identify and switch between them.
•See p. 34 for list of available label names.
•You can also enter the label name directly. (Entering characters (p. 17))
19
