First Time Setup
First time setup screen is displayed only when the TV is turned on for the first time after the power cord is inserted into a wall outlet and when “Auto power on” (p. 34) is set to “No”.
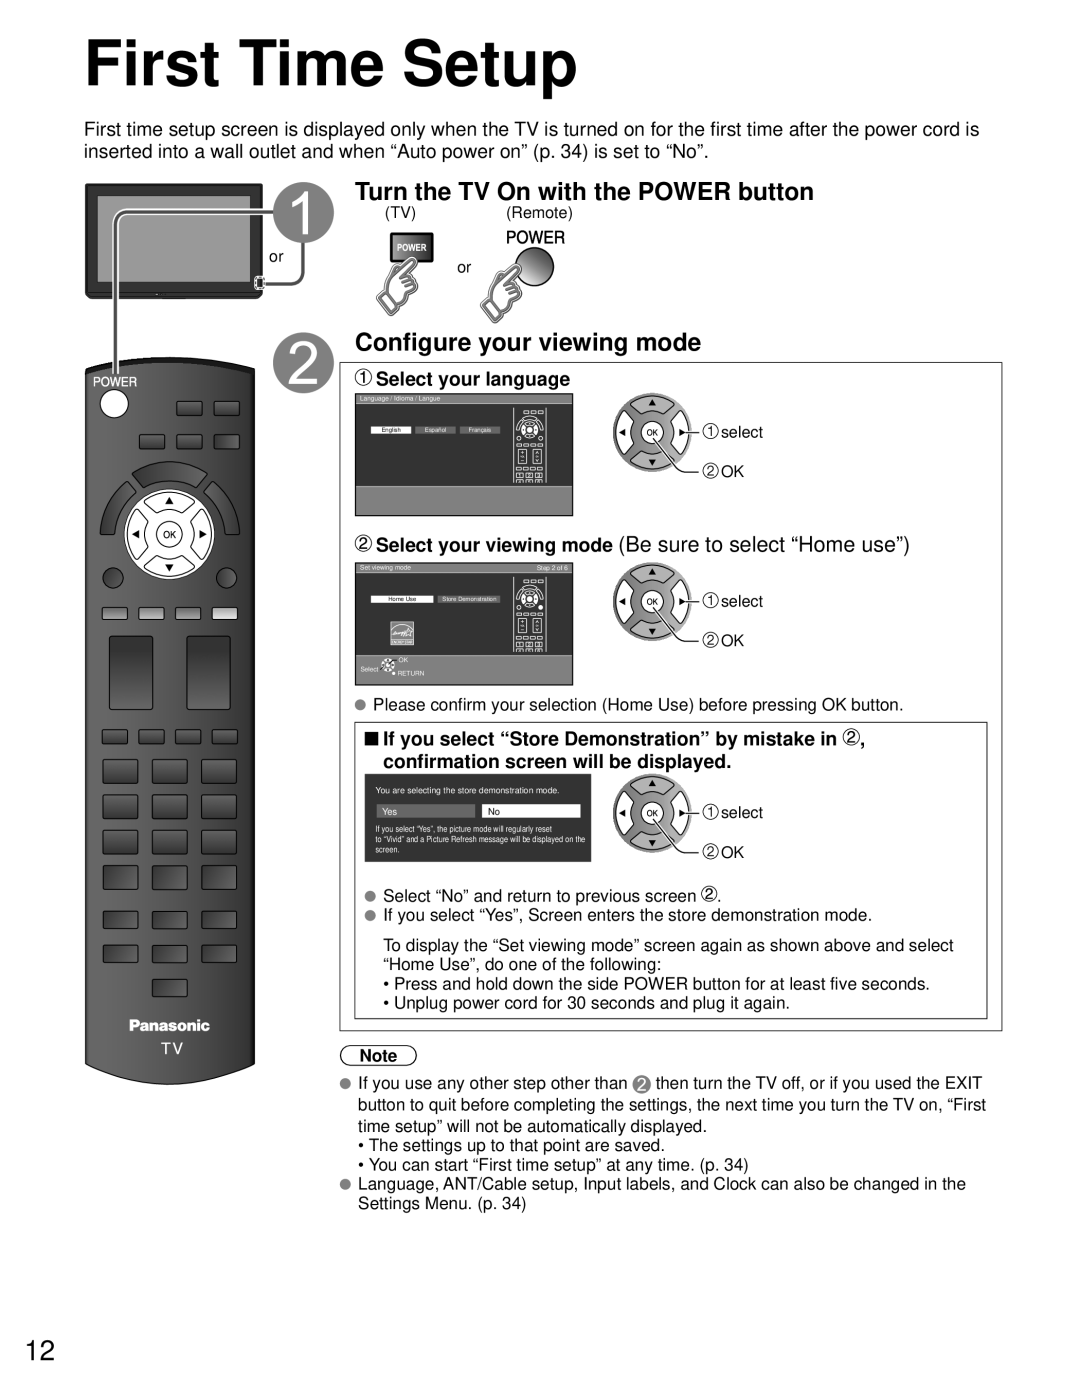
Turn the TV On with the POWER button
(TV)(Remote)
oror
Configure your viewing mode
 Select your language
Language / Idioma / Langue
English Español Français
![]() select
select
![]() OK
OK
 Select your viewing mode (Be sure to select “Home use”)
Set viewing mode |
| Step 2 of 6 | ||
Home Use |
|
| ||
Store Demonstration | ||||
|
|
|
|
|
|
|
|
|
|
|
|
|
|
|
OK
Select ![]()
![]() RETURN
RETURN
![]() select
select
![]() OK
OK
![]() Please confirm your selection (Home Use) before pressing OK button.
Please confirm your selection (Home Use) before pressing OK button.
![]() If you select “Store Demonstration” by mistake in
If you select “Store Demonstration” by mistake in ![]() , confirmation screen will be displayed.
, confirmation screen will be displayed.
You are selecting the store demonstration mode.
YesNo
If you select “Yes”, the picture mode will regularly reset
to “Vivid” and a Picture Refresh message will be displayed on the screen.
![]() select
select
![]() OK
OK
![]() Select “No” and return to previous screen
Select “No” and return to previous screen ![]() .
.
![]() If you select “Yes”, Screen enters the store demonstration mode.
If you select “Yes”, Screen enters the store demonstration mode.
To display the “Set viewing mode” screen again as shown above and select “Home Use”, do one of the following:
•Press and hold down the side POWER button for at least five seconds.
•Unplug power cord for 30 seconds and plug it again.
Note
If you use any other step other than | then turn the TV off, or if you used the EXIT |
button to quit before completing the settings, the next time you turn the TV on, “First
time setup” will not be automatically displayed.
•The settings up to that point are saved.
•You can start “First time setup” at any time. (p. 34)
Language, ANT/Cable setup, Input labels, and Clock can also be changed in the Settings Menu. (p. 34)
12