Configure Network settings

Select the Network type

Network settings

Step 6 of 7

Select Ethernet cable of wireless network.

Ethernet cable

Wireless(Wifi)

Set later

OK

Select Return

Set later: Go to

You can set in “Setup” menu later. Wireless (WiFi): Start “Wireless network” (p. 16)

Select the setting mode

Network settingsStep 6 of 7

Checks for proper network connection, settings and communication to the Internet and server automatically.

AutomaticManual

OK

Select RETURN

Automatic

Start connection test

Automatic: Press OK to start setup automatically. Error screen is displayed when Network connection has failed.

Manual: Go to Manual setting.

Manual

Manual setting

Getting

Network settings

Step 6 of 7


Connection test


Connection test


Check Ethernet cable connection


Validate IP address


Check for IP address duplication


Check connection to the Internet


Check communication with VIERA Connect server.


Test in progress...


Connection


RETURN


error


Complete “Network settings”

Helpful information is displayed when you successfully complete “Network settings”.

Network settings


Step 6 of 7

Configure settings of the network connection.


IP setting mode

Automatic


IP address

192.168.0.4


Subnet mask

255.255.255.0


Default gateway

192.168.0.1


DNS setting mode

Automatic


DNS

192.168.0.1


Proxy address


Proxy port


Connect test


Mac address

00-00-aa-cc-33-ab


Select


Change

RETURN


Manual

Error screen

started First Time

Press to exit from a menu screen

Press to go back to the previous screen

Network settings

Step 6 of 7


Network settings


Step 6 of 7


Network settings are complete.


Connection test


Check Ethernet cable connection


You can use VIERA Connect.


VIERA Connect lets you enjoy Internet contents


Validate IP address


on your VIERA TV.


Check for IP address duplication


Check connection to the Internet


Check communication with VIERA Connect server.


Connection to local network (router) failed.


Ensure wireless network availability


Retry

Manual

Set later


OK


Select

OK


Return


RETURN


Retry: Go to “Start connection test”

Set later: Go to

Adjust the Clock (Set clock)

When done, select NEXT and press OK to go to the next step.

Manual setting

Adjust the TV's date and time

Step 7 of 7

select


Minutes

10


Set clock


Year


- - -


set

or


Mode


Manual


Month


- - -


OK

0

9


Day


- - -


Hour


- - -


RETURN


Time zone


- - -


Minute


DST


Next


Follow the instructions on


Select

Edit

0

- 9


Change

RETURN


screen to complete the


following operations.


Auto setting

Set clock

Step 7 of 7

Adjust the TV's date and time


2011/4/5

6:00 AM


Mode

Auto


Year


Month


Day


Hour


Minute


Time zone

EST


DST

Off


Next


Select


Change

RETURN


Manual: Adjust the clock manually (Year/Month/Day/Hour/Minute)

Mode


Auto: The clock is adjusted automatically via Internet service. Only


available when the TV is on a network. -->Set “Network settings” first.


Select your time zone. (EST/CST/MST/PST/AKST/HST/NST/AST)

Time zone


Set DST (Daylight Saving Time) setting. (On/Off)

DST


On: Advances the clock one hour from the time it is set according to


the time zone.

Setup

15

Page 15
Image 15
Panasonic TC-L32DT30, TC-L37DT30 owner manual Configure Network settings, Adjust the Clock Set clock, Started First Time

TC-L37DT30, TC-L32DT30 specifications

The Panasonic TC-L32DT30 and TC-L37DT30 are part of Panasonic’s DT30 series, designed to cater to consumers seeking high-quality viewing experiences in compact sizes. Introduced as models that merge advanced technology with practicality, these televisions come equipped with several standout features.

Both models leverage LED backlighting technology, which provides bright and vibrant visuals while contributing to improved energy efficiency compared to traditional LCD TVs. The screens, with diagonal sizes of 32 inches and 37 inches respectively, make them suitable for smaller living spaces without compromising on viewing quality.

One of the main highlights of the TC-L32DT30 and TC-L37DT30 is their Full HD resolution of 1920 x 1080 pixels. This ensures that images appear sharp and detailed, with deeper colors and enhanced contrast for an immersive viewing experience. The enhanced motion clarity technology reduces blur during fast-moving scenes, making these TVs particularly appealing for sports enthusiasts and action movie lovers.

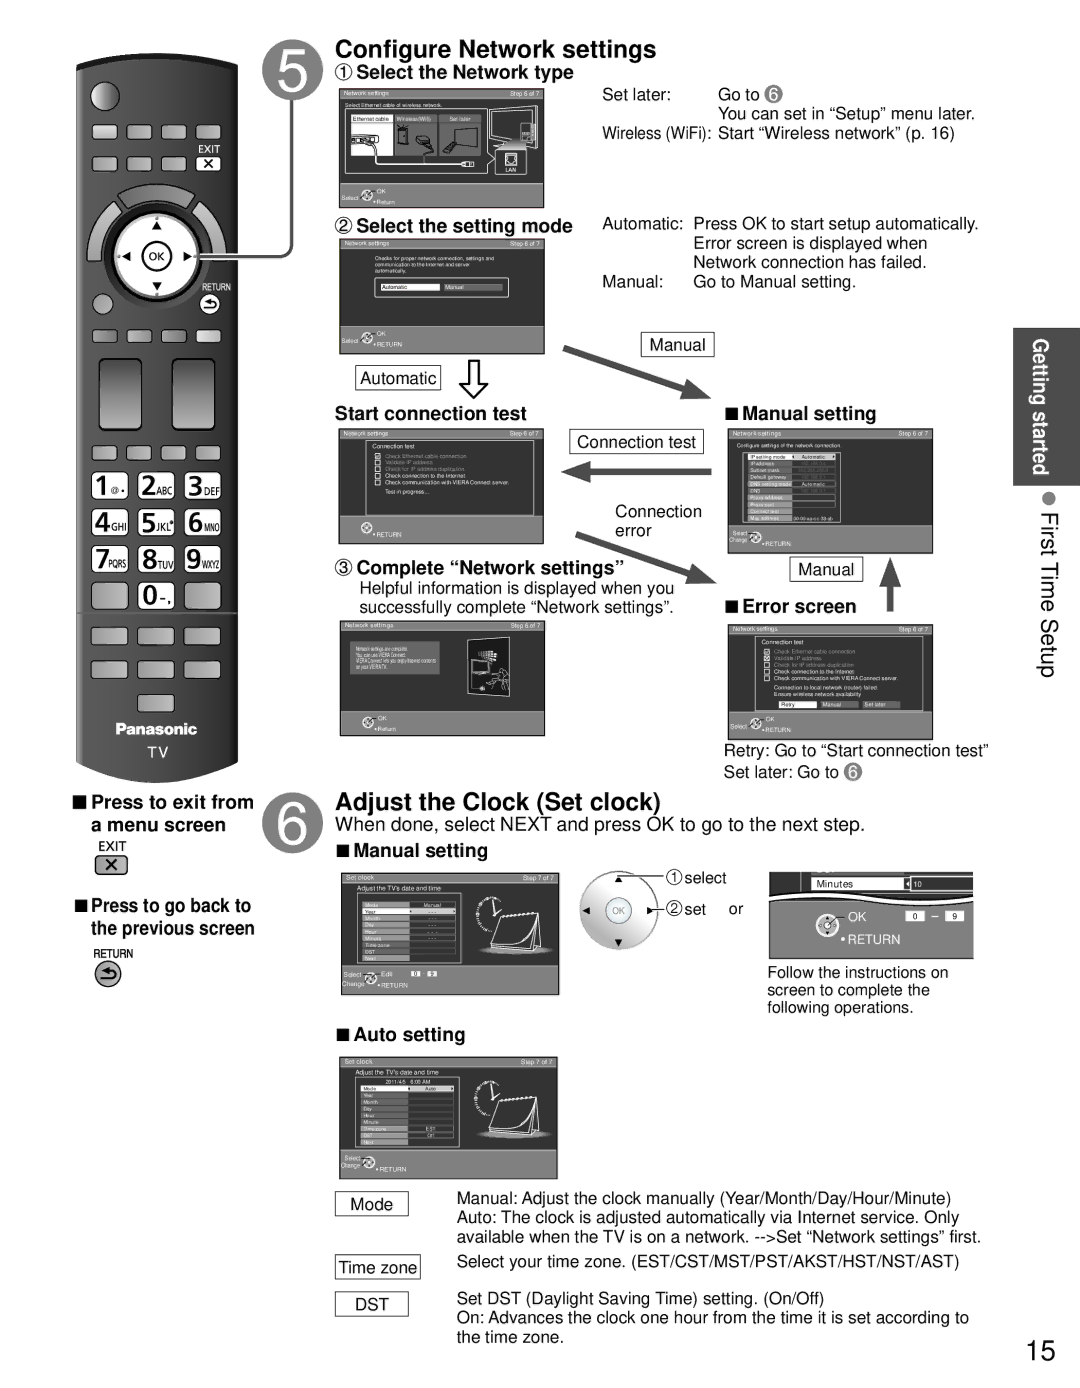
Additionally, both models feature Panasonic’s VIERA Connect platform, which expands the functionality of the TVs beyond traditional television viewing. This smart feature enables users to access a wide range of online content, including streaming services, social media, and various applications, effectively transforming the television into a multimedia hub.

The audio performance is also noteworthy, as the TC-L32DT30 and TC-L37DT30 are equipped with high-quality speakers that produce clear sound, further enhancing the overall viewing experience. With multiple HDMI and USB ports, connectivity is both versatile and user-friendly, allowing for easy connections to gaming consoles, Blu-ray players, and other multimedia devices.

In terms of design, both models boast a slim profile and sleek aesthetics, making them an elegant addition to any room. With their combination of quality, functionality, and design, the Panasonic TC-L32DT30 and TC-L37DT30 televisions stand out as solid choices for consumers looking to enjoy an exceptional viewing experience in more compact settings. Overall, these models represent Panasonic’s commitment to delivering reliable, state-of-the-art home entertainment solutions.