TH-42PW3, TH-42PWD3 specifications
The Panasonic TH-42PWD3 and TH-42PW3 are part of Panasonic's renowned line of plasma TVs, recognized for their remarkable picture quality and advanced technologies. Designed primarily for various commercial applications as well as home entertainment, these models offer a stunning visual experience that makes them stand out in any setting.One of the main features of the TH-42PWD3 and TH-42PW3 is their impressive 42-inch screen size, which delivers an expansive viewing area without overwhelming space. Both models boast a native resolution of 1024 x 768 pixels, ensuring that images are sharp and clear, making them ideal for everything from presentations to movie nights.
The plasma display technology employed in these models provides excellent contrast ratios, vibrant colors, and deeper blacks compared to traditional LCD screens. This results in lifelike images that are particularly beneficial for viewing high-definition content. Whether in a brightly lit room or a darker environment, the plasma screens of these models maintain exceptional visibility and color accuracy.
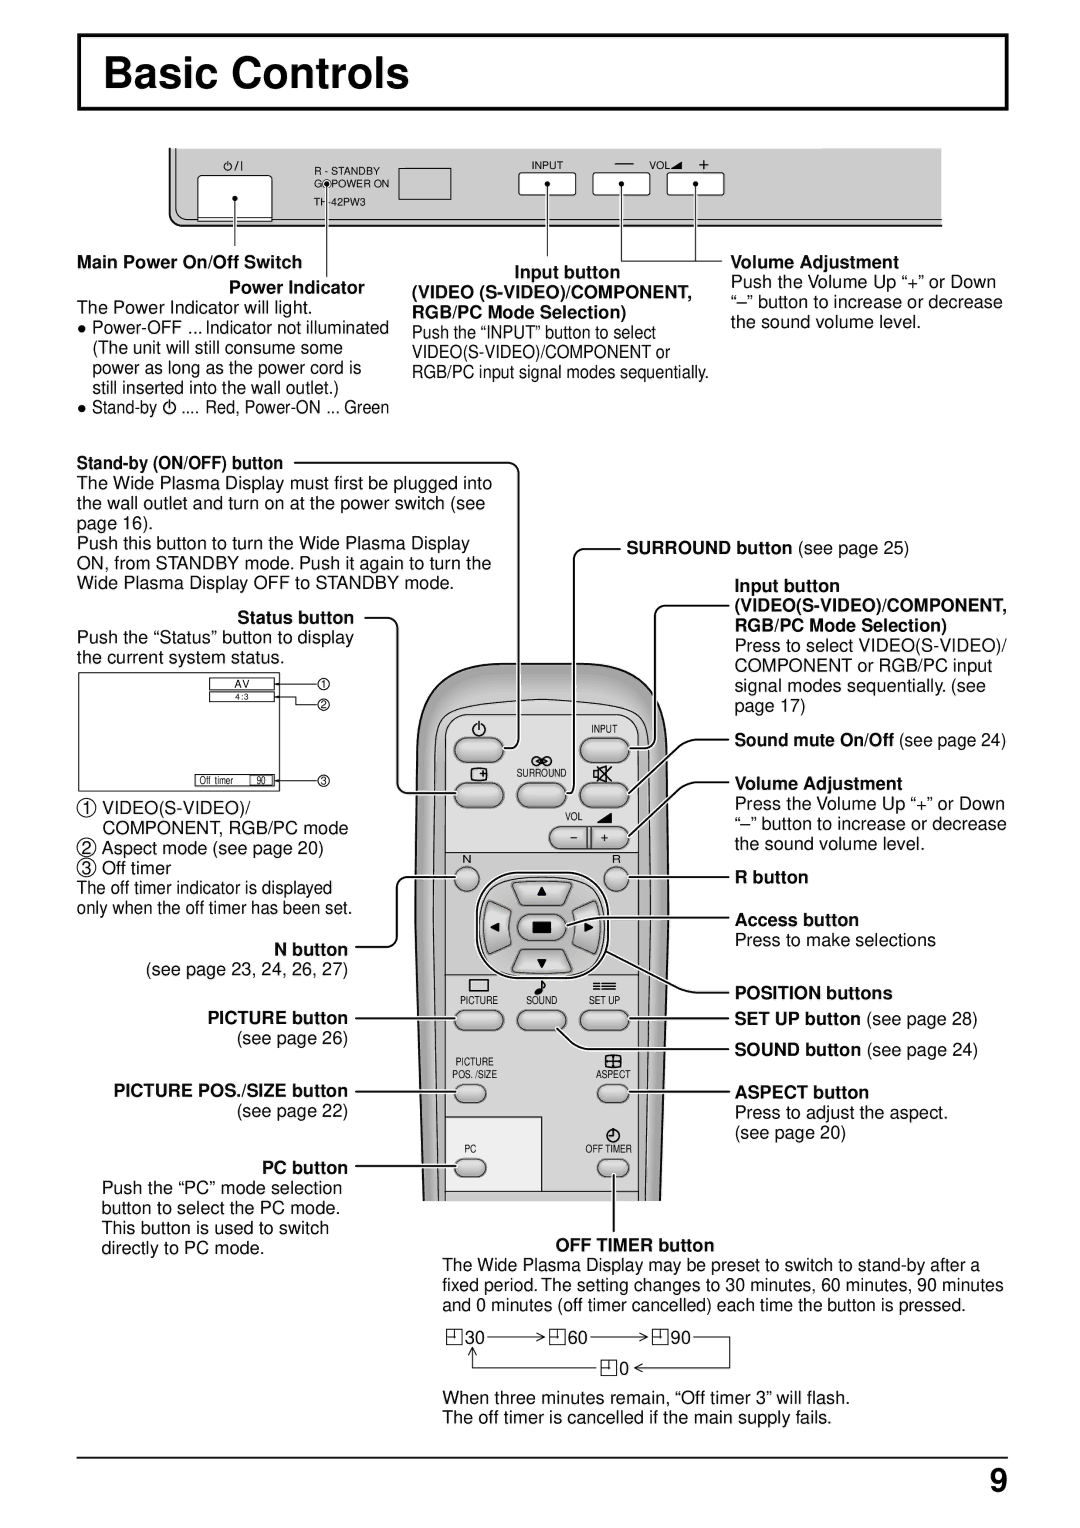
In terms of connectivity, the TH-42PWD3 and TH-42PW3 come equipped with multiple input options, including HDMI, Component, and S-Video, allowing users to easily connect a variety of devices, from Blu-ray players to gaming consoles. This versatility makes it convenient for users to switch between different sources without hassle.
Another notable characteristic of these models is their durability and robust construction. Built to last, the TH-42PWD3 and TH-42PW3 are designed for continuous use, making them well-suited for commercial environments like retail displays, conference rooms, or educational institutions. Their energy-efficient design also helps to reduce power consumption, which is an important consideration for large-scale installations.
The inclusion of advanced image processing technologies enhances the viewing experience even further. These models feature pixel management features that minimize image distortion and improve the overall quality of the displayed content. Whether watching fast-paced action sequences or immersive landscapes, the performance remains surprisingly smooth and engaging.
In summary, the Panasonic TH-42PWD3 and TH-42PW3 are exemplary models of plasma TV technology, offering 42 inches of vibrant and rich viewing experiences. With their advanced features, durability, and versatility in connectivity, they cater to a wide array of usage scenarios, making them a solid choice for both personal and professional environments.

