Power On / Off
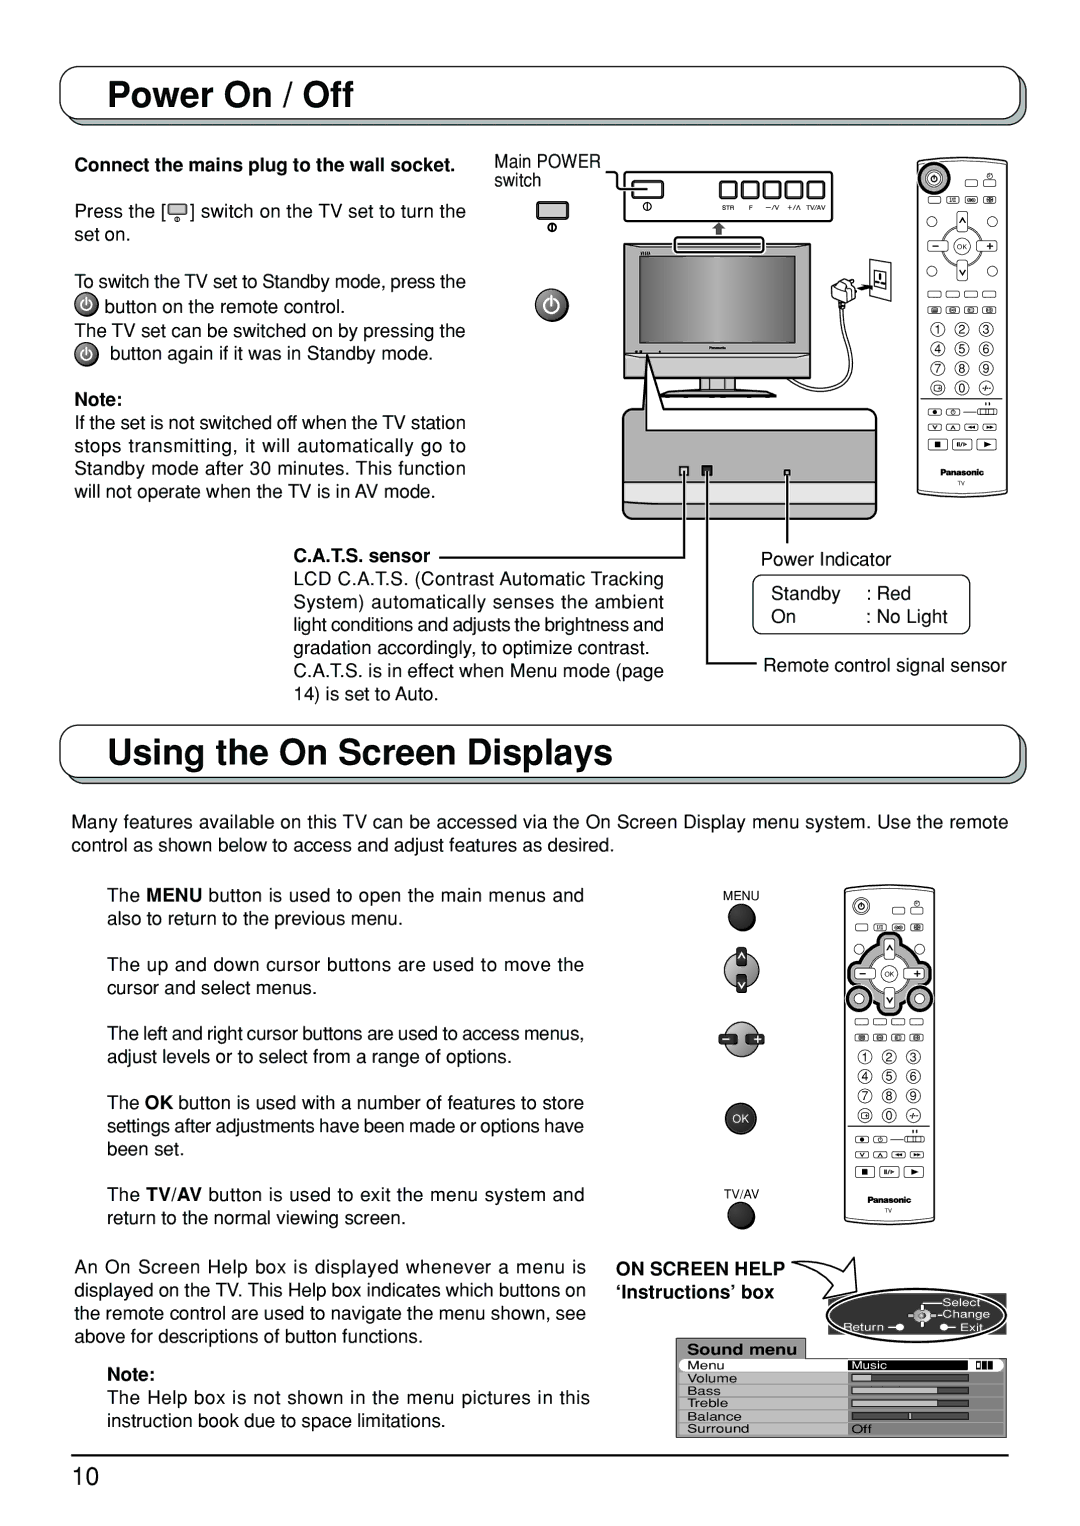
Connect the mains plug to the wall socket.
Press the [![]() ] switch on the TV set to turn the set on.
] switch on the TV set to turn the set on.
To switch the TV set to Standby mode, press the ![]() button on the remote control.
button on the remote control.
The TV set can be switched on by pressing the ![]() button again if it was in Standby mode.
button again if it was in Standby mode.
Note:
If the set is not switched off when the TV station stops transmitting, it will automatically go to Standby mode after 30 minutes. This function will not operate when the TV is in AV mode.
Main POWER switch
OK
1 2 3
4 5 6
7 8 9
0
TV
C.A.T.S. sensor
LCD C.A.T.S. (Contrast Automatic Tracking System) automatically senses the ambient light conditions and adjusts the brightness and gradation accordingly, to optimize contrast.
C.A.T.S. is in effect when Menu mode (page 14) is set to Auto.
Power Indicator
Standby | : Red |
On | : No Light |
![]() Remote control signal sensor
Remote control signal sensor
Using the On Screen Displays
Many features available on this TV can be accessed via the On Screen Display menu system. Use the remote control as shown below to access and adjust features as desired.
The MENU button is used to open the main menus and also to return to the previous menu.
The up and down cursor buttons are used to move the cursor and select menus.
The left and right cursor buttons are used to access menus, adjust levels or to select from a range of options.
The OK button is used with a number of features to store settings after adjustments have been made or options have been set.
MENU
OK
1 2 3
4 5 6
7 8 9
OK | 0 |
The TV/AV button is used to exit the menu system and return to the normal viewing screen.
An On Screen Help box is displayed whenever a menu is displayed on the TV. This Help box indicates which buttons on the remote control are used to navigate the menu shown, see above for descriptions of button functions.
Note:
The Help box is not shown in the menu pictures in this instruction book due to space limitations.
TV/AV
| TV |
|
ON SCREEN HELP |
|
|
‘Instructions’ box |
| Select |
|
| |
|
| Change |
| Return | Exit |
Sound menu |
|
|
Menu | Music |
|
Volume |
|
|
Bass |
|
|
Treble |
|
|
Balance |
|
|
Surround | Off |
|
10