Configure the Network Settings
■Install the software
Before installing the software, read the readme file on the provided
●Software included on the provided
CD-ROM
•Panasonic IP Setup Software
Configure the network settings of the unit. Refer to the following for further information.
•Viewer Software "Network Camera View3"
It is necessary to install the viewer software "Network Camera View3" to display images on a PC. Install the viewer software by
Important: The viewer software used on each PC should be licensed individually. Refer to your dealer for the software licensing.
■Uninstall the software
z Select "Control Panel" – "Add/Remove Programs". "Add/Remove Programs" window will be displayed on the PC screen.
xSelect "Network Camera View3".
c Click "Remove" or "Change/Remove", and follow the directions.
after around 20 minutes have passed when the values of all the following setup items are still the default val- ues; "IP address", "Default gateway", "Net mask", "HTTP port", "DHCP", "User name", "Password".
•The Panasonic IP setting software is inoperable in other subnets via the same router.
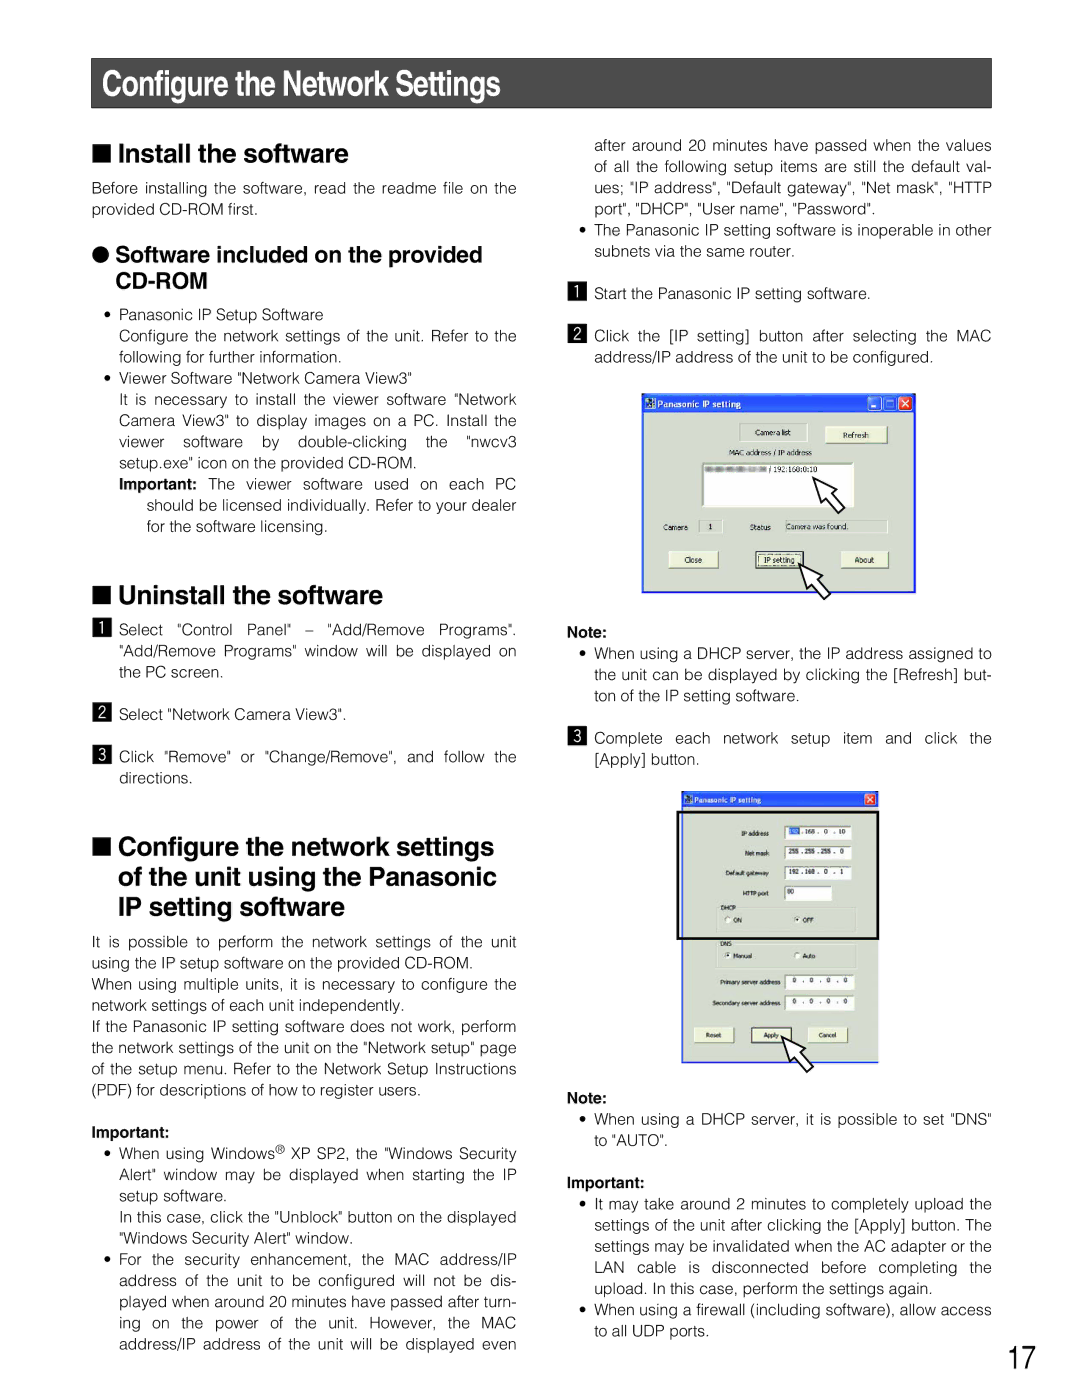
zStart the Panasonic IP setting software.
x Click the [IP setting] button after selecting the MAC address/IP address of the unit to be configured.
Note:
•When using a DHCP server, the IP address assigned to the unit can be displayed by clicking the [Refresh] but- ton of the IP setting software.
c Complete each network setup item and click the [Apply] button.
■Configure the network settings of the unit using the Panasonic IP setting software
It is possible to perform the network settings of the unit using the IP setup software on the provided
If the Panasonic IP setting software does not work, perform the network settings of the unit on the "Network setup" page of the setup menu. Refer to the Network Setup Instructions (PDF) for descriptions of how to register users.
Important:
•When using Windows® XP SP2, the "Windows Security Alert" window may be displayed when starting the IP setup software.
In this case, click the "Unblock" button on the displayed "Windows Security Alert" window.
•For the security enhancement, the MAC address/IP address of the unit to be configured will not be dis- played when around 20 minutes have passed after turn- ing on the power of the unit. However, the MAC address/IP address of the unit will be displayed even
Note:
•When using a DHCP server, it is possible to set "DNS" to "AUTO".
Important:
•It may take around 2 minutes to completely upload the settings of the unit after clicking the [Apply] button. The settings may be invalidated when the AC adapter or the LAN cable is disconnected before completing the upload. In this case, perform the settings again.
•When using a firewall (including software), allow access to all UDP ports.
17