Rack Mounting
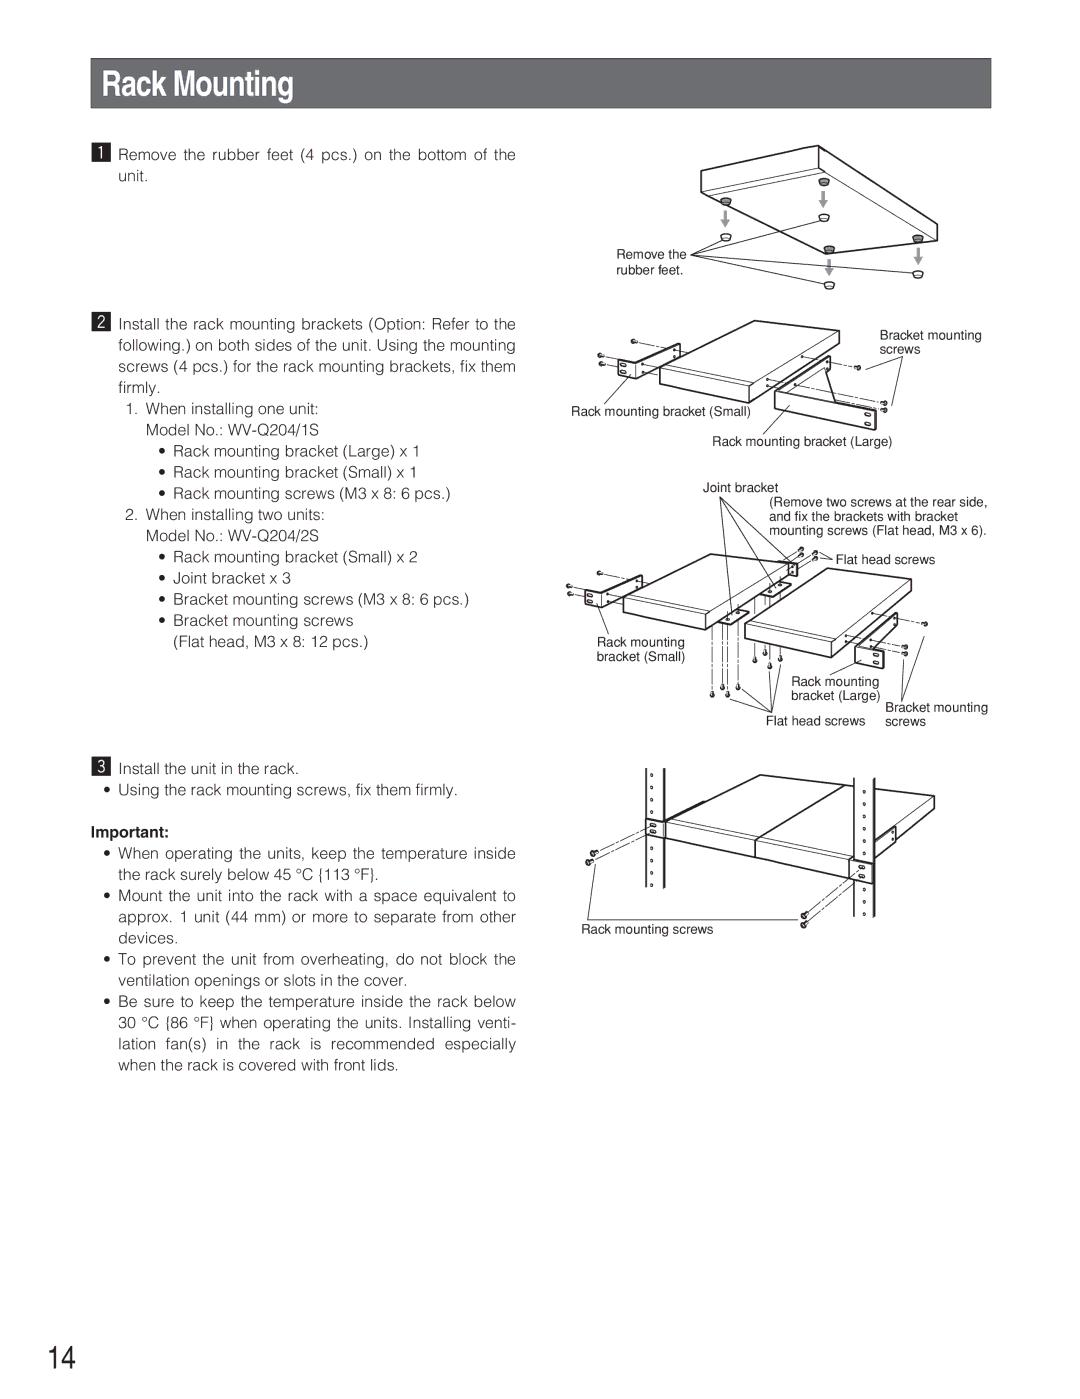
z Remove the rubber feet (4 pcs.) on the bottom of the unit.
x Install the rack mounting brackets (Option: Refer to the following.) on both sides of the unit. Using the mounting screws (4 pcs.) for the rack mounting brackets, fix them firmly.
1.When installing one unit: Model No.:
•Rack mounting bracket (Large) x 1
•Rack mounting bracket (Small) x 1
•Rack mounting screws (M3 x 8: 6 pcs.)
2.When installing two units: Model No.:
•Rack mounting bracket (Small) x 2
•Joint bracket x 3
•Bracket mounting screws (M3 x 8: 6 pcs.)
•Bracket mounting screws (Flat head, M3 x 8: 12 pcs.)
cInstall the unit in the rack.
• Using the rack mounting screws, fix them firmly.
Important:
•When operating the units, keep the temperature inside the rack surely below 45 °C {113 °F}.
•Mount the unit into the rack with a space equivalent to approx. 1 unit (44 mm) or more to separate from other devices.
•To prevent the unit from overheating, do not block the ventilation openings or slots in the cover.
•Be sure to keep the temperature inside the rack below 30 °C {86 °F} when operating the units. Installing venti- lation fan(s) in the rack is recommended especially when the rack is covered with front lids.
Remove the rubber feet.
Bracket mounting screws
Rack mounting bracket (Small)
Rack mounting bracket (Large)
Joint bracket
(Remove two screws at the rear side, and fix the brackets with bracket mounting screws (Flat head, M3 x 6).
![]()
![]()
![]() Flat head screws
Flat head screws
Rack mounting bracket (Small)
Rack mounting
bracket (Large)
Bracket mounting
Flat head screws screws
Rack mounting screws
14