|
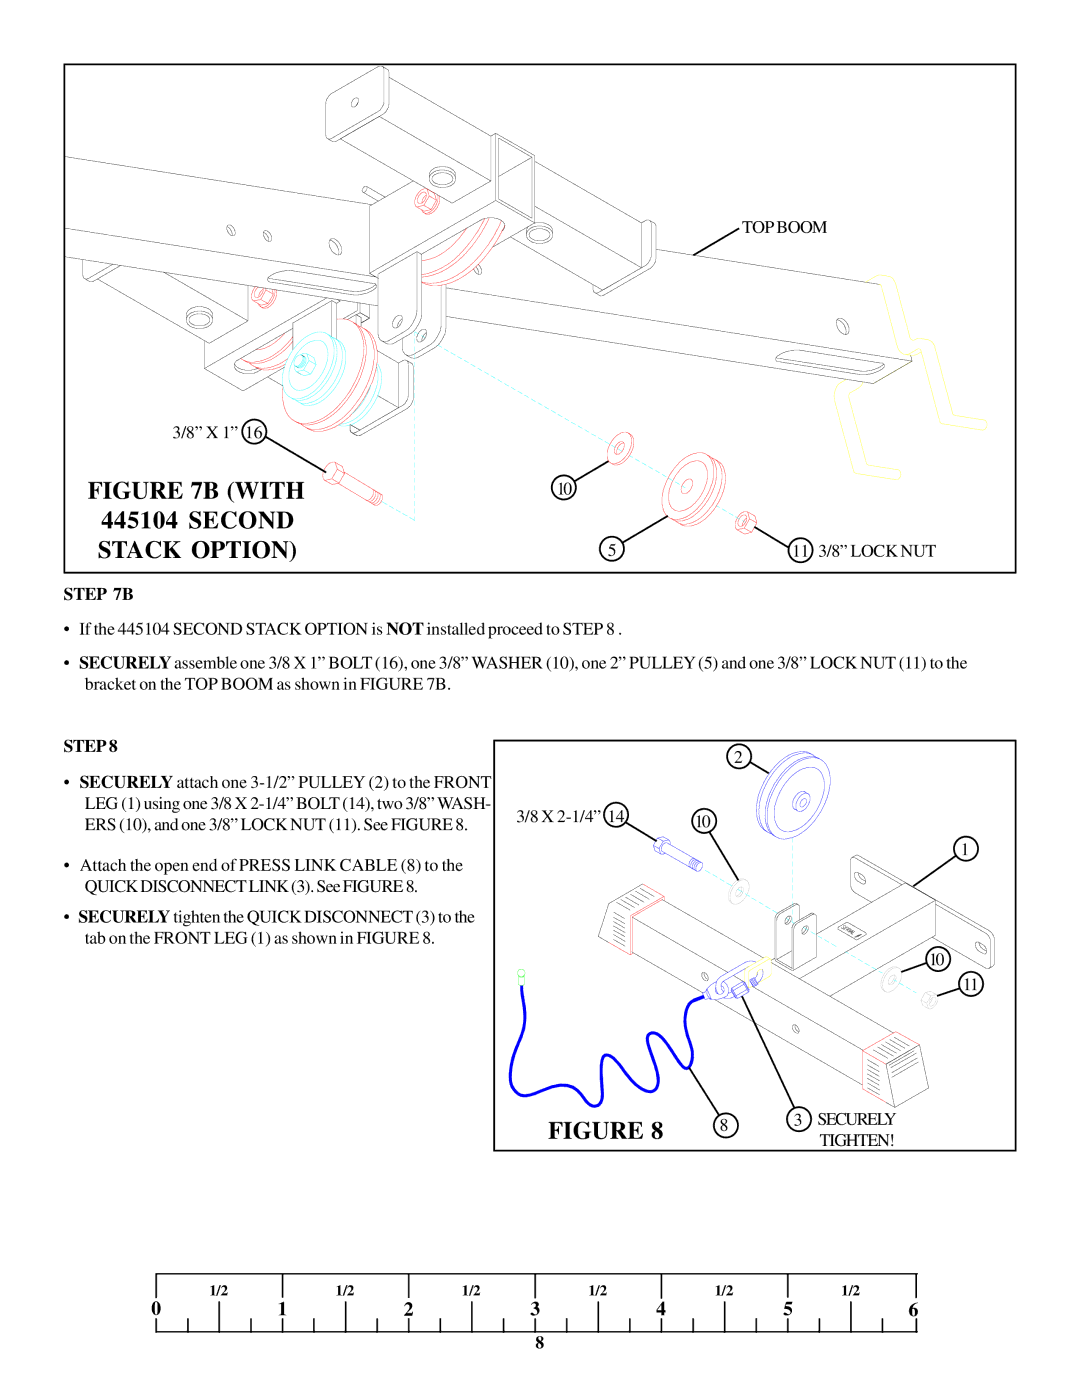
| TOP BOOM |
3/8” X 1” 16 |
|
|
FIGURE 7B (WITH | 10 |
|
445104 SECOND |
|
|
STACK OPTION) | 5 | 11 3/8” LOCK NUT |
STEP 7B
•If the 445104 SECOND STACK OPTION is NOT installed proceed to STEP 8 .
•SECURELY assemble one 3/8 X 1” BOLT (16), one 3/8” WASHER (10), one 2” PULLEY (5) and one 3/8” LOCK NUT (11) to the bracket on the TOP BOOM as shown in FIGURE 7B.
STEP 8 |
|
|
|
|
| 2 |
|
|
|
|
|
|
|
| |
• SECURELY attach one |
|
|
|
|
| ||
LEG (1) using one 3/8 X | 3/8 X |
| 10 |
|
| ||
ERS (10), and one 3/8” LOCK NUT (11). See FIGURE 8. |
|
|
| ||||
• Attach the open end of PRESS LINK CABLE (8) to the |
|
|
|
| 1 | ||
|
|
|
|
| |||
QUICK DISCONNECT LINK (3). See FIGURE 8. |
|
|
|
|
| ||
• SECURELY tighten the QUICK DISCONNECT (3) to the |
|
|
|
|
| ||
tab on the FRONT LEG (1) as shown in FIGURE 8. |
|
|
|
| 10 | ||
|
|
|
|
|
|
| |
|
|
|
|
|
|
| 11 |
|
|
| FIGURE 8 | 8 | 3 | SECURELY | |
|
|
|
|
| TIGHTEN! | ||
1/2 | 1/2 | 1/2 | 1/2 | 4 | 1/2 | 5 | 1/2 |
0 | 1 | 2 | 3 |
| 6 | ||
|
|
| 8 |
|
|
|
|