DR-S501
Overview Connections
Important Safety Instructions
Batteries
Power
Precautions
Installing this Unit
Precautions
For European Models
Supplied Accessories
Make sure you have the following accessories
Features
Introduction
Contents
Supported Discs
Introduction
Disc Notes
Function Support
About DivX
MP3/WMA/JPEG Compatibility
About WMA
DivX video compatibility
Storing Discs
Cleaning Discs
Handling Discs
Copyright
Installing the Batteries
Before Using the DVD receiver
Using the Remote Controller
Front & Rear Panels
Front Panel
Front & Rear Panels
Display
� Hdmi IN/OUT
AV Connector European model only
Rear Panel
Video 1 Input
Remote Controller
Preset / buttons
Resolution button
Tuner buttons Tuning / button
Mode button
Connecting Your Speakers
Connecting the DVD receiver
Placing the Speakers
Connecting a Powered Subwoofer
Connecting the DVD receiver
Connecting the Speaker Cables
Speaker Impedance
Connecting the AM Loop Antenna
Connecting Antenna
Connecting the Indoor FM Antenna
Attach the FM antenna, as shown
Connecting an Outdoor AM Antenna
Connecting an Outdoor FM Antenna
Using a TV/FM Antenna Splitter
AV Cables & Connectors
Video Output/Video Setting Matrix
Video Signal Flow Chart
RCA AV Connection Color Coding
Basic Setup
Before Making Any Connections
Optical Digital Jacks
Using Scart European model only
Connecting Your TV video connection
Using Component Video
Compatibility of this unit with progressive-scan TVs
Set top box
Connecting Other AV Component
Recorder
Connecting an RI Dock
Digital Audio Connection
Hdmi & the DVD receiver
What is HDMI?
Using Hdmi
Video
DVD receiver turns on and the Standby indicator turns off
Connecting the Power/Turning on the DVD receiver
Before connecting
Standby indicator
Use the Up and Down
Initial Setup
First Time Setup
Buttons to select TV Shape
Setting the Hdmi
Hdmi and Progressive Settings
Selecting Progressive or Interlaced
Understanding Common Operations
Adjusting the Volume
Using Headphones
Selecting the Input Source
Remote controller Press the Muting button
Using the Sleep Timer
Adjusting Subwoofer Level
Understanding Common Operations
Starting, Pausing & Stopping Playback
Playing Discs
Stop To stop playback, press the Stop
Playing Discs
Select Next & Previous track/chapter
Select
Fast Forward & Reverse
This section explains how to fast forward and reverse
Forward Frame-by-Frame Playback
To resume normal playback, press Play button
Navigating DVD & VCD Disc Menus
Navigating CDs & Super Audio CDs
Navigating MP3, WMA & DivX Discs
Viewing a Slideshow of Jpeg Images
Listening to the Radio
Using the Tuner
Tuning into Radio Stations
Listening to the Radio
Deleting Presets
Presetting AM/FM Stations
Selecting Presets
Listening to the Radio
PS Program Service
Using RDS European models only
What is RDS?
RT Radio Text
Selecting Listening Modes
Using the Listening Modes
Selecting Pure Audio Listening Mode on the DVD receiver
About the Listening Modes
Listening Mode and Receiver Settings
Using the Listening Modes
Theater-Dimensional Listening Angle Setting
Press and hold the Setup but Ton for 3 seconds
This is what appears for CDs
Advanced Playback
Press the Search button
Press the Play or Enter
During playback, press the Search button twice
Advanced Playback
Searching by Time
Use the number buttons to enter a time
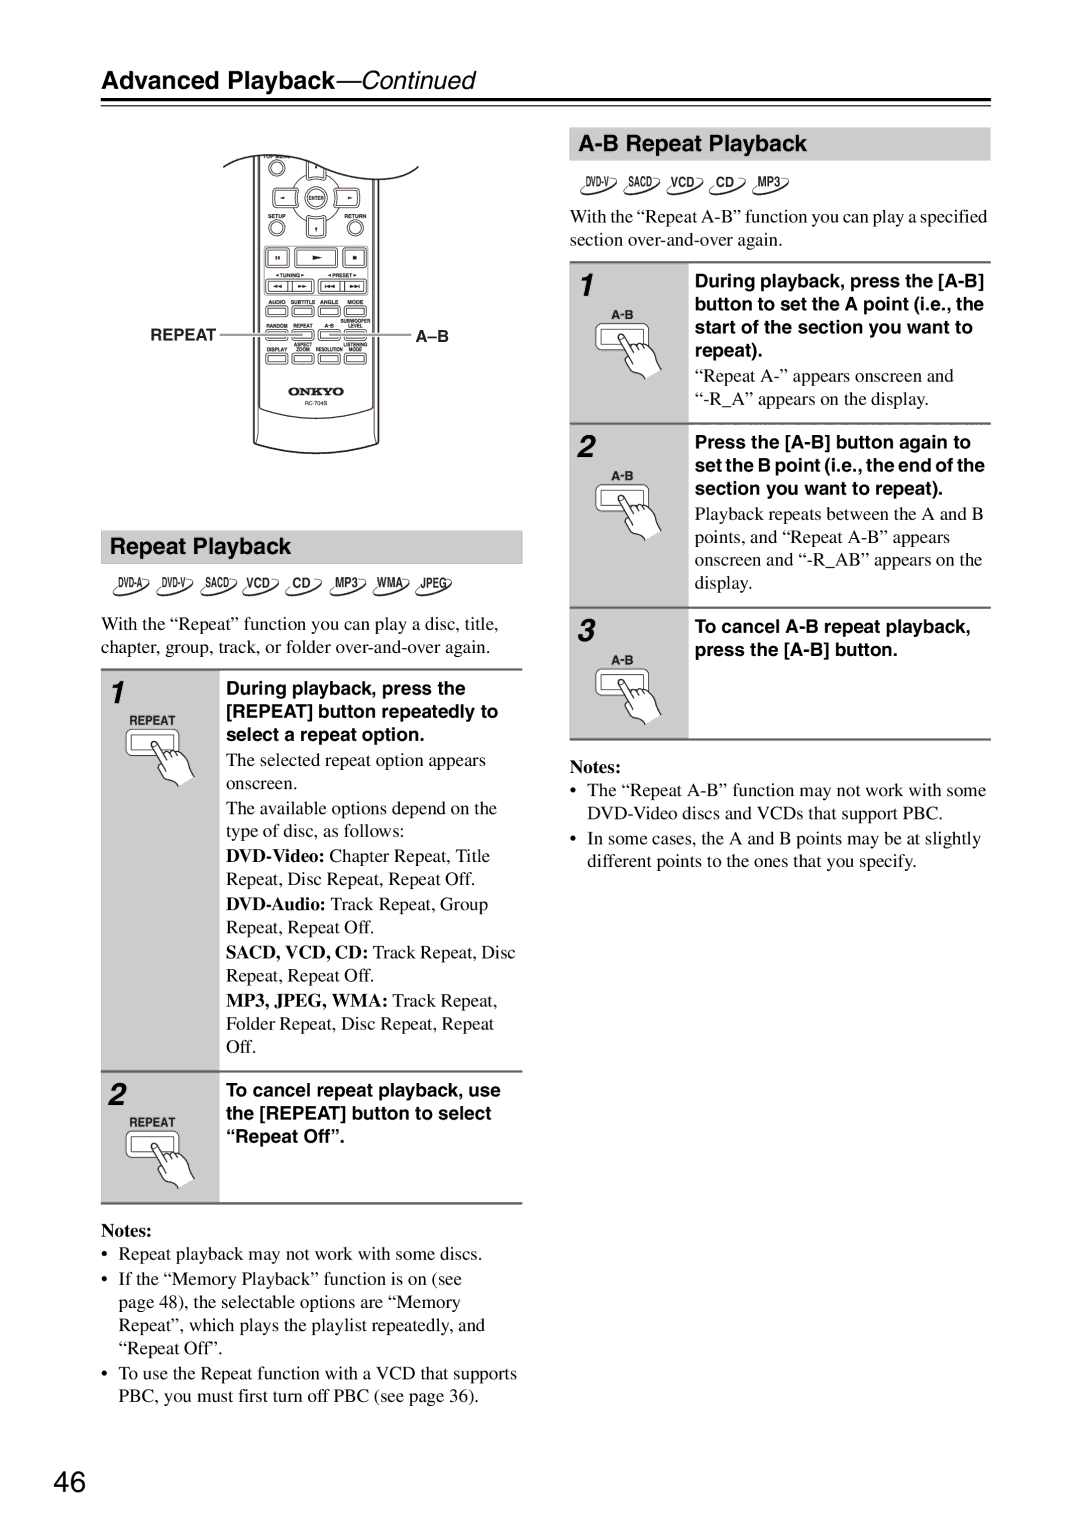
Repeat Playback
To cancel A-B repeat playback, press the A-B button
Repeat A- appears onscreen and -RA appears on the display
SACD, VCD, CD Disc Random, Ran- dom Off
Random Playback
Random playback may not work with some discs
Memory Playback
Adding New Items to the List
Deleting Items from the List
Last Memory
Editing Steps
Zoom x1.0 appears onscreen
Zooming
Selecting Camera Angles
Press the Zoom again repeat- edly to Zoom
Selecting Soundtracks
Selecting Subtitles
Disc Information
Disc and Input Information
Displaying Information
Input Information
Controlling a TV connected to the DVD receiver
Entering Remote Control Codes
Controlling Other Components
Controlling a TV
Controlling Other Components
Configuring the DVD receiver
Setup Menu
Configuring the DVD receiver
Digital Input Signal Formats
AM Frequency Step Setup not European models
Audio Input Setup
Crossover Frequency
Picture
DVD Onscreen Setup Menus
Menu Setting Description
Language
Tons to select the options,
DVD Onscreen Setup Menus
Using the Onscreen Setup Menus
Press the Enter button to con
Picture Menu
View Mode
Hdmi Output Setting
TV Shape
HD Jpeg Mode
Progressive Setting
HD Resolution
Video Black Level
Audio Menu
PAL Output Setting
Scart Output Setting European model only
Digital/HDMI Audio Out
Disc Menu Language
Language Menu
On-Screen Language
Audio Language
Selecting Other Languages
When you’ve finished, press the Enter button
Use this list when specifying other languages
Language Code
Display Menu
Change the Security Code
Operation Setting Menu
Setting the Parental Lock
Tal lock, and then press
Sacd Priority Contents
DVD Priority Contents
DivX Registration
Additional information
Resetting the receiver
Disc Content Organization
DVD-Video regions
Additional information
Glossary
MP3, WMA, Jpeg & DivX Files
Dynamic range
Hdcp High-bandwidth Digital Content Protection
PAL Phase alternation by line
File extension
Power
Troubleshooting
Audio
Video
Troubleshooting
Make sure the source material is Dolby Digital
Tuner
Disc Playback
Connection with External Devices
Others
Displayed ID Message
Hdmi Status Mode
No picture from the Hdmi connection
No sound from the Hdmi connection
Video Section
Specifications
Amplifier Section
Tuner Section
Remote Control Codes List
AOC
Remote Control Codes List
ECE
KEC
RCA
SSS
TV/DVD Combination
Memo
Memo
Onkyo Europe Electronics GmbH
Onkyo Europe UK Office

