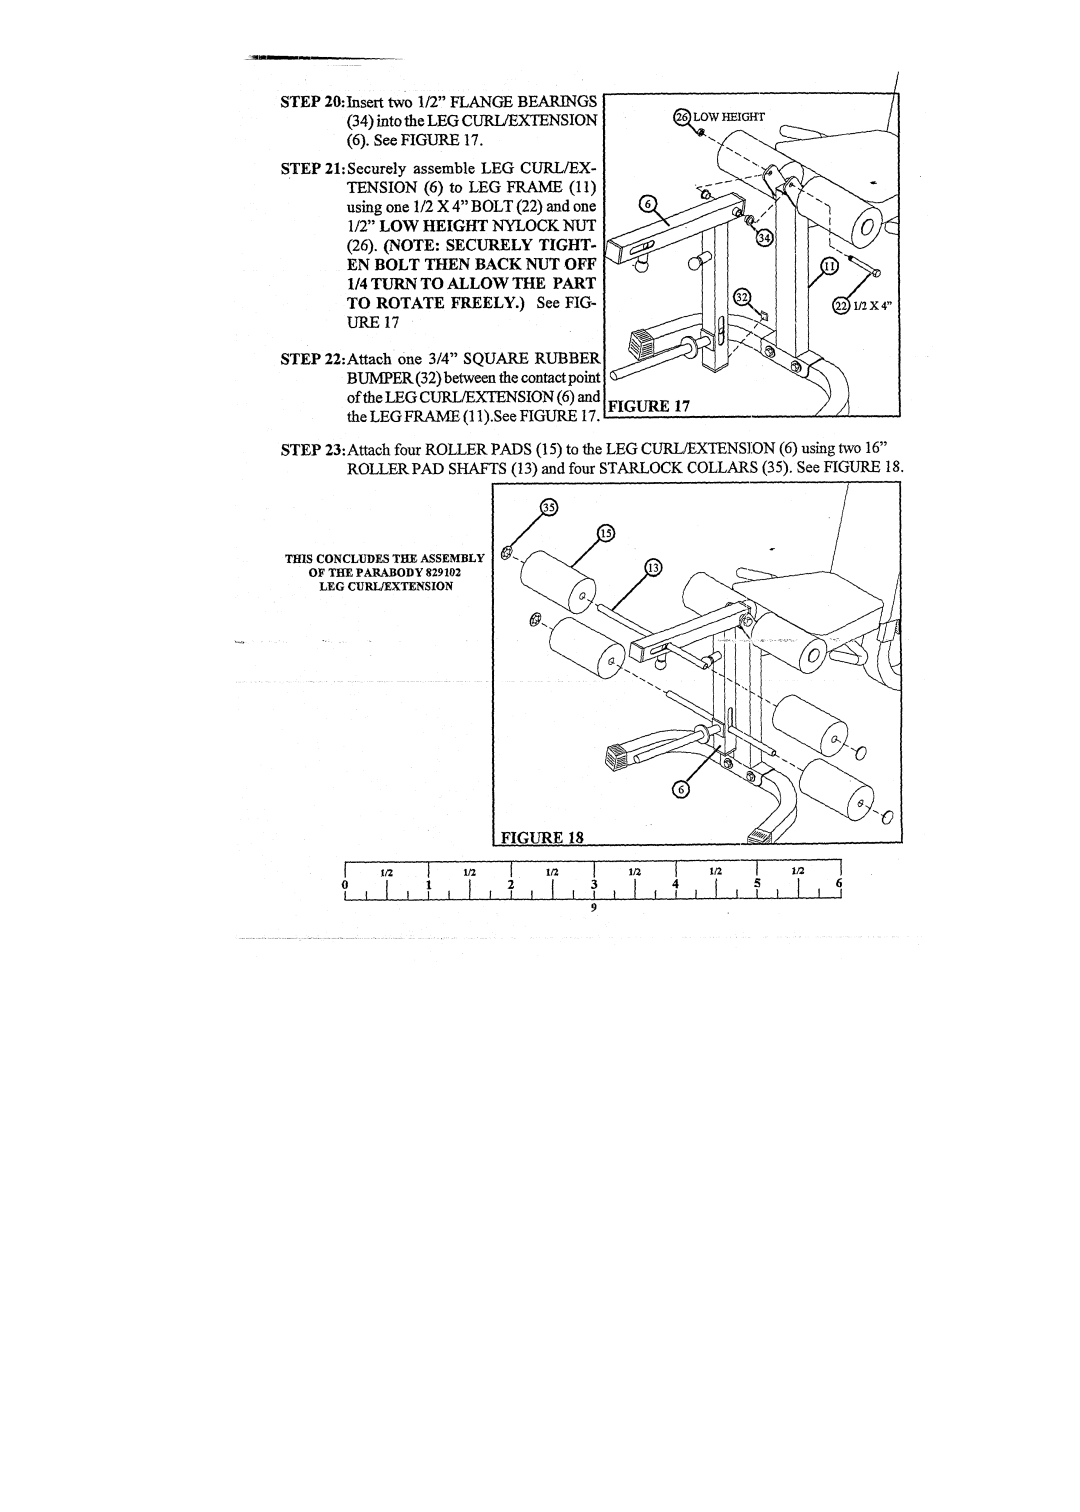
STEP 20:Insert two 1/2" FLANGEBEARINGS
(34)into the LEGCUR/JEXTENSION
(6).See FIGURE17.
STEP 21:Securely assemble LEG CURL/EX- TENSION(6) to LEG FRAME(11) using one 1/2 X 4" BOLT(22) and one
1/2" LOW HEIGHT NYLOCKNUT (26). (NOTE: SECIYRELYTIGHT-
EN BOLT THEN BACK NUT ,OFF 1/4 TURN TO ALLOWTHE PART TO ROTATEFREELY.) See FIG-
BUMPER(32) between the contact point
ofthe LEGCURL/EXTENSION(6) and I,G.URE 17 the LEGFRAME(11).See FIGURE17.
,
~I/2X 4"
[
STEP23:Attach four ROLLERPADS(15) to the LEGCURL/EXTENS]:ON(6) using two ROLLERPADSHAFTS(13) and four STARLOCKCOLLARS(35). See FIGURE
TI~IS CONCLUDEST Wi~.~ ASSEMBLY
OF TIlE PARABODY829102
LEG CURL/EXTENSION
FIGURE 18
I
0 | 1 | [ I I | 3 |
I I [ | I I | . I | I |
|
|
| 9 |