13 |
15 |
2 |
20 |
19 |
4 |
21 |
22 |
3/8 X |
21 |
1 |
27 1/2 X 3” |
FIGURE 6 |
STEP 6:
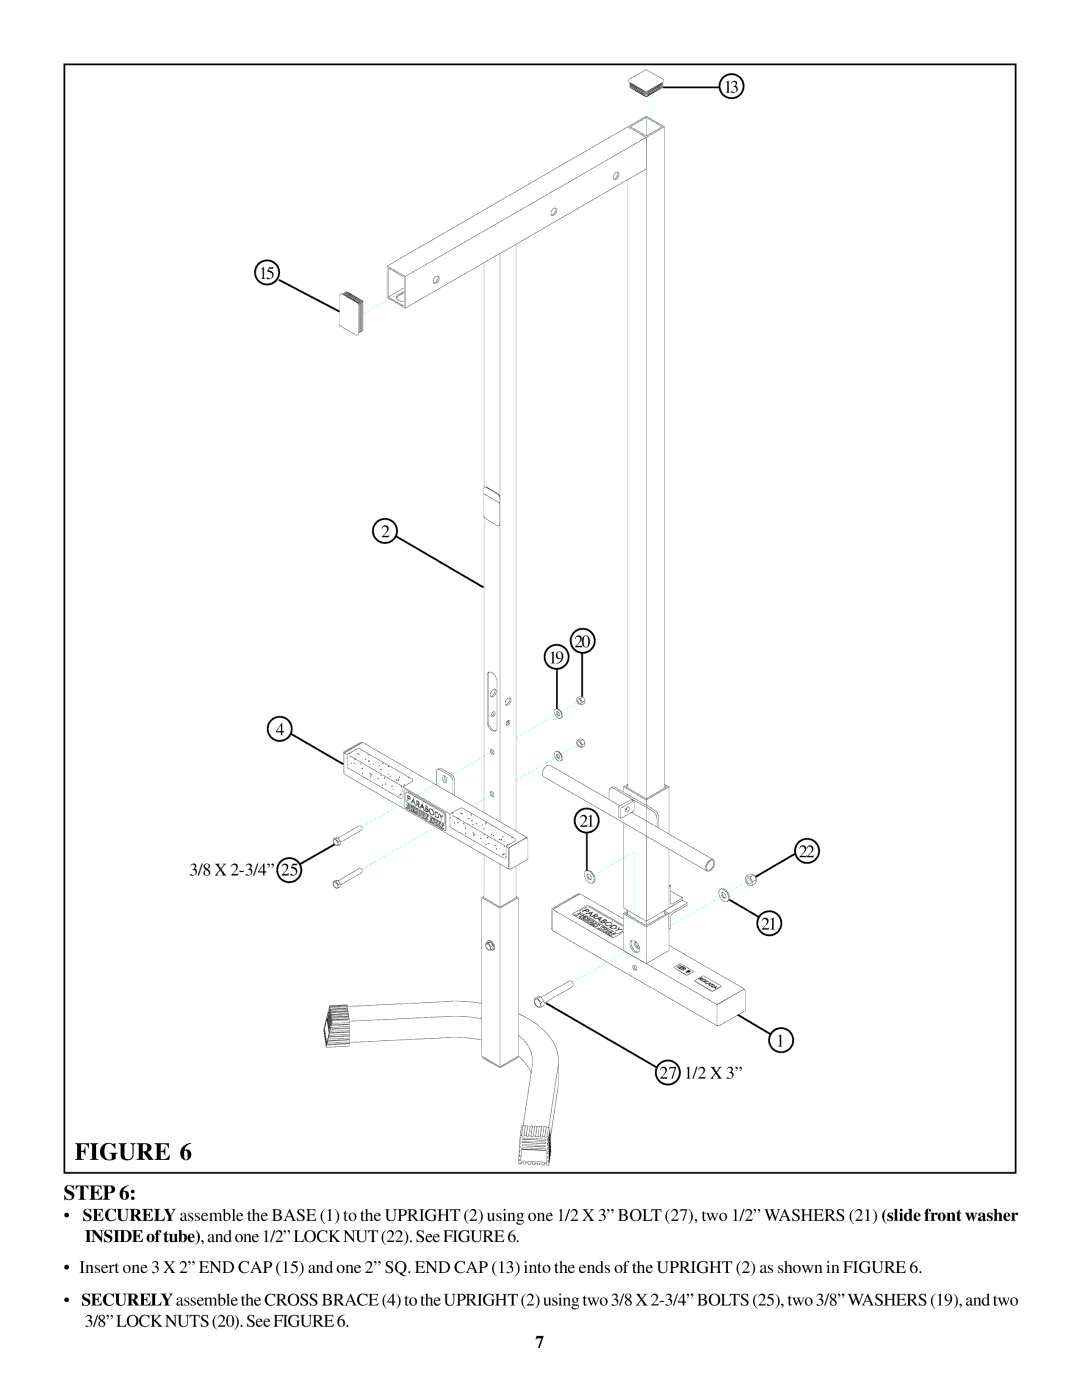
•SECURELY assemble the BASE (1) to the UPRIGHT (2) using one 1/2 X 3” BOLT (27), two 1/2” WASHERS (21) (slide front washer INSIDE of tube), and one 1/2” LOCK NUT (22). See FIGURE 6.
•Insert one 3 X 2” END CAP (15) and one 2” SQ. END CAP (13) into the ends of the UPRIGHT (2) as shown in FIGURE 6.
•SECURELY assemble the CROSS BRACE (4) to the UPRIGHT (2) using two 3/8 X
7
