//
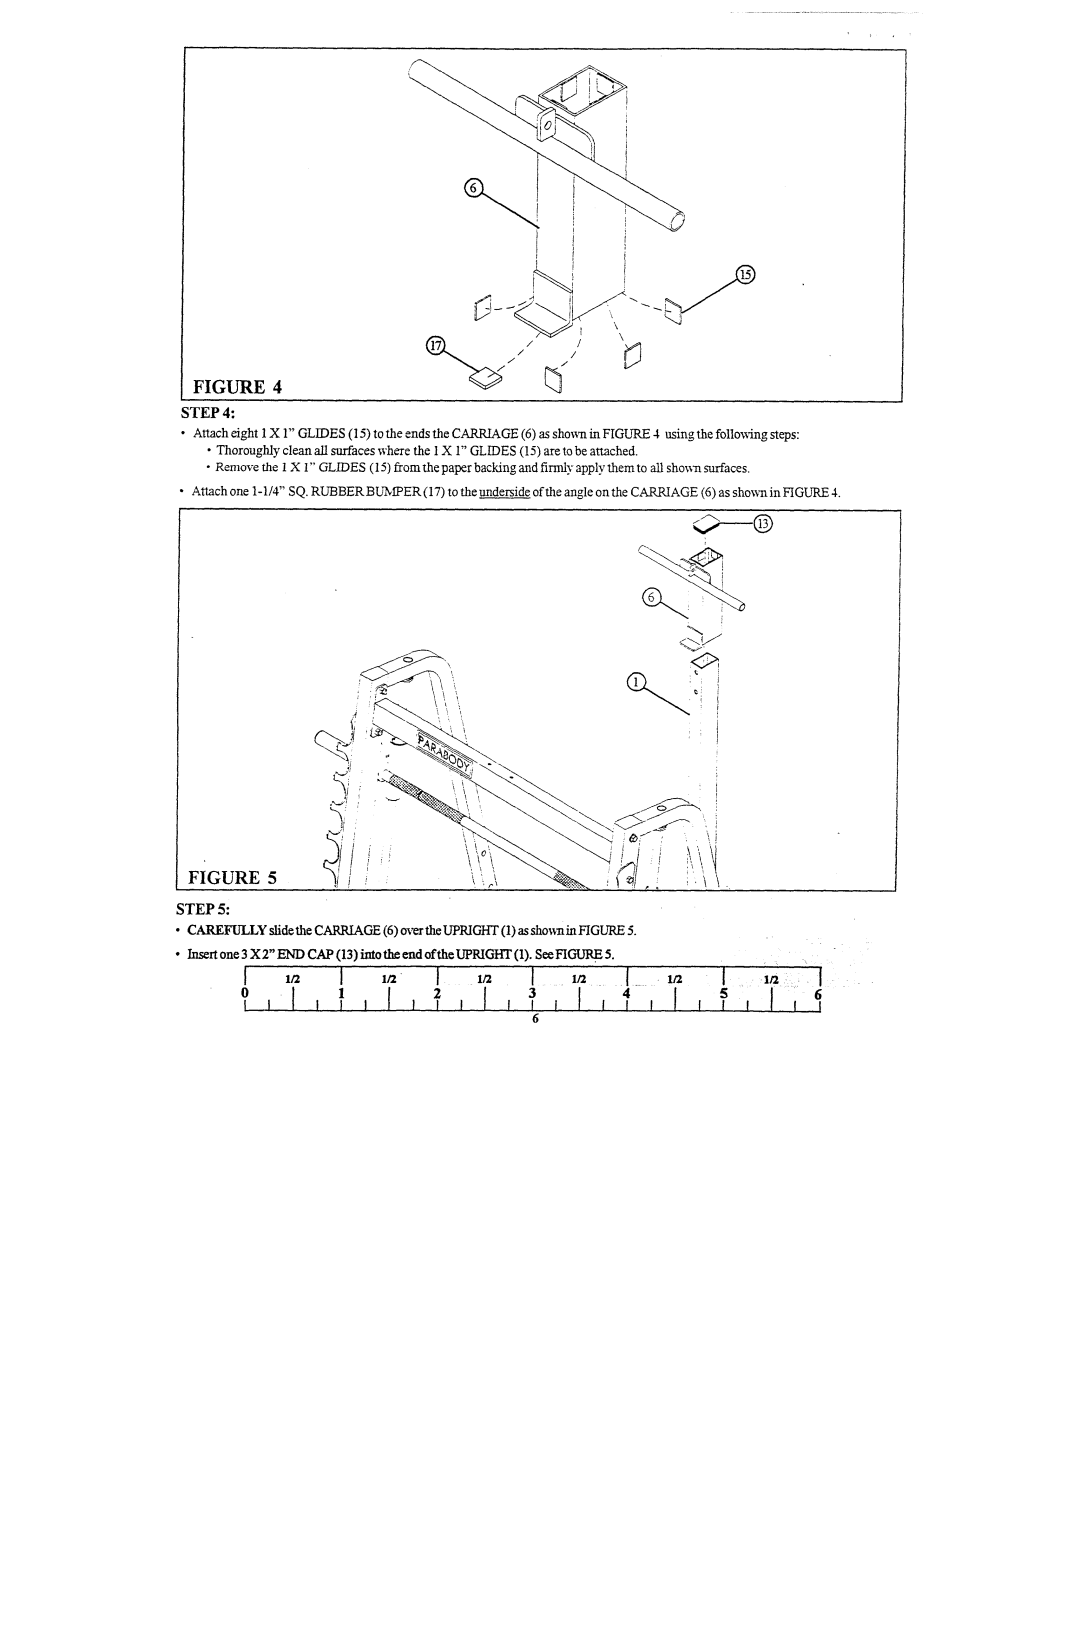
FIGURE 4
STEP 4:
¯Attacheight 1X1" GLIDES(15) to the ends the CARRIAGE(6)as sho~lin FIGURE4using the follo~4ngsteps:
¯ThorougltlycleanMlsurfaces wherethe 1 X1" GLIDES(15) are to be attached.
¯Removethe 1 X 1" GLIDES(15) from the paper backing and firmly apply" them to all
¯Attach one
FIGURE
STEP 5:
¯CAREFULLYslidethe CARRIAGE(6) over the UPRIGHT(1) as sho,~,min FIGURE
¯Insert one 3 X2" ENDCAP(13) imothe end oft.he UPRIGHT(1). SeeFICAJRE
0 | 1 | 1 | I | 3 | 4 |
|
|
