Rack Mounting Your Parasound A 31
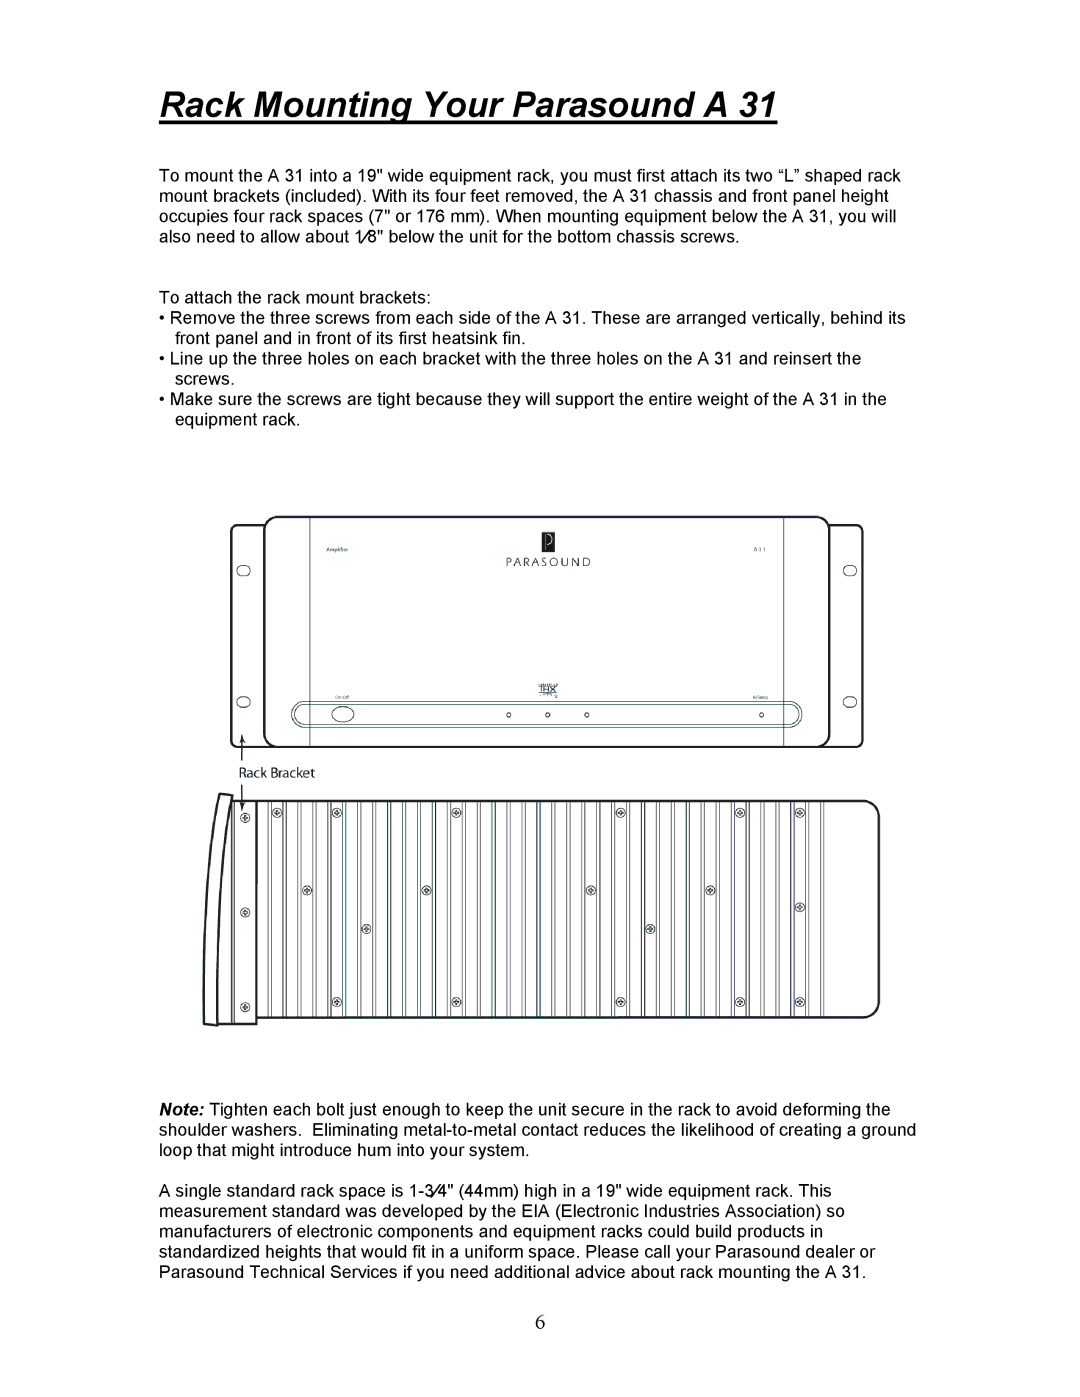
To mount the A 31 into a 19" wide equipment rack, you must first attach its two “L” shaped rack mount brackets (included). With its four feet removed, the A 31 chassis and front panel height occupies four rack spaces (7" or 176 mm). When mounting equipment below the A 31, you will also need to allow about 1⁄8" below the unit for the bottom chassis screws.
To attach the rack mount brackets:
•Remove the three screws from each side of the A 31. These are arranged vertically, behind its front panel and in front of its first heatsink fin.
•Line up the three holes on each bracket with the three holes on the A 31 and reinsert the screws.
•Make sure the screws are tight because they will support the entire weight of the A 31 in the equipment rack.
Note: Tighten each bolt just enough to keep the unit secure in the rack to avoid deforming the shoulder washers. Eliminating
Asingle standard rack space is
6