3.0 INSTALLATION
Because the CopperLink Ethernet Extender requires no configuration, it can be installed quickly. If you are installing a standalone unit, refer to section 3.1 “Standalone unit installation”. Otherwise, refer to section 3.2 “Rack card installation”.
Note If asymmetric transmission or line rates other than 12.5 Mbps are required (Model 2168 only), refer to section 4.0, “Configura- tion (Model 2168 Only)” on page 14.
3.1 STANDALONE UNIT INSTALLATION
Do the following:
1.Connect the line interface between the units (refer to section 3.3, “Connecting the
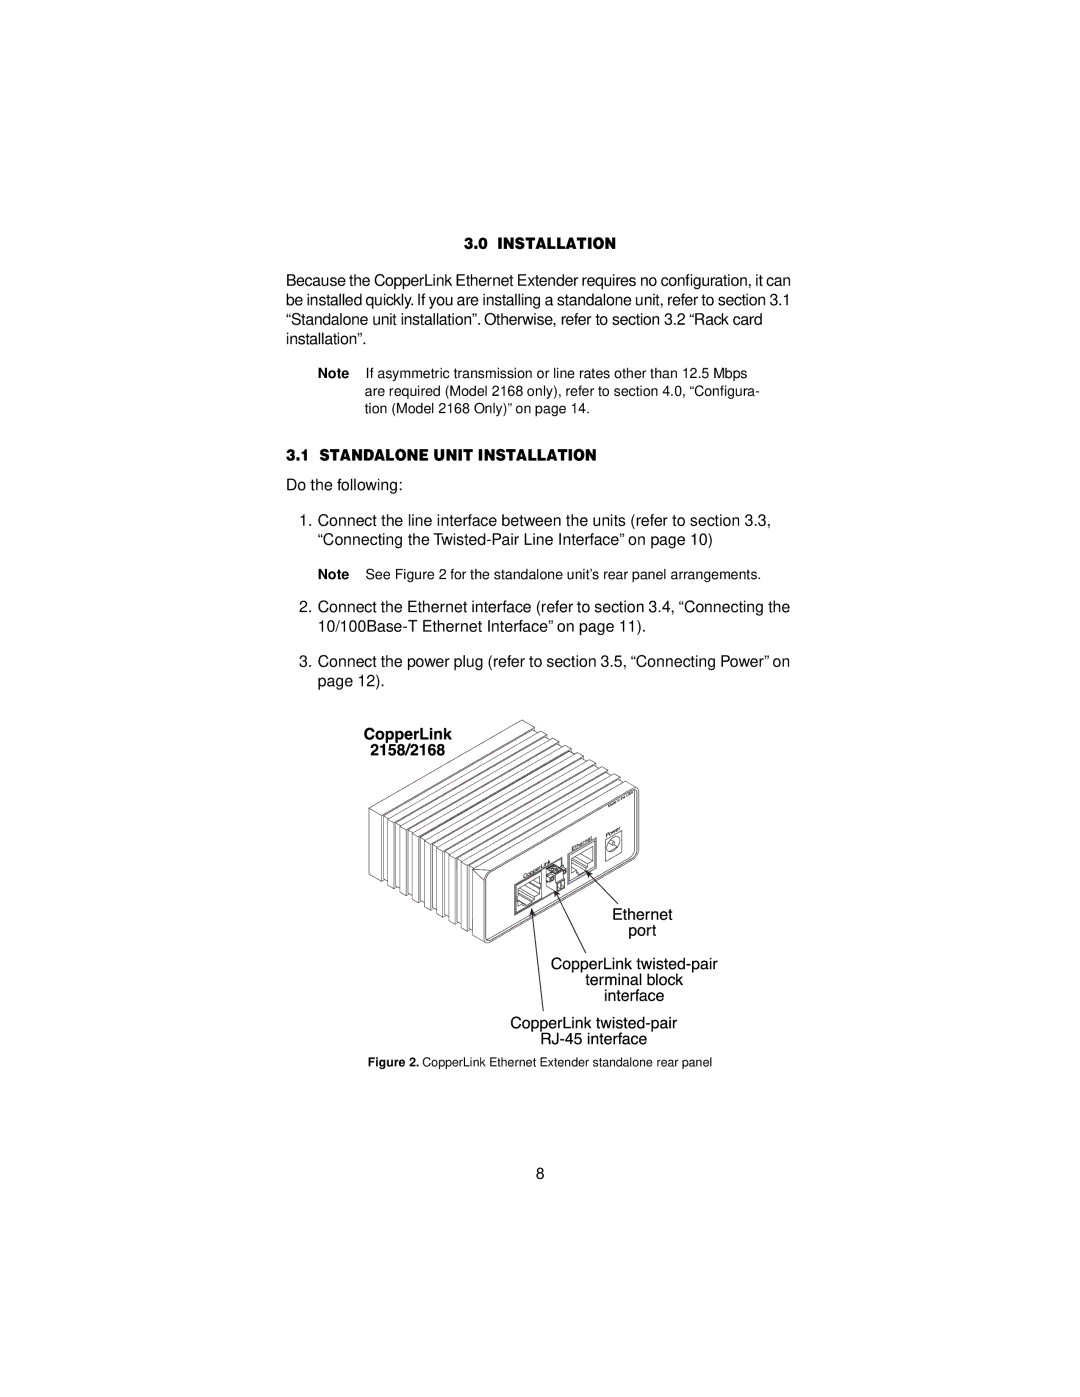
Note See Figure 2 for the standalone unit’s rear panel arrangements.
2.Connect the Ethernet interface (refer to section 3.4, “Connecting the
3.Connect the power plug (refer to section 3.5, “Connecting Power” on page 12).
Figure 2. CopperLink Ethernet Extender standalone rear panel
8