
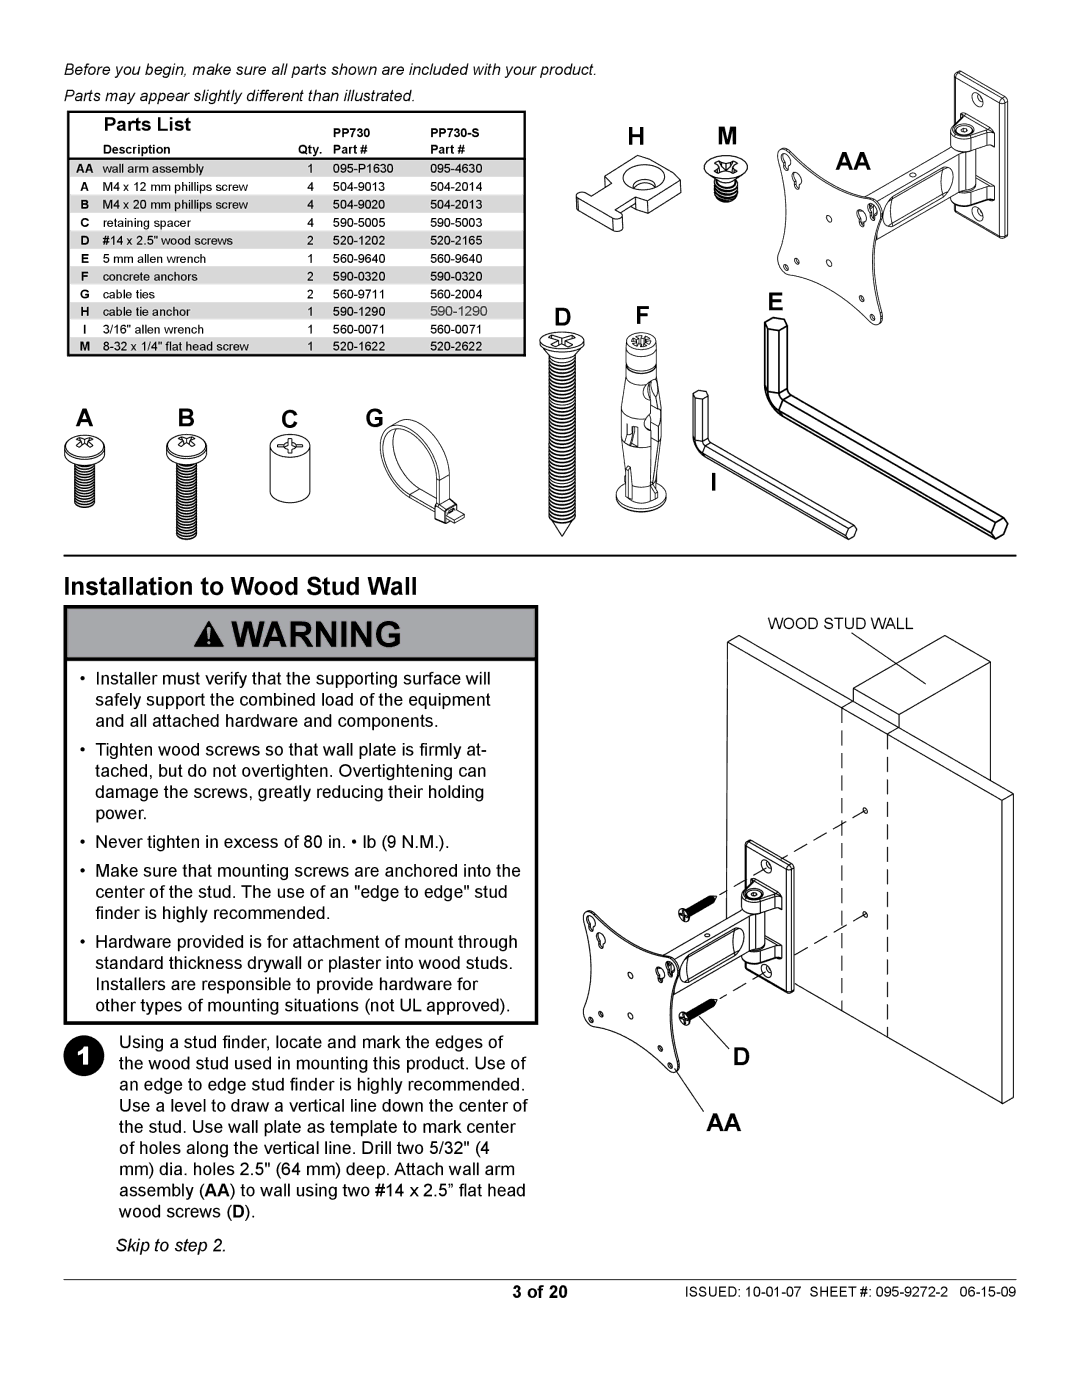
PP730-S, PP730 specifications
Peerless Industries has long been a trusted name in the realm of audiovisual mounting solutions, and their PP730 and PP730-S products continue this legacy with advanced design and technology tailored for modern display needs. Both models represent a commitment to delivering high-quality, secure, and flexible mounting options for flat panel TVs and displays.One of the standout features of the PP730 and PP730-S is their universal compatibility. These mounting solutions are designed to accommodate a wide range of display sizes and brands, ensuring that users can easily find a fitting for their specific requirements. This versatility makes them ideal for various applications, including commercial, educational, and residential settings.
The PP730 and PP730-S are built with a heavy-duty construction that provides added durability and support for larger displays. They are designed to safely hold screen weights up to 175 pounds, allowing users to mount even the most substantial models with confidence. The robust design not only enhances stability but also prolongs the lifespan of both the mount and the display.
Another essential feature is the integrated tilt function. The PP730 and PP730-S allow for a significant range of tilt adjustments, enabling users to achieve the perfect viewing angle while reducing glare and reflections from ambient light sources. This feature is particularly beneficial in environments where lighting conditions can vary, such as conference rooms or classrooms.
In terms of installation, both models are engineered for simplicity and ease of use. The PP730 and PP730-S come with a comprehensive installation guide and all necessary hardware, making it accessible for both professional installers and DIY enthusiasts. The mount allows for both wall and ceiling installations, providing flexibility in display positioning.
Furthermore, these mounts are compatible with Peerless Industries' advanced cable management system. This feature allows users to keep their setup tidy and organized by routing cables away from view, ensuring a clean and professional appearance.
The PP730-S, specifically, offers an additional set of features tailored for the savvy user, including a sleek, low-profile design that keeps the display close to the wall for a streamlined look. This makes it particularly appealing for those looking to maximize space in smaller areas.
In conclusion, the Peerless Industries PP730 and PP730-S are exemplary choices for anyone seeking a reliable, versatile, and aesthetic mounting solution for flat panel displays. With their durable construction, adjustable tilt, and straightforward installation, these mounts exemplify Peerless Industries' commitment to quality and innovation in the audiovisual market.