Manuals
/
Pelco
/
Household Appliance
/
Home Security System
Pelco
C2478M-B-ML
manual
English
Models:
C2478M-B-ML
1
5
28
28
Download
28 pages
46.58 Kb
1
2
3
4
5
6
7
8
Install
Wire Gauge
Page 5
Image 5
Page 4
Page 6
Page 5
Image 5
Page 4
Page 6
Contents
I N S T A L L A T I O N
Pressurized Spectra III Series
English Español Português Italiano Français
Deutsch
Page
Deutsch
English Español Português Italiano Français
English
Preinstallation
English
English
Site Installation
Use a 24 VAC transformer with a minimum of 100 VA
Wire Gauge
Cable Type
Maximum Distance
Español
Preinstalación
Español
Español
Instalación en la ubicación
Calibre del cable
Tipo de cable
Distancia máxima
Português
Pré-instalação
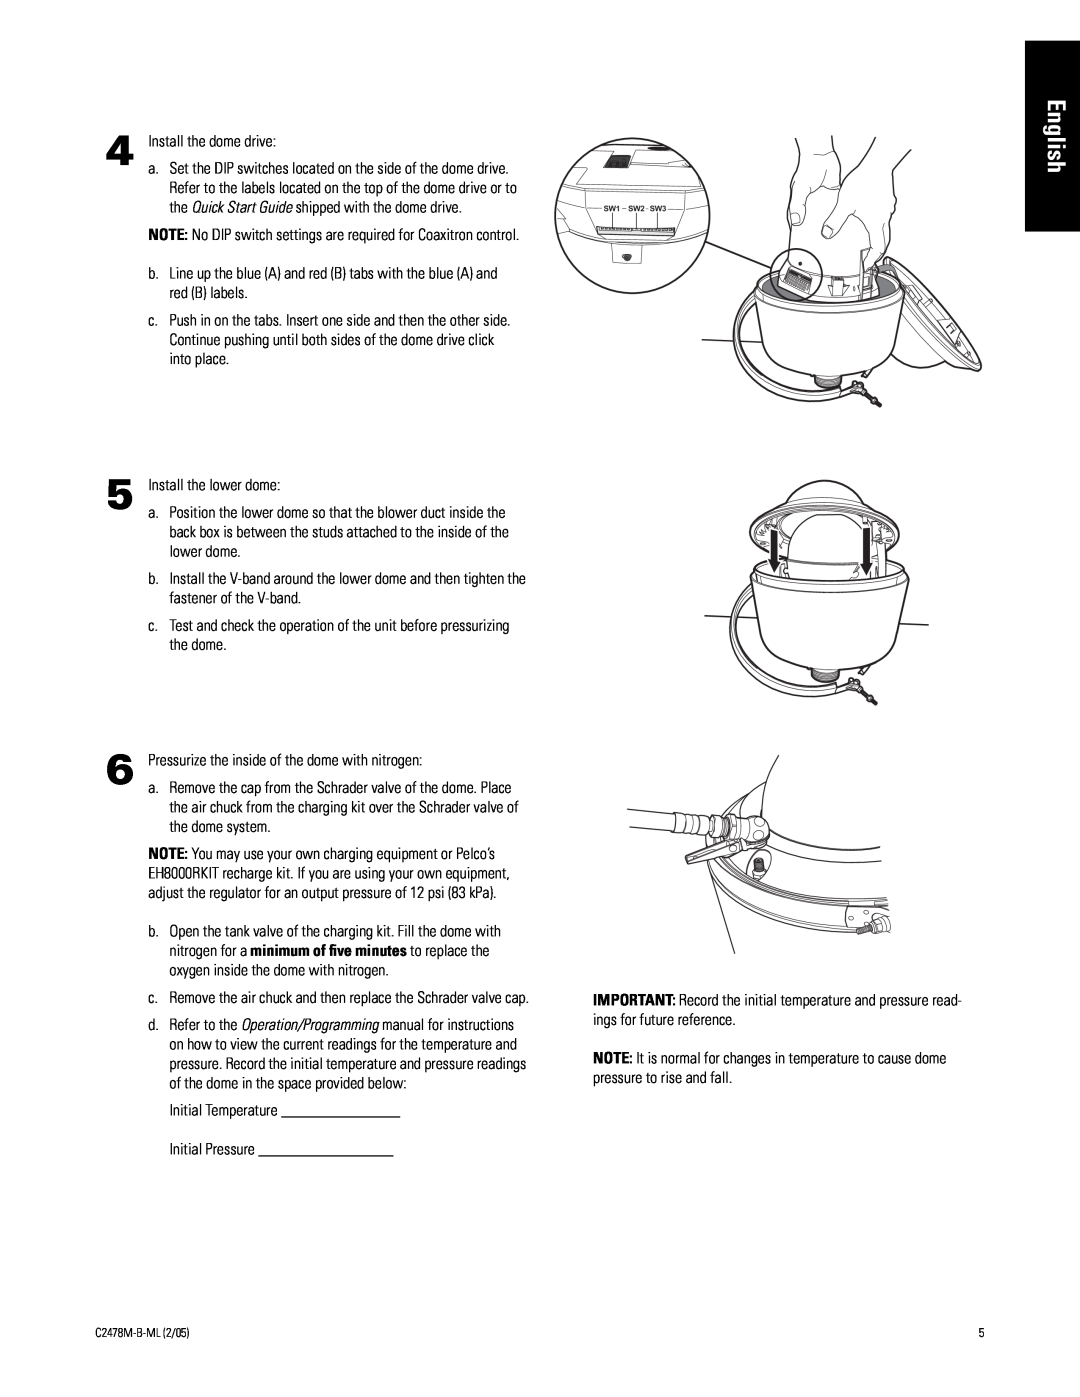
Instale o dome drive
Português
Português
Instalação no local
e levante-a
Consulte as instruções fornecidas com o suporte
Bitola do cabo
Tipo de cabo
Distância máxima
Italiano
Pre-installazione
Italiano
Installare lunità dome
Italiano
Installazione in loco
Lunghezza massima
Tipo di cavo
Misura filo
Colore filo
Français
Pré-installation
Français
Installez la commande de dôme
Français
Installation sur place
aiguilles dune montre et soulevez-la
instructions fournies avec la fixation
Distance maximum
Type de câble
Calibre du câble
Couleur du fil
Deutsch
Vorinstallation
Deutsch
Installieren Sie den Dome-Antrieb
Deutsch
Installation vor Ort
Maximale Entfernung
Kabeltyp
Drahtstärke
Stift
Clovis, California 93612 USA USA & Canada
Worldwide Headquarters 3500 Pelco Way
Tel: 800/289-9100 Fax: 800/289-9150 International
Tel: 1-559/292-1981 Fax: 1-559/348-1120
Top
Page
Image
Contents