ENTERING AN IP ADDRESS
If you use DHCP to derive IP addresses, you do not need to set up an IP address for the DX4000. Follow these steps to set up the IP address for the DX4000 if DHCP has been turned off:
1.Select the System menu from the main menu of the DX4000, and then select Network.
2.On the Network menu, turn off DHCP.
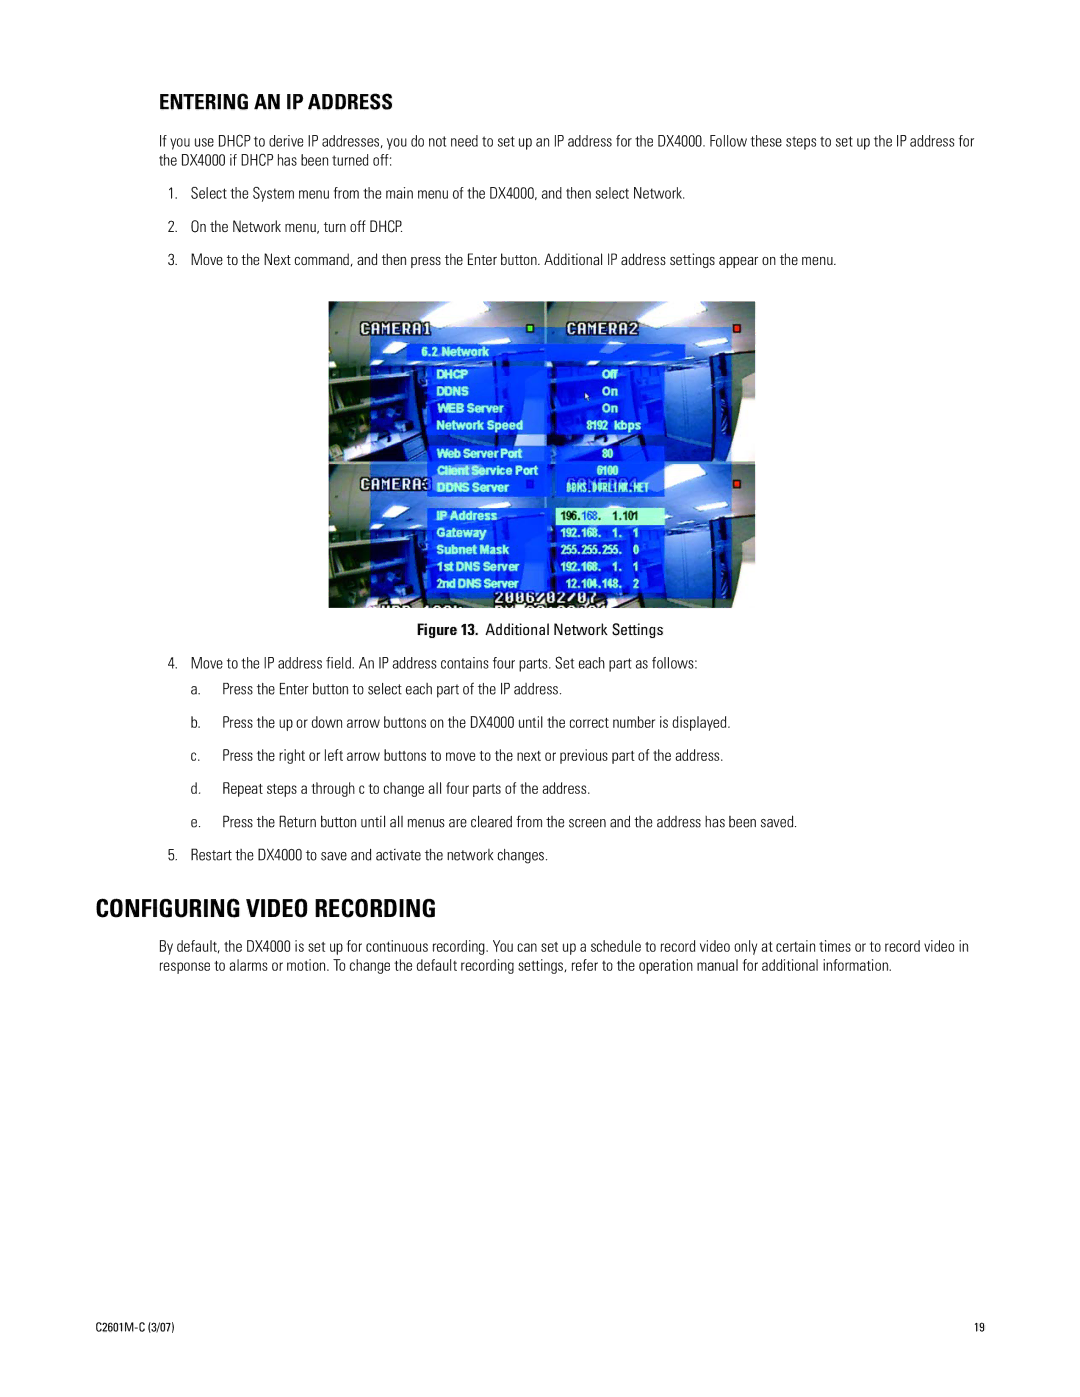
3.Move to the Next command, and then press the Enter button. Additional IP address settings appear on the menu.
Figure 13. Additional Network Settings
4.Move to the IP address field. An IP address contains four parts. Set each part as follows:
a.Press the Enter button to select each part of the IP address.
b.Press the up or down arrow buttons on the DX4000 until the correct number is displayed.
c.Press the right or left arrow buttons to move to the next or previous part of the address.
d.Repeat steps a through c to change all four parts of the address.
e.Press the Return button until all menus are cleared from the screen and the address has been saved.
5.Restart the DX4000 to save and activate the network changes.
CONFIGURING VIDEO RECORDING
By default, the DX4000 is set up for continuous recording. You can set up a schedule to record video only at certain times or to record video in response to alarms or motion. To change the default recording settings, refer to the operation manual for additional information.
19 |
