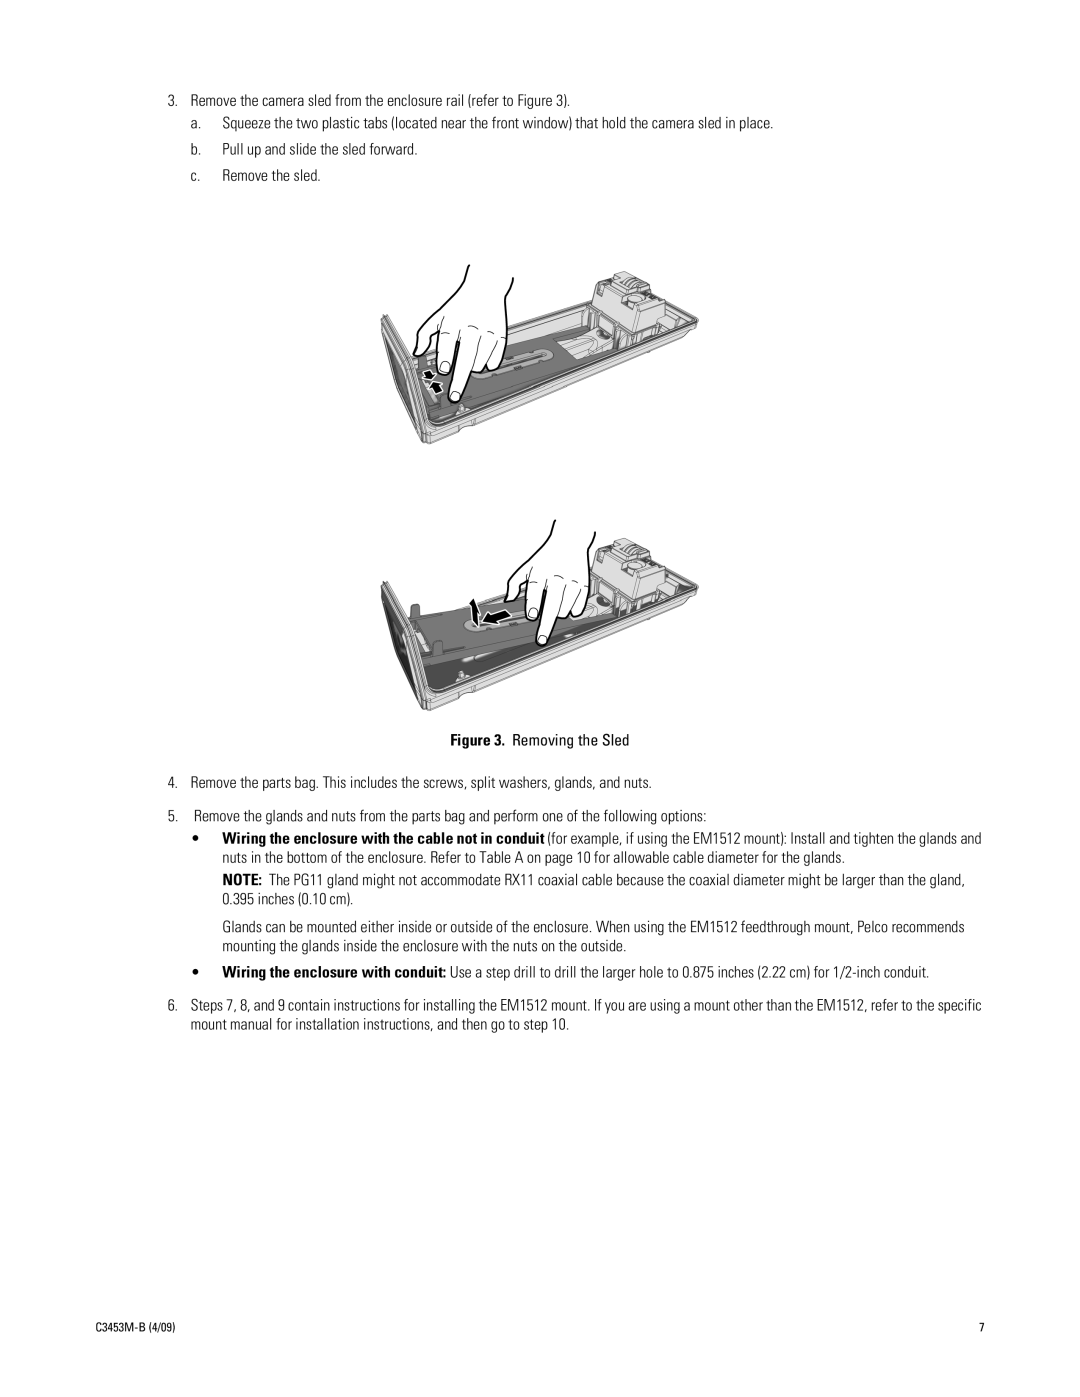
3.Remove the camera sled from the enclosure rail (refer to Figure 3).
a.Squeeze the two plastic tabs (located near the front window) that hold the camera sled in place.
b.Pull up and slide the sled forward.
c.Remove the sled.
Figure 3. Removing the Sled
4.Remove the parts bag. This includes the screws, split washers, glands, and nuts.
5.Remove the glands and nuts from the parts bag and perform one of the following options:
•Wiring the enclosure with the cable not in conduit (for example, if using the EM1512 mount): Install and tighten the glands and nuts in the bottom of the enclosure. Refer to Table A on page 10 for allowable cable diameter for the glands.
NOTE: The PG11 gland might not accommodate RX11 coaxial cable because the coaxial diameter might be larger than the gland, 0.395 inches (0.10 cm).
Glands can be mounted either inside or outside of the enclosure. When using the EM1512 feedthrough mount, Pelco recommends mounting the glands inside the enclosure with the nuts on the outside.
•Wiring the enclosure with conduit: Use a step drill to drill the larger hole to 0.875 inches (2.22 cm) for
6.Steps 7, 8, and 9 contain instructions for installing the EM1512 mount. If you are using a mount other than the EM1512, refer to the specific mount manual for installation instructions, and then go to step 10.
| 7 |