Camera and Lens Installation
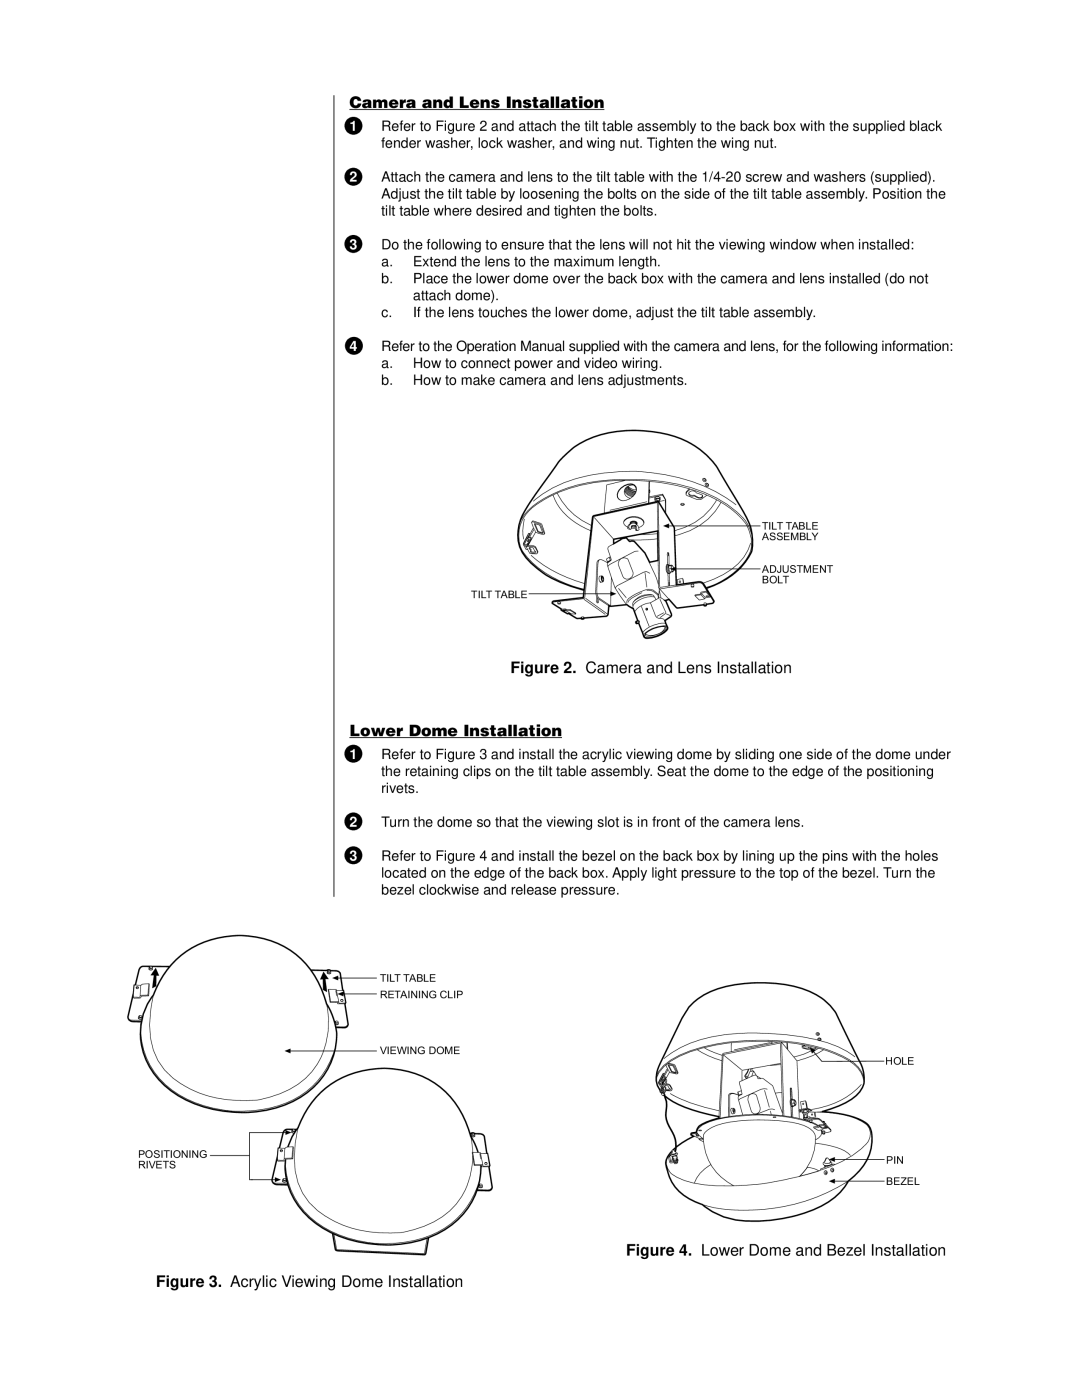
1Refer to Figure 2 and attach the tilt table assembly to the back box with the supplied black fender washer, lock washer, and wing nut. Tighten the wing nut.
2Attach the camera and lens to the tilt table with the
3Do the following to ensure that the lens will not hit the viewing window when installed:
a.Extend the lens to the maximum length.
b.Place the lower dome over the back box with the camera and lens installed (do not attach dome).
c.If the lens touches the lower dome, adjust the tilt table assembly.
4Refer to the Operation Manual supplied with the camera and lens, for the following information:
a.How to connect power and video wiring.
b.How to make camera and lens adjustments.
TILT TABLE
ASSEMBLY
ADJUSTMENT
BOLT
TILT TABLE
Figure 2. Camera and Lens Installation
Lower Dome Installation
1Refer to Figure 3 and install the acrylic viewing dome by sliding one side of the dome under the retaining clips on the tilt table assembly. Seat the dome to the edge of the positioning rivets.
2Turn the dome so that the viewing slot is in front of the camera lens.
3Refer to Figure 4 and install the bezel on the back box by lining up the pins with the holes located on the edge of the back box. Apply light pressure to the top of the bezel. Turn the bezel clockwise and release pressure.
POSITIONING RIVETS
![]() TILT TABLE
TILT TABLE
![]() RETAINING CLIP
RETAINING CLIP
VIEWING DOME
HOLE
PIN
BEZEL