2 OPENING PREPARATION (CONTINUED)
O. Cut two pieces of flashing | 2O | |
tape 12" longer than the |
| |
rough opening width. Place | SILL TAPES | |
tape #1 across the sill nosing |
| |
just up to where the nosing |
| |
begins to slope down and | #2 | |
extending 6" up each jamb. |
| |
Apply the second piece of |
| |
flashing tape |
| |
the first piece and the exterior |
| |
edge of the sill pan and 6" up | Sill Pan | |
each jamb. | ||
#1 | ||
| 2O | |
| Sill Nose |
3 PREPARE THE DOOR FOR INSTALLATION
TWO OR MORE PEOPLE WILL BE REQUIRED TO HANDLE THE PANEL AND FRAME SAFELY.
A.Remove the plastic wrap and cardboard packaging from the door.
Note: If screens, grilles or hardware are removed from the door at this time, label them and store them in a protected area.
B.Remove the shipping spacers. Carefully slide the movable panel halfway open and remove the spacers from both the top and bottom of the movable panel.
C.Remove the venting panel by lifting it off of the lower track and tilting the bottom of the panel away from the door frame. Then, lower the panel out of the top track. Carefully set the panel aside.
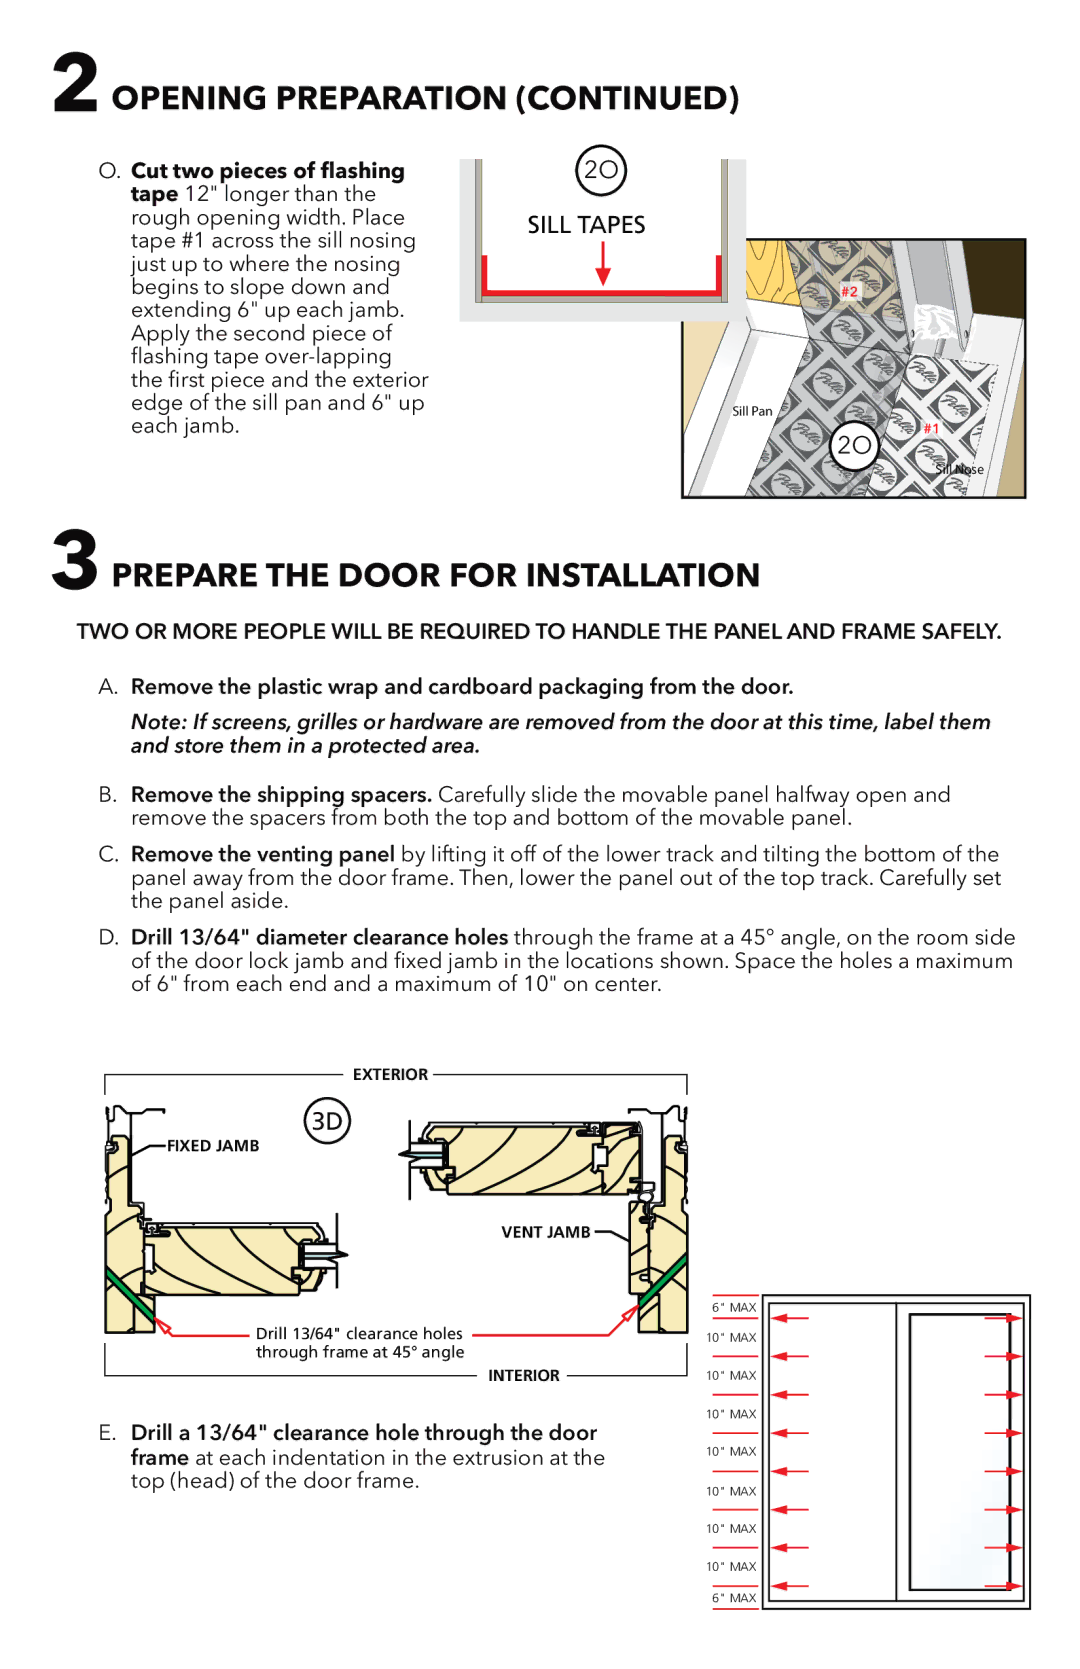
D.Drill 13/64" diameter clearance holes through the frame at a 45° angle, on the room side of the door lock jamb and fixed jamb in the locations shown. Space the holes a maximum of 6" from each end and a maximum of 10" on center.
EXTERIOR
3D2D
FIXED JAMB
VENT JAMB![]()
![]() Drill 13/64" clearance holes through frame at 45° angle
Drill 13/64" clearance holes through frame at 45° angle
INTERIOR
E.Drill a 13/64" clearance hole through the door frame at each indentation in the extrusion at the top (head) of the door frame.
6" MAX
10" MAX
10" MAX
10" MAX
10" MAX
10" MAX
10" MAX
10" MAX 6" MAX