3 PREPARE THE DOOR FOR INSTALLATION (CONTINUED)
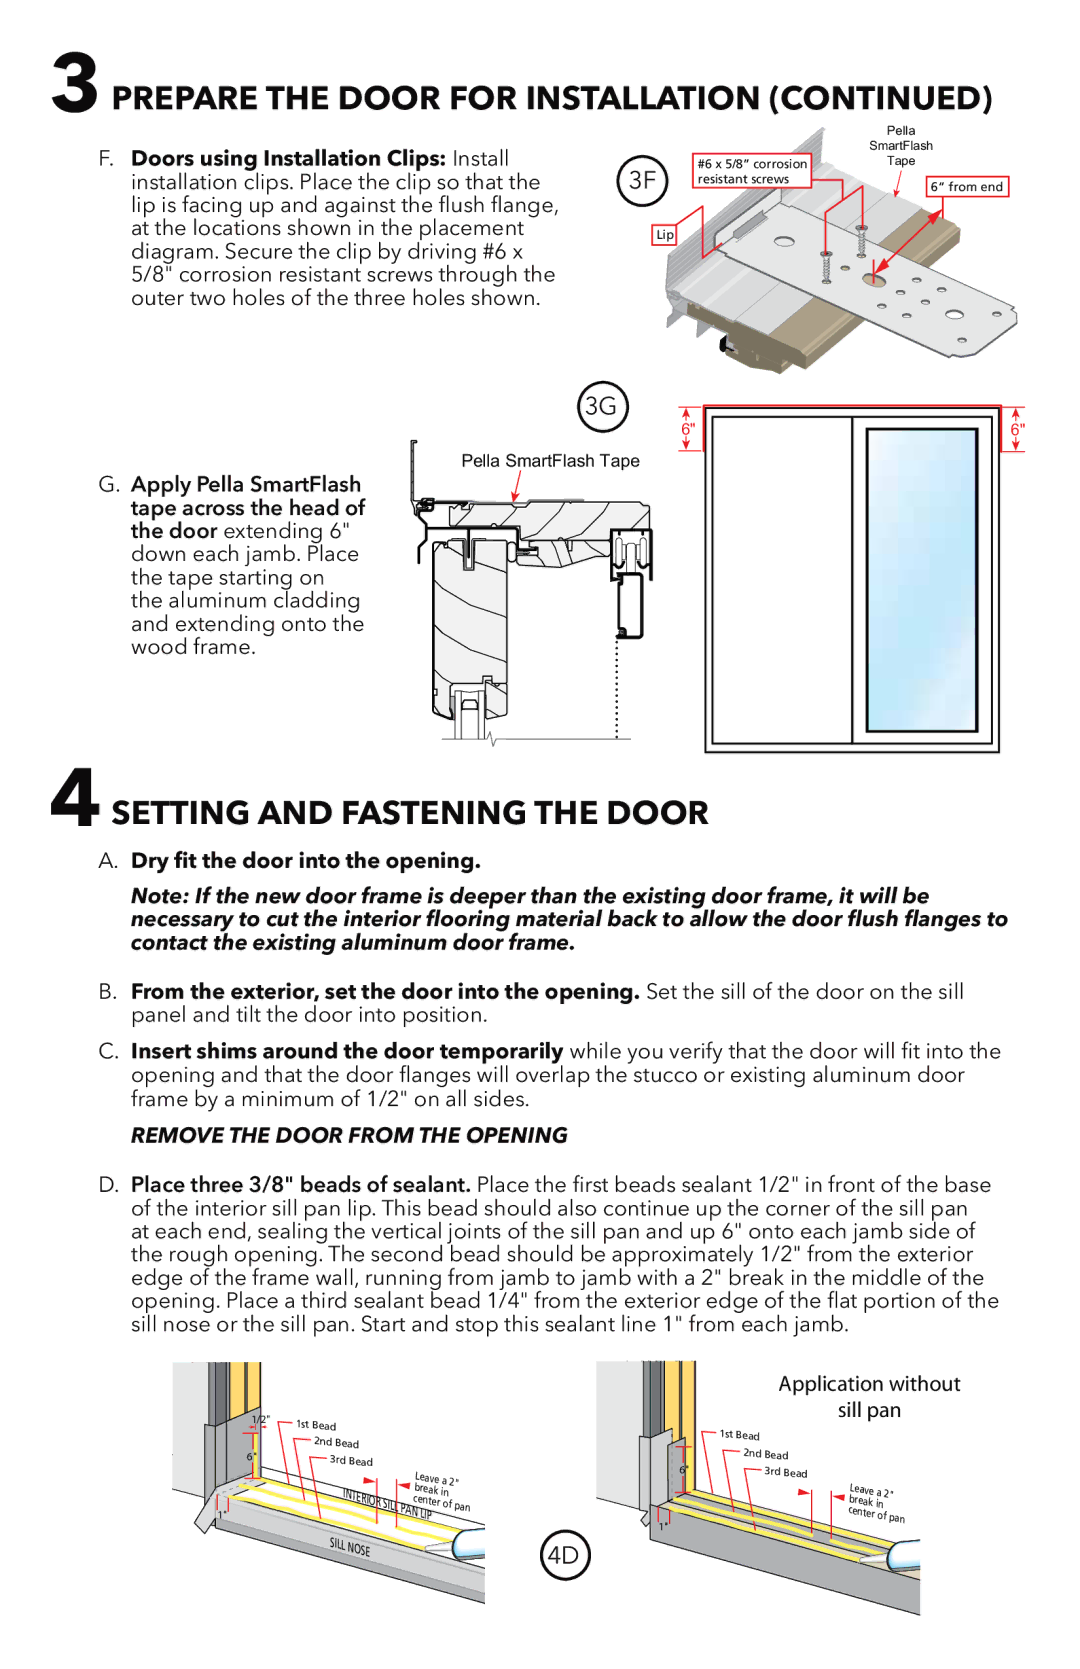
F.Doors using Installation Clips: Install installation clips. Place the clip so that the lip is facing up and against the flush flange, at the locations shown in the placement diagram. Secure the clip by driving #6 x 5/8" corrosion resistant screws through the outer two holes of the three holes shown.
3F
Lip
#6 x 5/8” corrosion resistant screws
Pella
SmartFlash
Tape
6“ from end
G.Apply Pella SmartFlash tape across the head of the door extending 6" down each jamb. Place the tape starting on the aluminum cladding and extending onto the wood frame.
3G
6"
Pella SmartFlash Tape
6"
4 SETTING AND FASTENING THE DOOR
A.Dry fit the door into the opening.
Note: If the new door frame is deeper than the existing door frame, it will be necessary to cut the interior flooring material back to allow the door flush flanges to contact the existing aluminum door frame.
B.From the exterior, set the door into the opening. Set the sill of the door on the sill panel and tilt the door into position.
C.Insert shims around the door temporarily while you verify that the door will fit into the opening and that the door flanges will overlap the stucco or existing aluminum door frame by a minimum of 1/2" on all sides.
REMOVE THE DOOR FROM THE OPENING
D.Place three 3/8" beads of sealant. Place the first beads sealant 1/2" in front of the base of the interior sill pan lip. This bead should also continue up the corner of the sill pan at each end, sealing the vertical joints of the sill pan and up 6" onto each jamb side of the rough opening. The second bead should be approximately 1/2" from the exterior edge of the frame wall, running from jamb to jamb with a 2" break in the middle of the opening. Place a third sealant bead 1/4" from the exterior edge of the flat portion of the sill nose or the sill pan. Start and stop this sealant line 1" from each jamb.
1/2"
6"
1"
1st Bead |
|
2nd Bead | |
3rd Bead | |
INTERIOR | |
| SILL |
SILL | NOSE |
| |
Leave break
PAN LIP
a2"
in
of pan
4D
6"
1"
Application without | |||
|
| sill pan | |
1st Bead |
| ||
2nd Bead |
| ||
3rd Bead |
| ||
|
| Leave a | 2" |
|
| break in |
|
|
| center of | |
|
|
| pan |
|
|
|
|