Installation
The default switch settings (all switches in the UP position) will work for most installations.
There are five steps required to configure the Perle Fast Ethernet media converter:
1.Set the Auto-MDIX jumper setting (optional).
2.Set the switch settings (optional).
3.Install and connect the fiber cable.
4.Install and connect the copper cable.
5.Power up the media converter.
Auto MDIX Jumper Settings
Note: The factory settings for Auto-MDIX will work for most installations, but in the rare case that you need to modify the settings, the procedure is below.
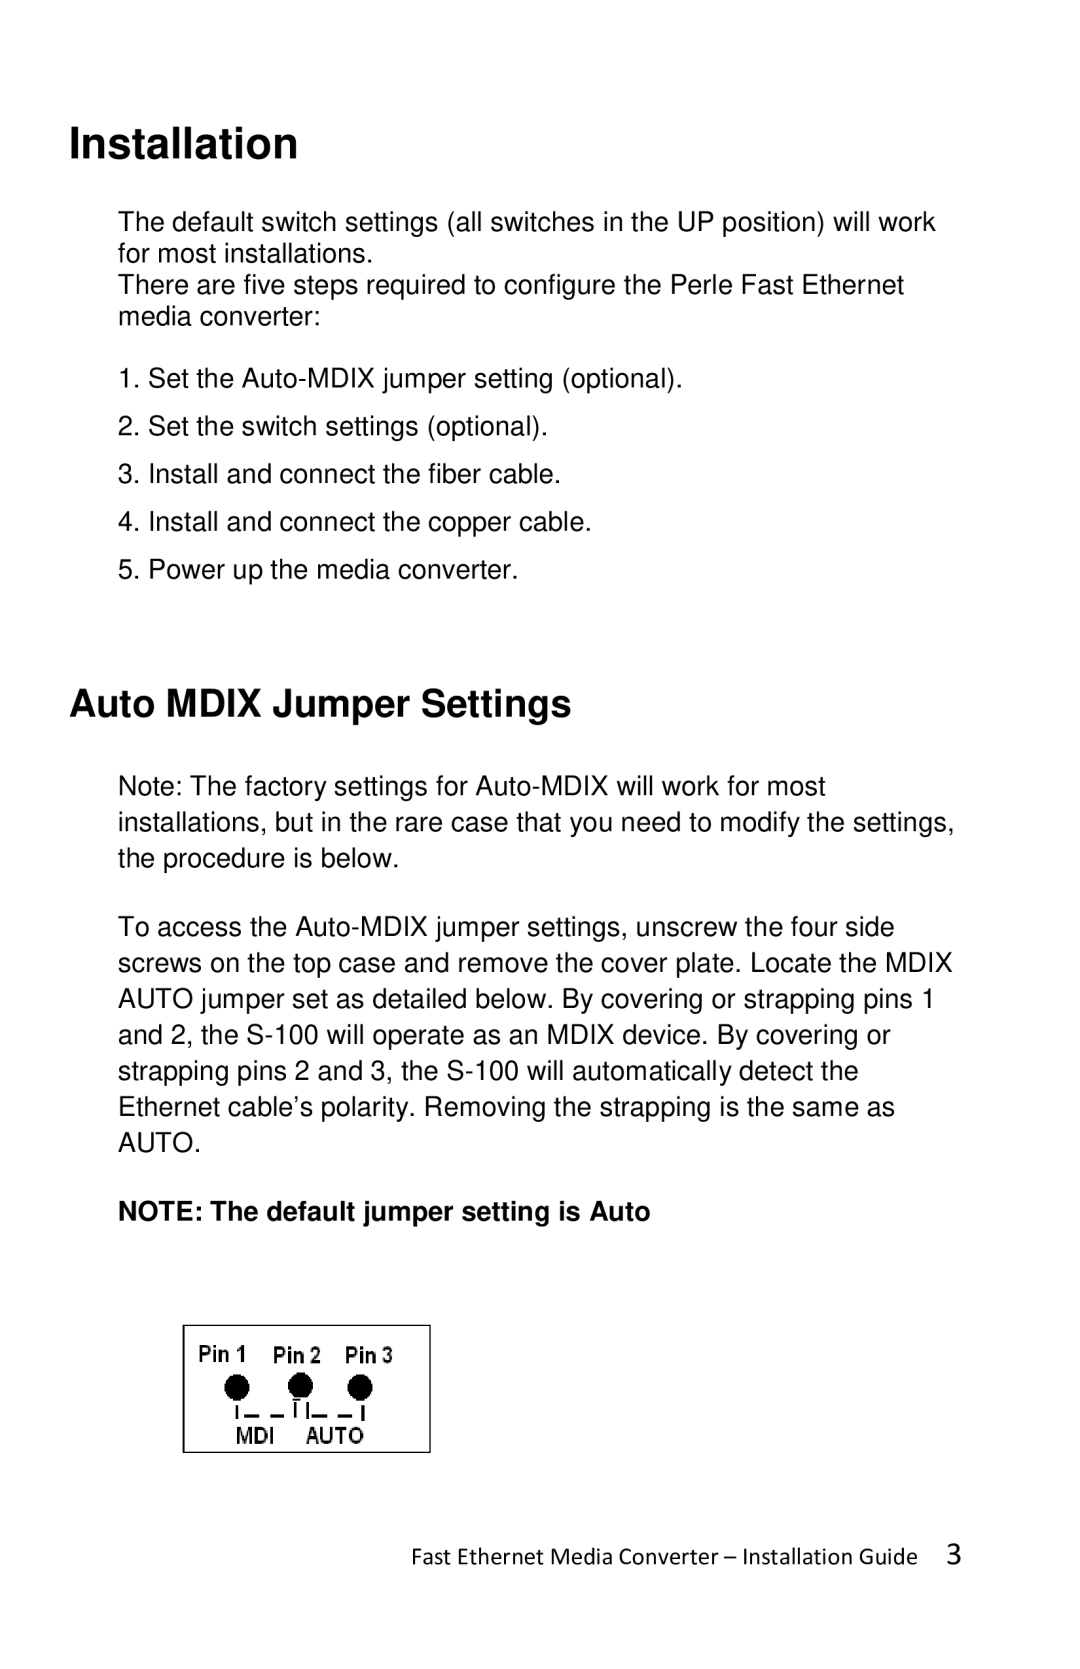
To access the Auto-MDIX jumper settings, unscrew the four side screws on the top case and remove the cover plate. Locate the MDIX AUTO jumper set as detailed below. By covering or strapping pins 1 and 2, the S-100 will operate as an MDIX device. By covering or strapping pins 2 and 3, the S-100 will automatically detect the Ethernet cable’s polarity. Removing the strapping is the same as AUTO.
NOTE: The default jumper setting is Auto
Fast Ethernet Media Converter – Installation Guide 3