Installation and Tapping – Concessionaire Dispensers
Connecting the Keg Coupler
(when Supplied by Perlick)
■ Place one brown leather washer into black beer |
line connector hose on hex nut side. Screw |
connector to stainless steel beverage line on |
faucet standard. Tighten with a wrench, but do |
not over tighten. |
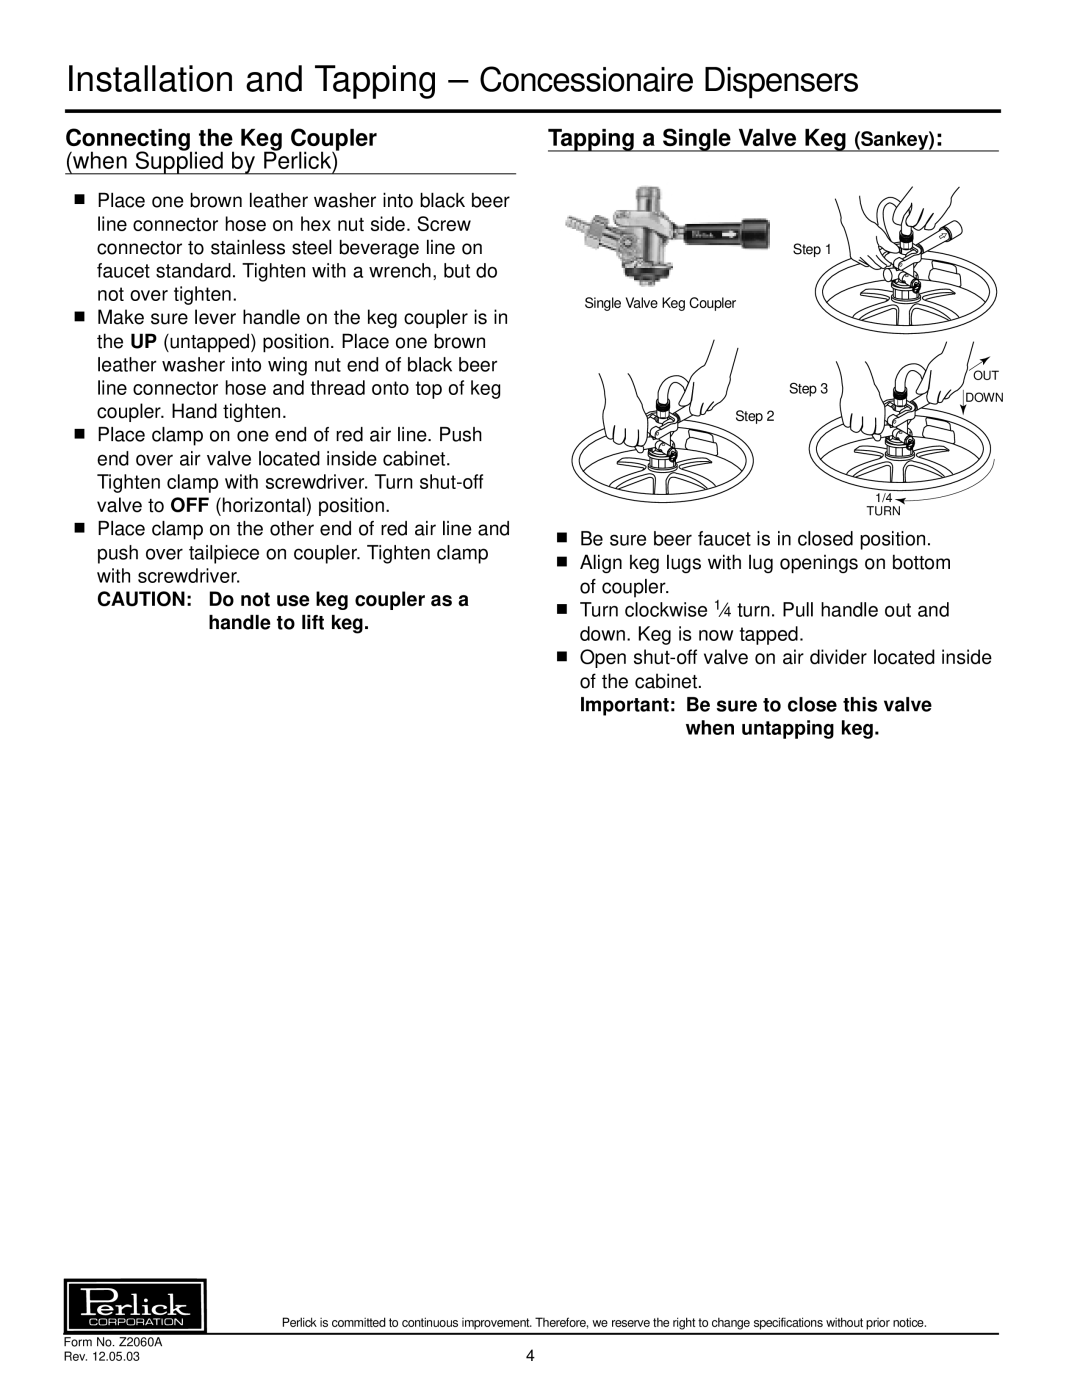
Tapping a Single Valve Keg (Sankey):
Step 1
■ | Make sure lever handle on the keg coupler is in |
| the UP (untapped) position. Place one brown |
| leather washer into wing nut end of black beer |
| line connector hose and thread onto top of keg |
| coupler. Hand tighten. |
■ | Place clamp on one end of red air line. Push |
| end over air valve located inside cabinet. |
| Tighten clamp with screwdriver. Turn |
Single Valve Keg Coupler
Step 3
Step 2
OUT
DOWN
valve to OFF (horizontal) position. |
■ Place clamp on the other end of red air line and |
push over tailpiece on coupler. Tighten clamp |
with screwdriver. |
CAUTION: Do not use keg coupler as a |
handle to lift keg. |
1/4 ![]()
TURN
■Be sure beer faucet is in closed position.
■Align keg lugs with lug openings on bottom of coupler.
■Turn clockwise 1⁄4 turn. Pull handle out and down. Keg is now tapped.
■Open
Important: Be sure to close this valve when untapping keg.
| Perlick is committed to continuous improvement. Therefore, we reserve the right to change specifications without prior notice. |
Form No. Z2060A | 4 |
Rev. 12.05.03 |