19MD350B
Notification
For Customer Use
Important Safety Instructions
Read before operating equipment
Introduction
Precaution
Laser Safety
Important Copyright Information
To Avoid the Hazards of Electrical Shock and Fire
Symbols Used in this Manual
Trademark Information
Location and Handling
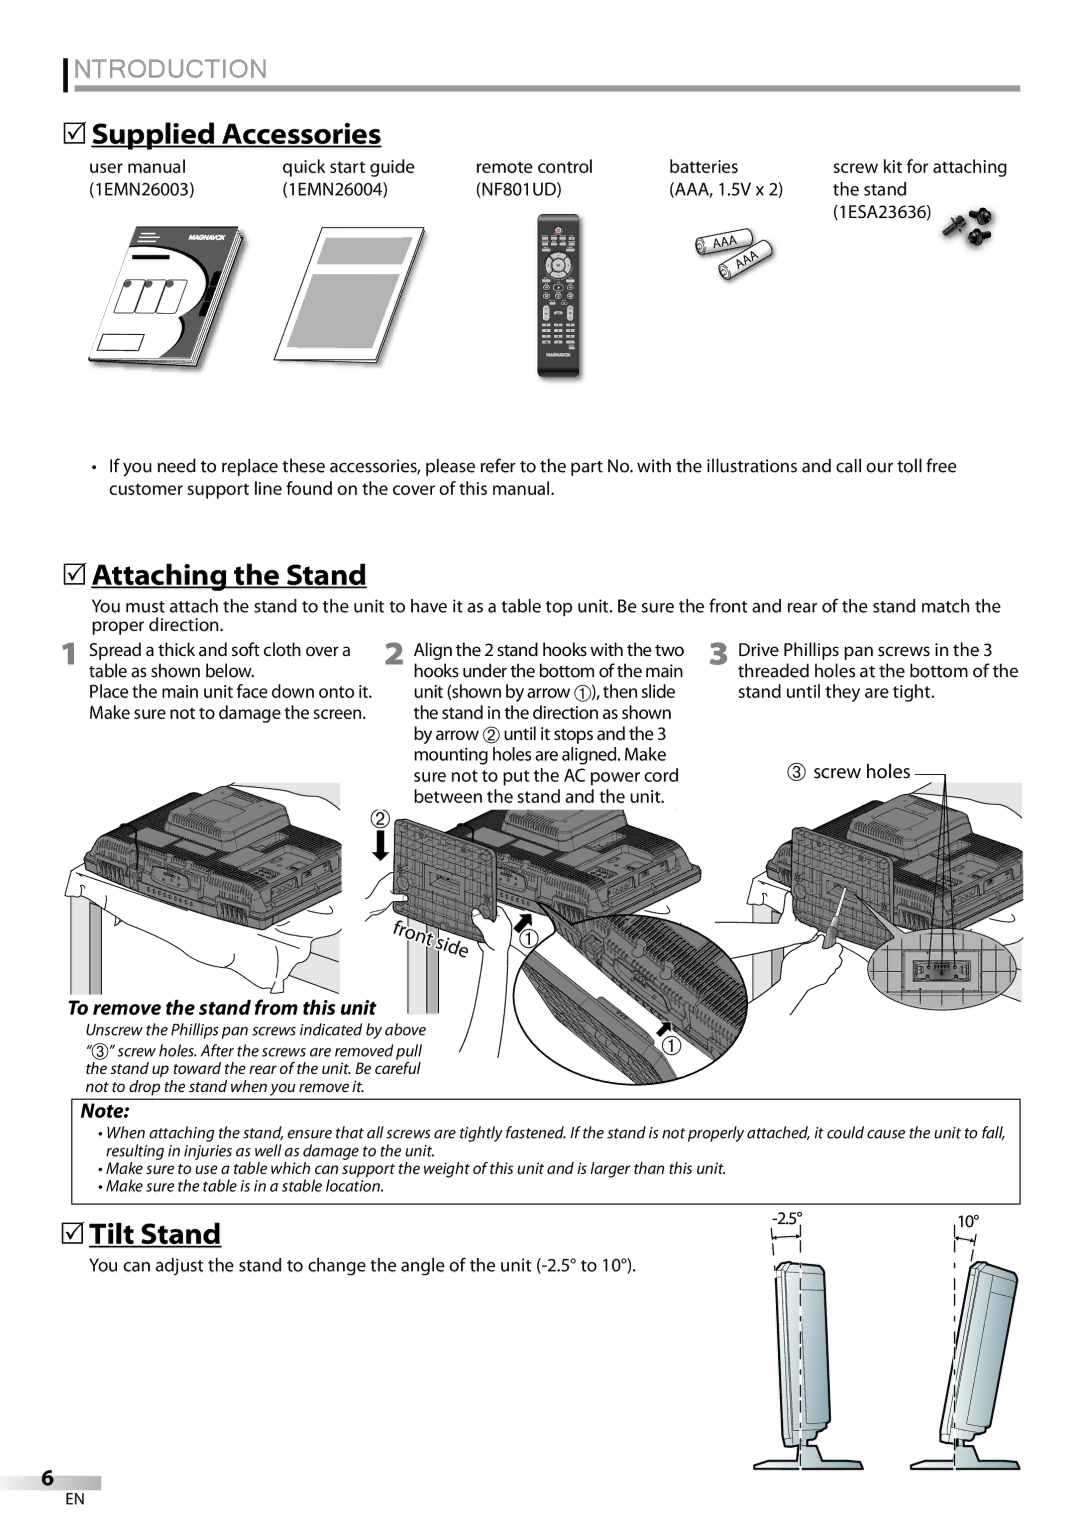
Tilt Stand
Supplied Accessories
Attaching the Stand
To remove the stand from this unit
Features
DTV/TV/CATV
Contents
TV Functions
DVD Functions
Control Panel
Terminals
Analog mode TV
Remote Control Function
Digital mode DTV
DVD mode
Installing the Batteries
Battery Precautions
Connection to Cable Receiver or Satellite Box
Preparation
Antenna Connection
Satellite provider
External Device Connection
Hdmi Connection
HDMI-DVI Connection
Component video Connection
Video Connection
Audio Output Connection for digital broadcasting only
Plug In the AC Power Cord
Resolution
PC Connection
Before you begin
TV Functions Initial Setup
After an initial setup is completed
Make sure the unit is connected to antenna or cable
Watching TV
Volume Adjustment
Sleep Timer
Channel Selection
Still Mode
Switching Each Input Mode
Switching Audio Mode
Press Info
TV Screen Information
Broadcasting information
Selected program
TV Screen Display Mode
For 169 video signal
For PC input signal
Optional Setting
Main Menu
Autoprogram
Press Menu to exit
Channel List
Use Cursor K/L to select Channel List, then press
Channel you want to add, then press OK
Antenna Confirmation
Language Selection
Use Cursor K/L to select Antenna, then press OK
Use Cursor K/L to select the desired setting, then press OK
Picture Adjustment
Adjust the picture quality
Smart Picture
Smart Sound
Sound Adjustment
TV Speakers
Equalizer
Caption Service
Caption mode
Closed Caption
Digital Caption Service
To select Digital Caption Service
Use Cursor K/L to select On, then press OK
Font Color
Font Style
Font Size
Font Opacity
Channel Lock
Child Lock
Use Cursor K/L to select Child Lock, then press
Change PIN
Association of America
Channel Lock
US Movie ratings lock
Press Menu to exit
US TV ratings lock
To set the sub ratings
Use Cursor K/L to select US TV ratings lock, then press OK
Change PIN
Use Cursor K/L to select Change PIN, then press
Clock, Phase
PC Settings
Auto Adjustment
Horizontal Position, Vertical Position
Use Cursor K/L to select Energy Saving Mode, then press OK
Energy Saving Mode
Location
Use Cursor K/L to select the desired mode, then press OK
Current Software Info
Confirm the version of the software currently used
Operating DVD
DVD Functions Playable Media
Unplayable Media
Resume Playback
Playback
Disc Menu
DVD
Fast Forward / Fast Reverse
Slow Forward / Slow Reverse
Zoom
Chapter / Title / Track Search
During playback, press Mode repeatedly until / appears
Search Functions
You can select chapters, titles or tracks on the disc
Time Search
Direct Search
Repeat Playback
Repeat A-B Playback Programmed Playback
Random Playback
You can repeat playback between a and B on a disc
Special Settings
On-screen Display
Subtitle Language
Camera Angles
Black Level Setting
Press Cursor K/ L to adjust the black level
Audio Language
Appears
Stereo Sound Mode
Virtual Surround
Press Cursor K/ L to select the sound level
Subtitle *1, *2Default OFF
DVD Setting
DVD Language Setting
Audio *1, *2
DVD Audio Setting
Down Sampling
Number buttons to enter the current 4-digit password
Parental Setting
If you have set password already, use
Use the Number buttons to enter the new 4-digit password
Others
You can change the other functions
Reset to the Default Setting Language Code List
Language
Troubleshooting
There is no clock function on this unit
Troubleshooting
Troubleshooting Guide
Tape containing captions Have been read during copying
During playback Angle does not switch
Captions are displayed as a
Make sure the disc is compatible with the unit
Glossary
Maintenance
Information
Atsc
Catv
LCD
Limited Warranty Ninety 90 DAY Labor / ONE 1 Year Parts
Français