TV menu-Installation

Installation

7

Language

3

Language


English


Autoprogram


Français


Source


Español


Clock

Weak channel installation

Current software info

Reset AV settings

Info

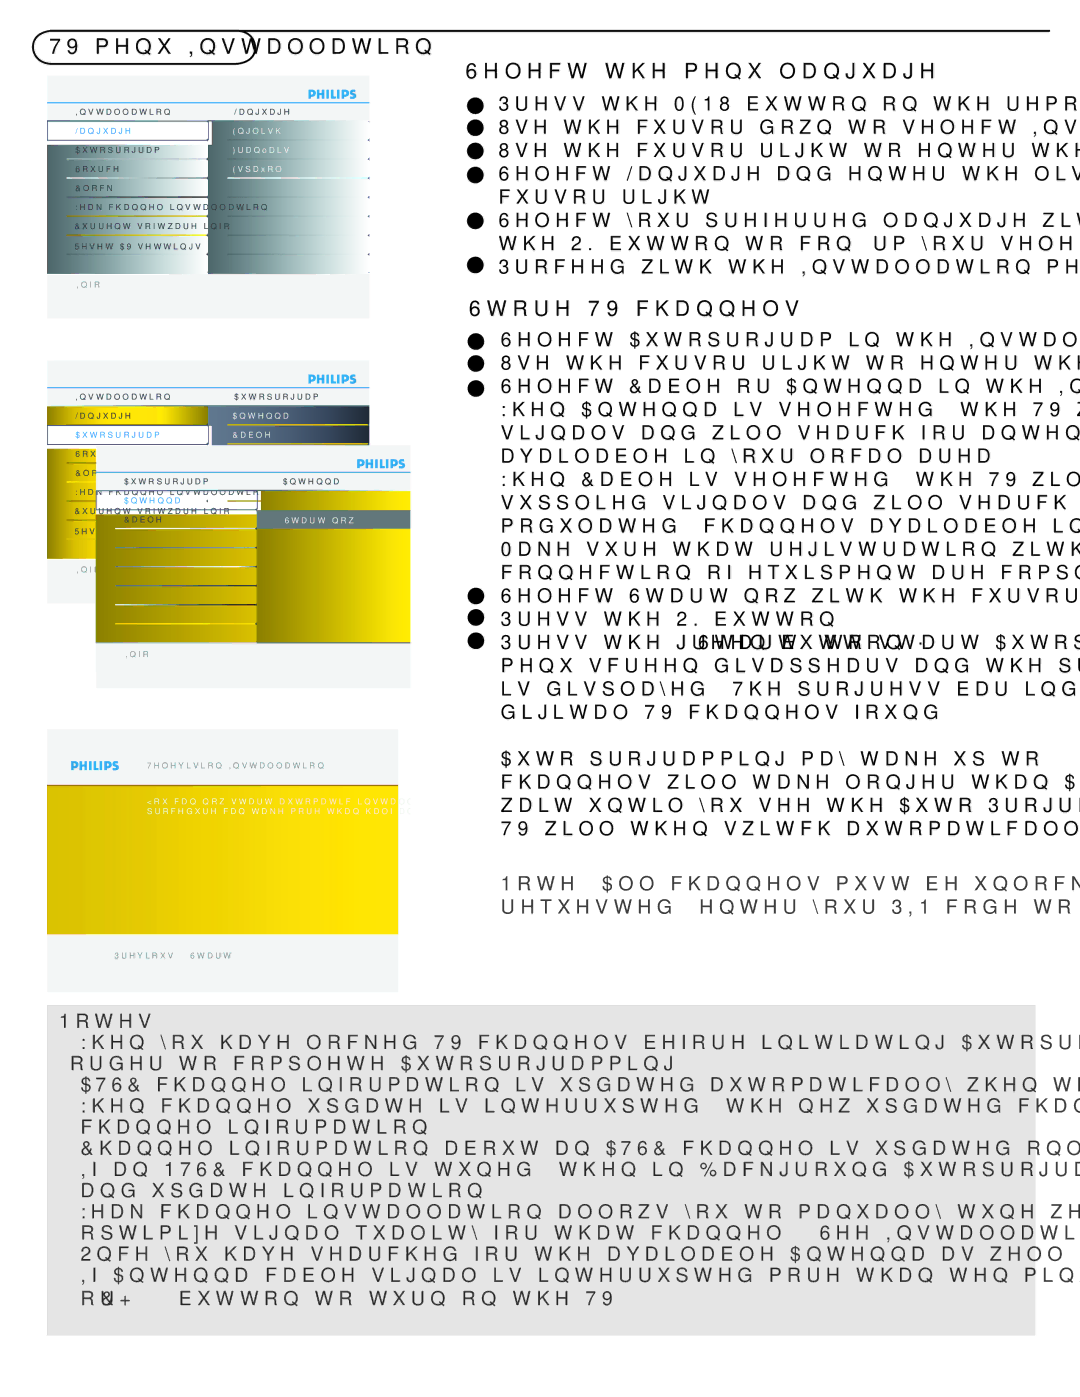
Select the menu language

1

Press the MENU button on the remote control.

2Use the cursor down to select Installation in the Settings menu.

3 Use the cursor right to enter the Installation menu.

4 Select Language and enter the list of available languages with the cursor right.

5 Select your preferred language with the cursor up/down and press the OK button to confirm your selection.

6 Proceed with the Installation menu.

Store TV channels

1

Select Autoprogram in the Installation menu.

2Use the cursor right to enter the Autoprogram menu.

Installation

7

Autoprogram

2

3 Select Cable or Antenna in the Installation mode.

Language


Antenna


When Antenna is selected, the TV will detect antenna

Autoprogram


Cable


signals and will search for antenna TV (NTSC and ATSC) channels

Source


available in your local area.


Clock


When Cable is selected, the TV will detect cable company

Autoprogram


2

Antenna


Weak


supplied signals and will search for cable TV (NTSC, ATSC, QAM

Curre t software info


Antenna


Cable


Start now


modulated) channels available in your area.

Reset AV settings


Make sure that registration with your cable TV provider and

Info

Info

Television Installation

connection of equipment are completed.

4Select Start now with the cursor right key.

5 Press the OK button.

6 Press the green button “Start” to start Autoprogramming. The menu screen disappears and the progress of Autoprogramming is displayed. The progress bar indicates the number of analog and digital TV channels found.

Auto programming may take up to 20 minutes to complete. Digital channels will take longer than Analog to find and program. Please

You can now start automatic installation. This procedure can take more than half an hour.

wait until you see the Auto Programming complete message. The TV will then switch automatically to the first channel found.

Note: All channels must be unlocked in order to autoprogram. If requested, enter your PIN code to unlock all channels. (p. 25)

Previous Start

Notes:

When you have locked TV channels before initiating Autoprogram, a message appears asking to enter your PIN code in order to complete Autoprogramming.

ATSC channel information is updated automatically when the TV is in standby after 3 minutes and every 3 hours thereafter.

When channel update is interrupted, the new updated channel information is retained along with the old un-updated channel information.

Channel information about an ATSC channel is updated only for the ATSC channel currently tuned.

If an NTSC channel is tuned, then in Background Autoprogramming the TV will scan all the possible ATSC frequencies and update information.

Weak channel installation allows you to manually tune weak ATSC channels in order to adjust the antenna and thus optimize signal quality for that channel. (See Installation menu, Weak channel installation, p. 13.)

Once you have searched for the available Antenna as well as the Cable TV channels, they are stored in the memory.

If Antenna/cable signal is interrupted more than ten minutes, TV will go into off mode. You are requested to press Power button or CH + / - button to turn on the TV.

12

Page 19
Image 19
Philips 19PFL5402D quick start TV menu-Installation, Select the menu language, Store TV channels

19PFL5402D specifications

The Philips 19PFL5402D is a compact television that brings a mix of advanced technology and user-friendly features to enhance the viewing experience. Designed with a 19-inch screen, this model is ideal for smaller spaces such as bedrooms, dorm rooms, or kitchens while still delivering impressive picture quality. One of the standout features of the Philips 19PFL5402D is its high-definition display, which supports a resolution of 1366x768 pixels. This ensures that viewers can enjoy sharp, clear images with vibrant colors and excellent contrast.

The television incorporates Philips' Pixel Plus technology, which enhances image quality by improving the sharpness and detail of the picture. This technology works by intelligently analyzing the source content and optimizing it for the best viewing experience, ensuring that whether you're watching a movie, sports, or news, the visuals remain engaging and immersive. Additionally, the TV includes a built-in digital tuner, enabling viewers to access a wide range of digital channels without the need for an external set-top box.

In terms of connectivity, the Philips 19PFL5402D offers multiple input options, including HDMI and VGA ports. This versatility allows users to connect various devices such as gaming consoles, Blu-ray players, and even computers, making it a versatile choice for entertainment. Furthermore, the model features a USB port that enables users to view photos or play media files directly from a USB flash drive, enhancing the overall functionality of the TV.

The design of the Philips 19PFL5402D is sleek and modern, featuring a slim profile that fits well in any environment. The built-in speakers deliver decent sound quality, although those seeking a more immersive audio experience might consider pairing the TV with external speakers or a soundbar. The user interface is straightforward, making navigation through channels and settings easy and intuitive.

Overall, the Philips 19PFL5402D stands out due to its combination of advanced display technologies, connectivity options, and user-centric design. It's a fitting choice for those looking to enjoy quality viewing experiences in smaller spaces while benefiting from the latest in television technology. Whether for casual viewing or specific entertainment needs, this TV manages to deliver on all fronts.