Installation Guide
Ceiling Flush Mount Bracket Indoor Use Only
Model No. BB-HCA10CE
Please read this document before using the product, and save this document for future reference.
Panasonic Network Camera Website: http://panasonic.co.jp/pcc/products/en/netwkcam/
Please read the Operating Instructions included with the camera before proceeding.
•This document (Installation Guide) explains how to install the
Abbreviations
•The Ceiling Flush Mount Bracket is referred to as “the bracket” in this document.
•The Network Camera is referred to as “the camera” in this document.
Preparation
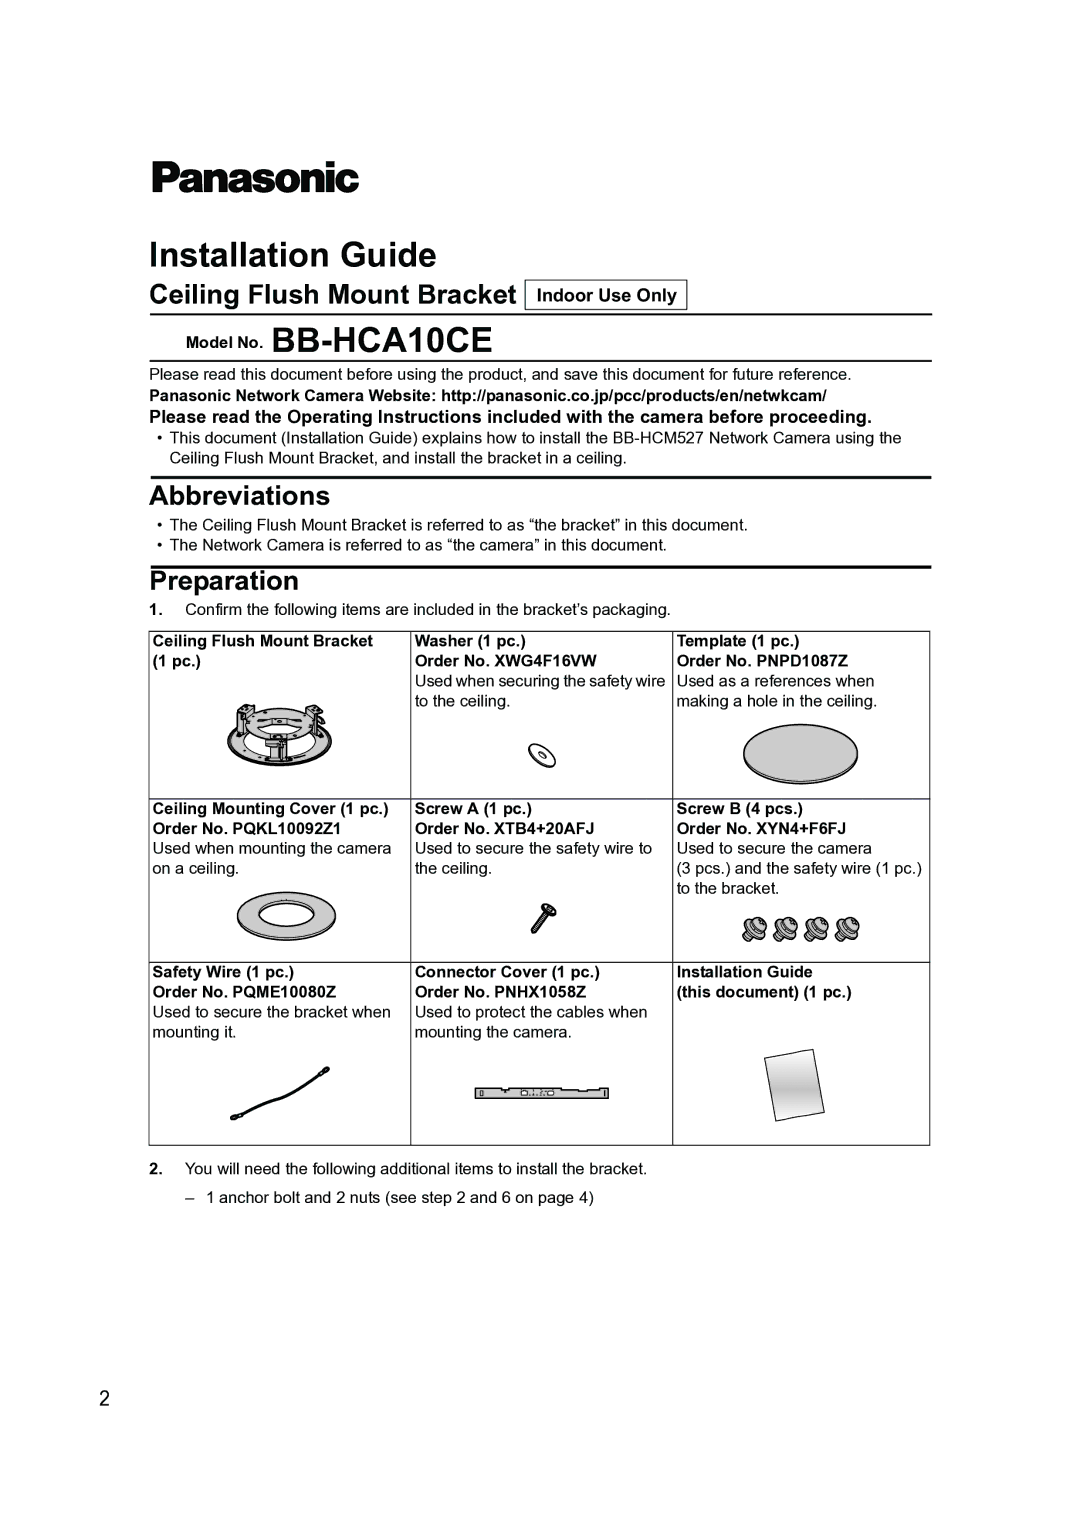
1. Confirm the following items are included in the bracket’s packaging.
Ceiling Flush Mount Bracket | Washer (1 pc.) | Template (1 pc.) |
(1 pc.) | Order No. XWG4F16VW | Order No. PNPD1087Z |
| Used when securing the safety wire | Used as a references when |
| to the ceiling. | making a hole in the ceiling. |
Ceiling Mounting Cover (1 pc.) | Screw A (1 pc.) | Screw B (4 pcs.) |
Order No. PQKL10092Z1 | Order No. XTB4+20AFJ | Order No. XYN4+F6FJ |
Used when mounting the camera | Used to secure the safety wire to | Used to secure the camera |
on a ceiling. | the ceiling. | (3 pcs.) and the safety wire (1 pc.) |
|
| to the bracket. |
Safety Wire (1 pc.) | Connector Cover (1 pc.) | Installation Guide |
Order No. PQME10080Z | Order No. PNHX1058Z | (this document) (1 pc.) |
Used to secure the bracket when | Used to protect the cables when |
|
mounting it. | mounting the camera. |
|
2.You will need the following additional items to install the bracket.
– 1 anchor bolt and 2 nuts (see step 2 and 6 on page 4)
2