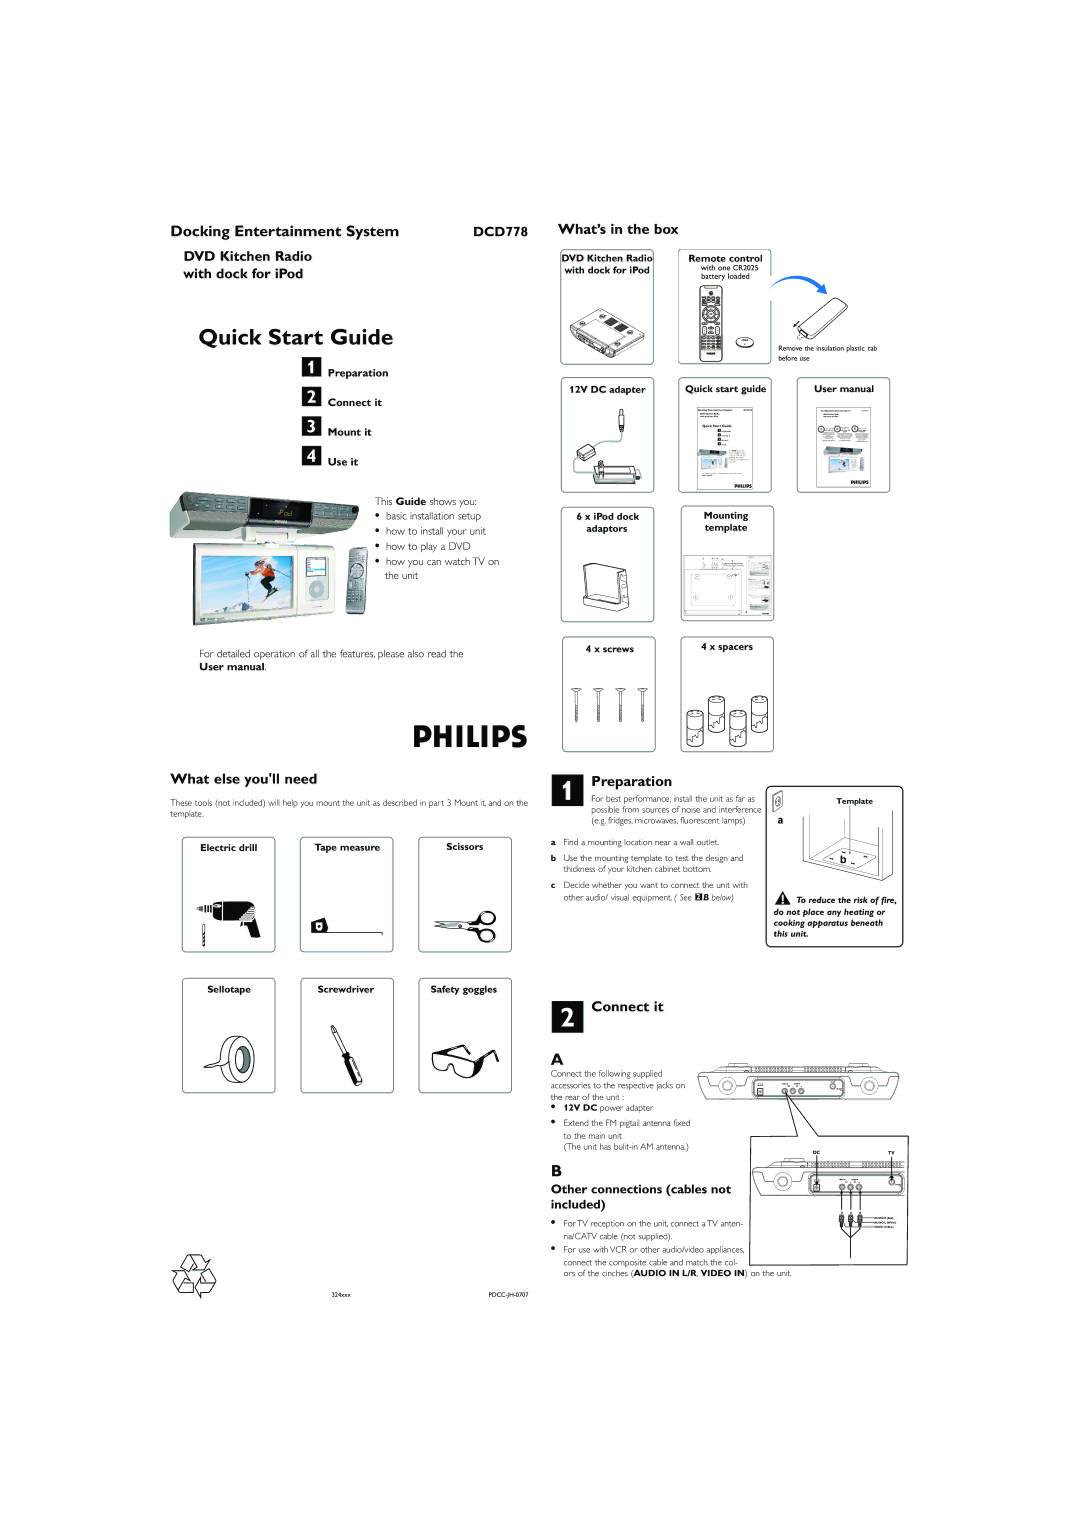
Docking Entertainment System | DCD778 | What’s in the box |
DVD Kitchen Radio |
| DVD Kitchen Radio |
with dock for iPod |
| with dock for iPod |
Quick Start Guide
1 Preparation
12V DC adapter
2 Connect it
3 Mount it
4 Use it
Remote control
with one CR2025 battery loaded
CR2025
Remove the insulation plastic tab before use
Quick start guide | User manual | ||||
|
|
|
|
|
|
| Docking Entertainment SystemDCD778 |
| Docking Entertainment SystemDCD778 | ||
| DVD Kitchen Radio |
| DVD Kitchen Radio | ||
| with dock for iPod |
| with dock for iPod | ||
Quick Start Guide |
|
| |
1 | Need help fast? | Besoin d'une aide | Necesita ayuda |
Preparation | rapide? | inmediata? | |
2Connect it
3 Mount it | www.philips.com/usasupport | www.philips.com/usasupport |
www.philips.com/usasupport
4Use it
This Guide shows you:
•basic installation setup
•how to install your unit
•how to play a DVD
•how you can watch TV on the unit
For detailed operation of all the features, please also read the
User manual.
This Guide shows you:
•basic installation setup
•how to install your unit
•how to play a DVD
•how you can watch TV on the unit
6 x iPod dock adaptors
Mounting template
| Mount it |
DC |
|
| A |
| • |
Recommended depth of cabinet | • |
at the rear to allow for connections | • |
2.5" | • |
| • |
Use 1/4" |
|
drill |
|
| B |
| • |
| • |
| • |
| C |
| • |
For detailed operation of all the features, please also read the | 4 x screws | 4 x spacers |
|
| |
User manual. |
|
|
What else you'll need
These tools (not included) will help you mount the unit as described in part 3 Mount it, and on the template.
Electric drill | Tape measure | Scissors |
Preparation
1 For best performance, install the unit as far as possible from sources of noise and interference (e.g. fridges, microwaves, fluorescent lamps)
aFind a mounting location near a wall outlet.
bUse the mounting template to test the design and thickness of your kitchen cabinet bottom.
cDecide whether you want to connect the unit with other audio/ visual equipment. ( See 2 B below)
Template
a
b
To reduce the risk of fire,
do not place any heating or cooking apparatus beneath this unit.
Sellotape | Screwdriver | Safety goggles |
2 Connect it
A
Connect the following supplied accessories to the respective jacks on the rear of the unit :
•12V DC power adapter
•Extend the FM pigtail antenna fixed to the main unit
(The unit has
DC | TV |
B
Other connections (cables not included)
•
•
W | 324xxx |
For TV reception on the unit, connect a TV anten- na/CATV cable (not supplied).
For use with VCR or other audio/video appliances, connect the composite cable and match the col-
ors of the cinches (AUDIO IN L/R, VIDEO IN) on the unit.
VIDEO (Yellow)