
DVD765SA specifications
The Philips DVD765SA is a progressive scan DVD player that has made a significant mark in the landscape of home entertainment systems. Known for its impressive playback capabilities, the DVD765SA combines various technologies to deliver an outstanding viewing experience.One of the standout features of the Philips DVD765SA is its progressive scan capability. This technology allows for smoother video playback by displaying the entire frame in a single pass rather than alternating between odd and even lines. This results in sharper images and improved clarity, making it ideal for viewing high-definition content. Coupled with its 10-bit video D/A converter, the player is able to deliver stunning visuals that rival those found in higher-end models.
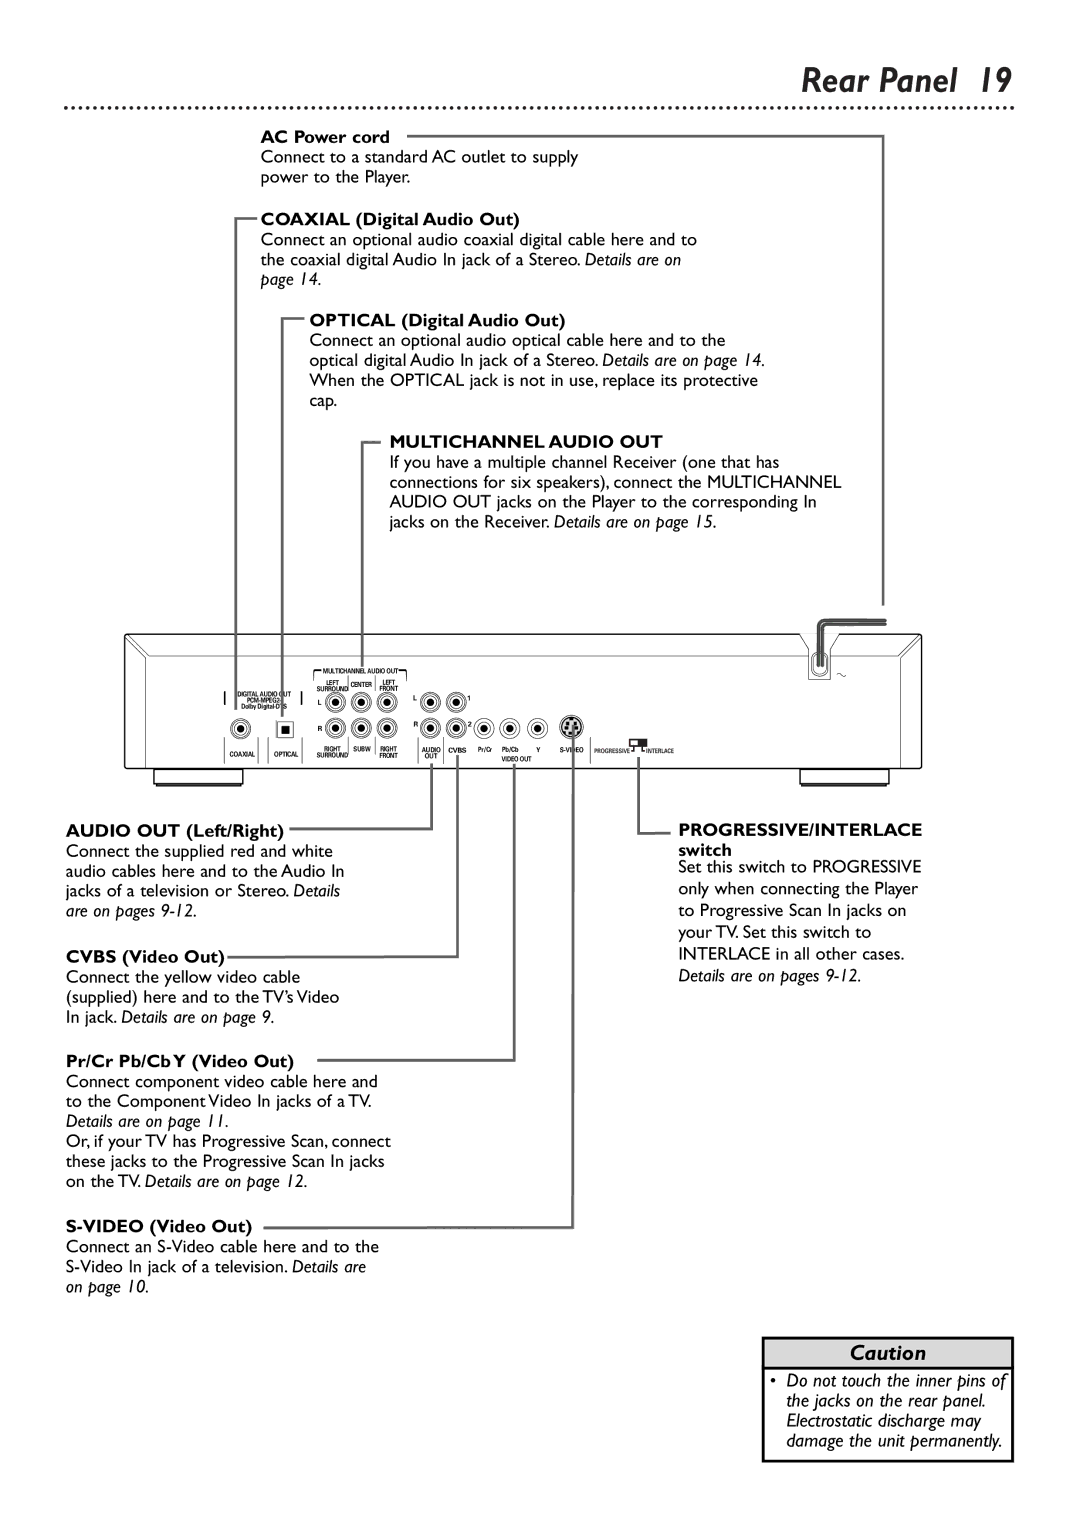
Audio performance is another strong suit of the Philips DVD765SA. The player supports numerous audio formats, including Dolby Digital and DTS, ensuring that users can enjoy an immersive sound experience. With its built-in 192 kHz/24-bit audio DAC, the player produces rich, high-fidelity sound, enhancing the overall cinematic experience.
In terms of connectivity, the DVD765SA includes a variety of outputs, such as composite video, S-Video, and component video outputs, allowing it to easily connect to a wide range of televisions and home theater systems. Additionally, the player features a digital audio output, making it compatible with external audio systems for enhanced sound quality.
Another notable characteristic of the Philips DVD765SA is its versatility in playing various disc formats. It supports not only standard DVDs but also CD, CD-R, CD-RW, and VCD formats, giving users the flexibility to enjoy their entire collection without limitation. Furthermore, it can read MP3 and JPEG files from CD-R and CD-RW discs, allowing for a diverse entertainment experience that includes music and photo slideshows.
The design of the Philips DVD765SA is both sleek and functional. Its user-friendly interface and remote control provide easy navigation through menus and settings. The player is designed for durability and long-term use, making it an excellent addition to any home entertainment setup.
Overall, the Philips DVD765SA stands out as a reliable and multi-functional DVD player. With its advanced technologies, solid audio and video performance, and compatibility with multiple formats, it caters to the needs of diverse users who value quality in their home viewing experiences. Whether it’s for watching movies, listening to music, or viewing photos, the Philips DVD765SA delivers on all fronts.