DVP3200V/75 specifications
The Philips DVP3200V/75 is a versatile and user-friendly DVD player that brings a wide range of entertainment options into your living room. This compact device is designed to deliver impressive video quality and supports multiple formats, ensuring you can enjoy your favorite movies and TV shows without compatibility issues.One of the standout features of the DVP3200V/75 is its extensive format support. It can play a variety of disc types, including DVD, CD, and VCD, as well as various file formats such as JPEG, MP3, and DivX. This means whether you have a classic DVD collection or digital movies stored on your USB drive, this player can handle it all.
Equipped with Progressive Scan technology, the DVP3200V/75 enhances the clarity and sharpness of your video playback. By delivering a smoother image with increased detail, this technology significantly improves the viewing experience, especially on larger screens. For users who appreciate enhanced audio quality, the player also includes Dolby Digital decoding, providing rich and immersive sound to accompany your visuals.
The sleek design of the DVP3200V/75 not only makes it a stylish addition to your entertainment setup but also offers easy navigation. The intuitive on-screen menu allows users to quickly access their media and manage playback options. Additionally, the player features multi-language subtitles and various settings to customize the viewing experience according to personal preferences.
For convenience, the DVP3200V/75 is equipped with a USB port that allows for direct playback of multimedia files from USB drives. This feature makes it easy to access your digital content without the need for a computer or additional devices.
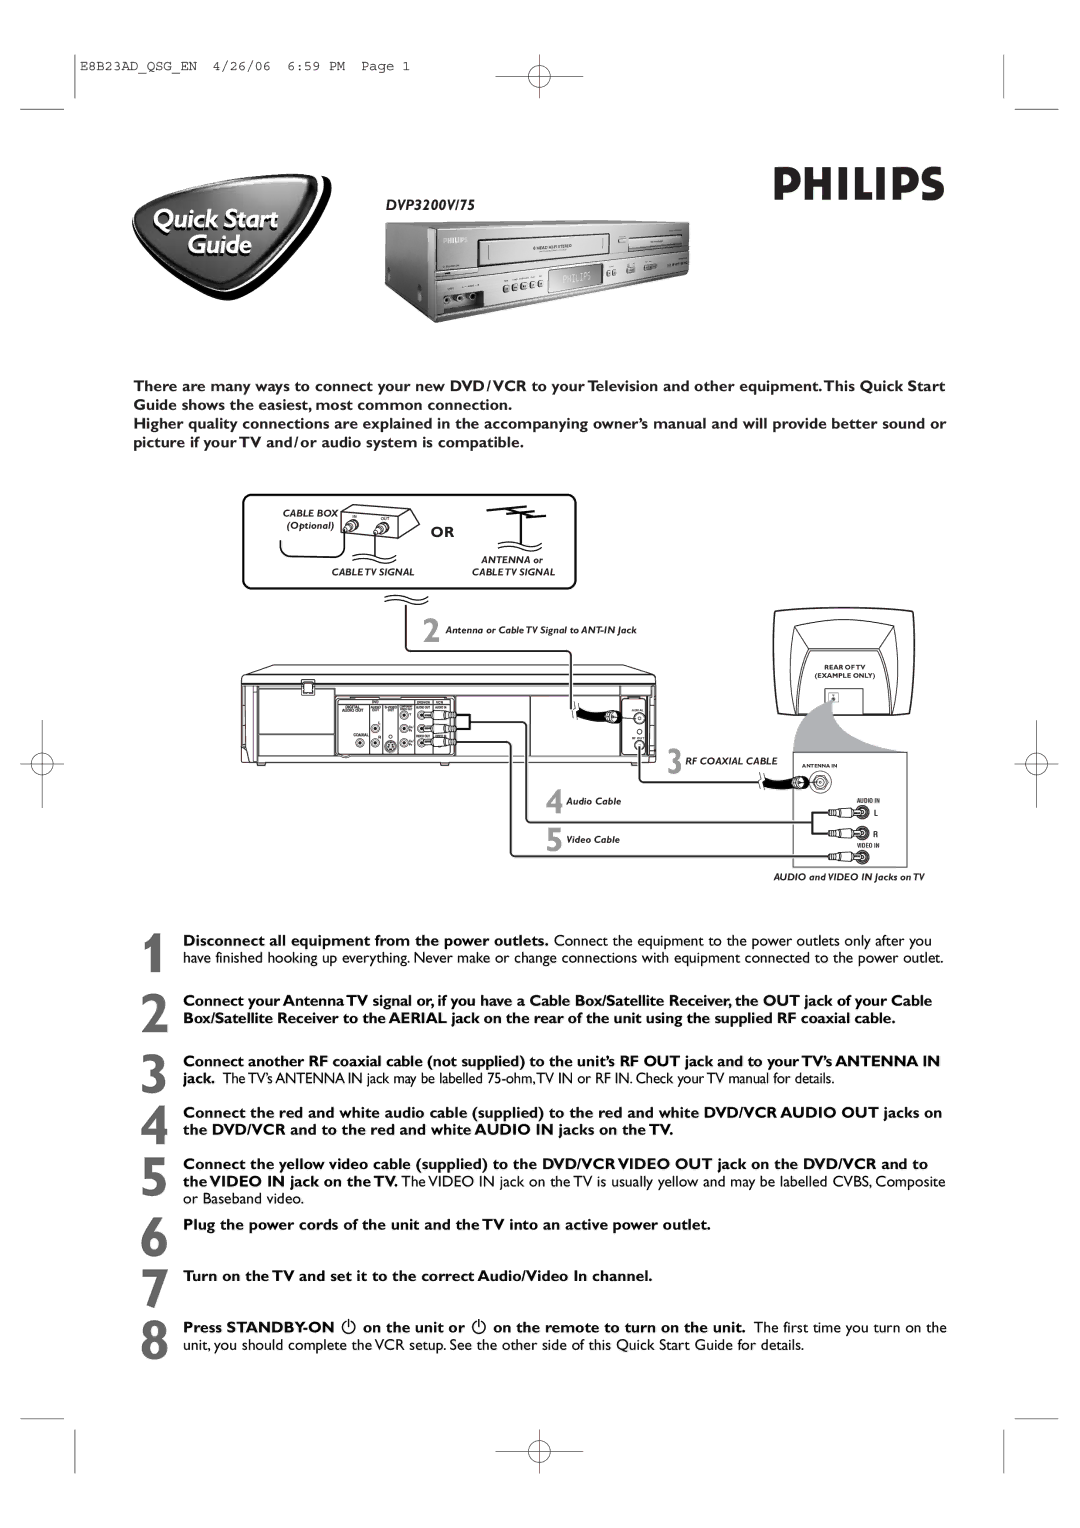
In terms of connectivity, the DVP3200V/75 includes composite video output, making it compatible with a wide range of televisions and projectors. Its design is aimed at providing easy setup and integration into existing home theater systems.
In summary, the Philips DVP3200V/75 is an excellent choice for anyone looking for a reliable and feature-packed DVD player. With its versatile format support, advanced video technologies, and user-friendly features, this player enhances your home entertainment experience, allowing you to enjoy movies and music the way they were meant to be experienced. Whether you're watching a blockbuster film or listening to your favorite music tracks, the DVP3200V/75 is designed to deliver quality and satisfaction.