3 Connect
Make the following basic connections to use the DVD player.
Basic connections:
•Video cables
•Audio cables
Optional connections:
•Audio to other devices:
•Digital amplifier/receiver
•Analog stereo system
Note
•Refer to the type plate at the rear or bottom of the product for identification and supply ratings.
•Before you make or change any connections, ensure that all the devices are disconnected from the power outlet.
Tip
•Different types of connectors may be used to connect this product to your TV, depending on availability and your needs. A comprehensive interactive guide to help you connect your product is available at www.connectivityguide.philips.com.
Connect video cables
Connect this DVD player to the TV to view disc play.
Select the best video connection that the TV can support.
jacks (for a standard TV or Progressive Scan | English | |
• Option 1: Connect to component video |
| |
TV). |
| |
• Option 2: Connect to video (CVBS) jack |
| |
(for a standard TV). | Connect | |
| Note | |
| ||
|
|
|
•You must connect this DVD player directly to a TV.
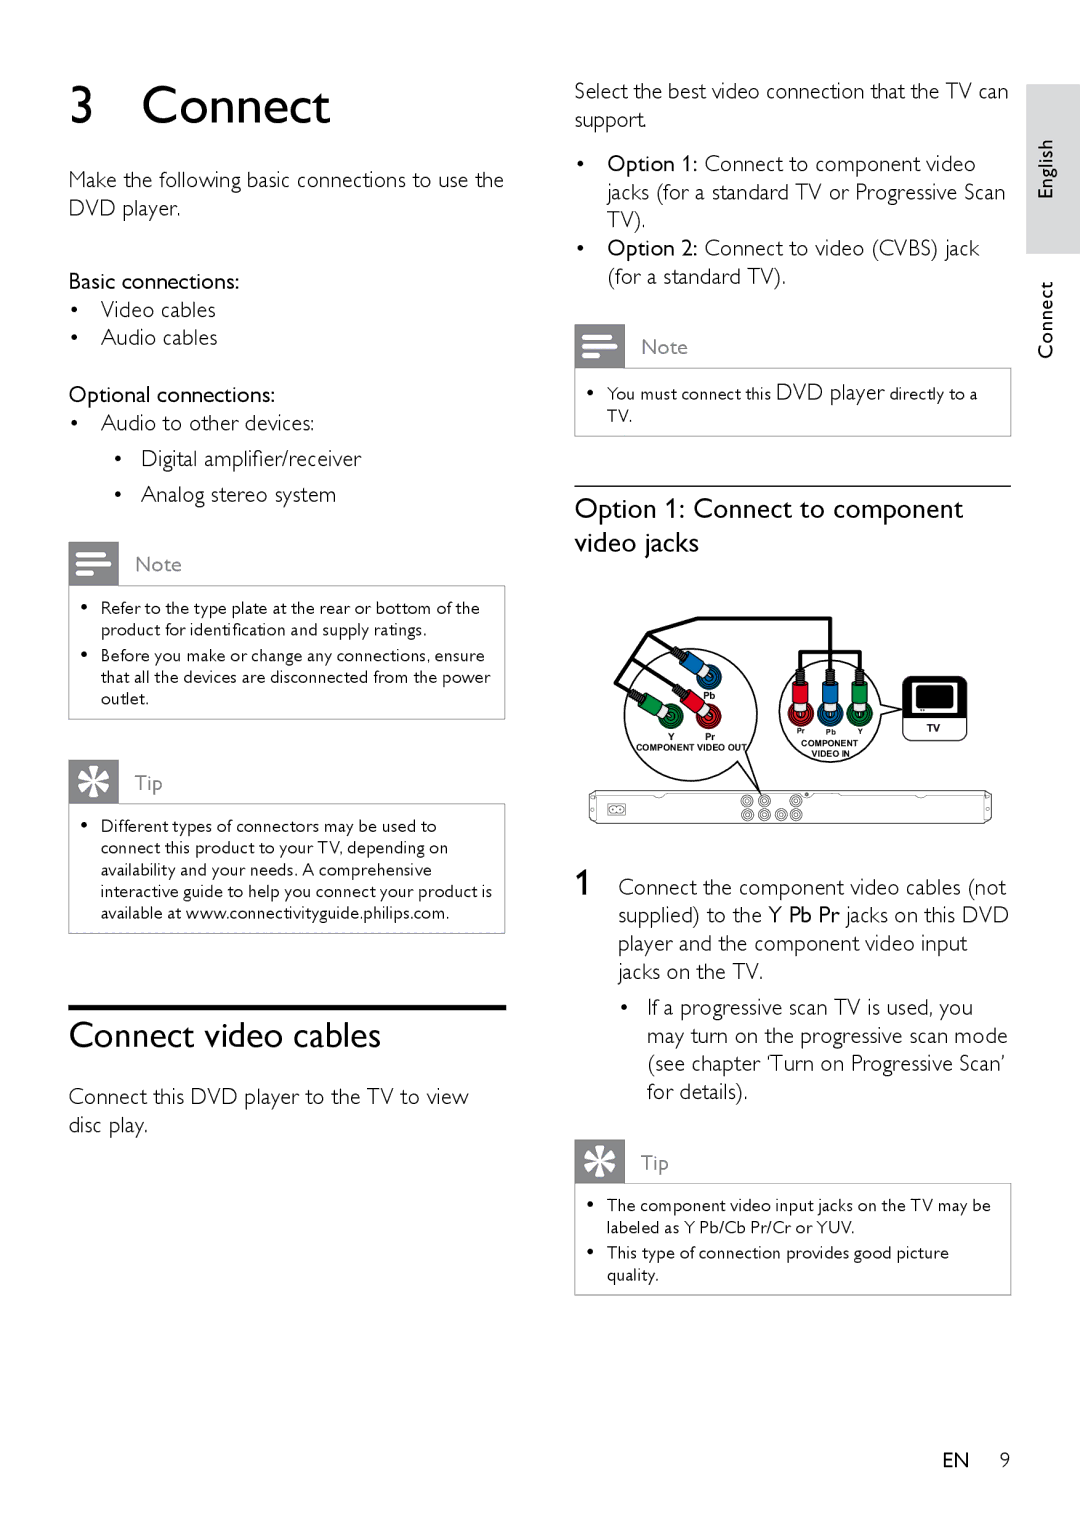
Option 1: Connect to component video jacks
| Pb |
|
|
|
Y | Pr | Pr | Pb | Y |
COMPONENT |
| |||
COMPONENT VIDEO OUT |
| |||
| VIDEO IN |
| ||
|
|
|
| |
1 Connect the component video cables (not supplied) to the Y Pb Pr jacks on this DVD player and the component video input jacks on the TV.
•If a progressive scan TV is used, you may turn on the progressive scan mode
(see chapter ‘Turn on Progressive Scan’ for details).
Tip
•The component video input jacks on the TV may be labeled as Y Pb/Cb Pr/Cr or YUV.
•This type of connection provides good picture quality.
EN 9
