Connect power
![]() Caution
Caution
•Risk of product damage! Ensure that the power supply voltage corresponds to the voltage printed on the back of the product.
•Before connecting the AC power cord, ensure you have completed all other connections.
![]() Note
Note
•The type plate is located on the back of the product.
1 Connect the AC power cable to the wall
socket.
» The product is ready to be set up for use.
4 Get started
Prepare the remote control
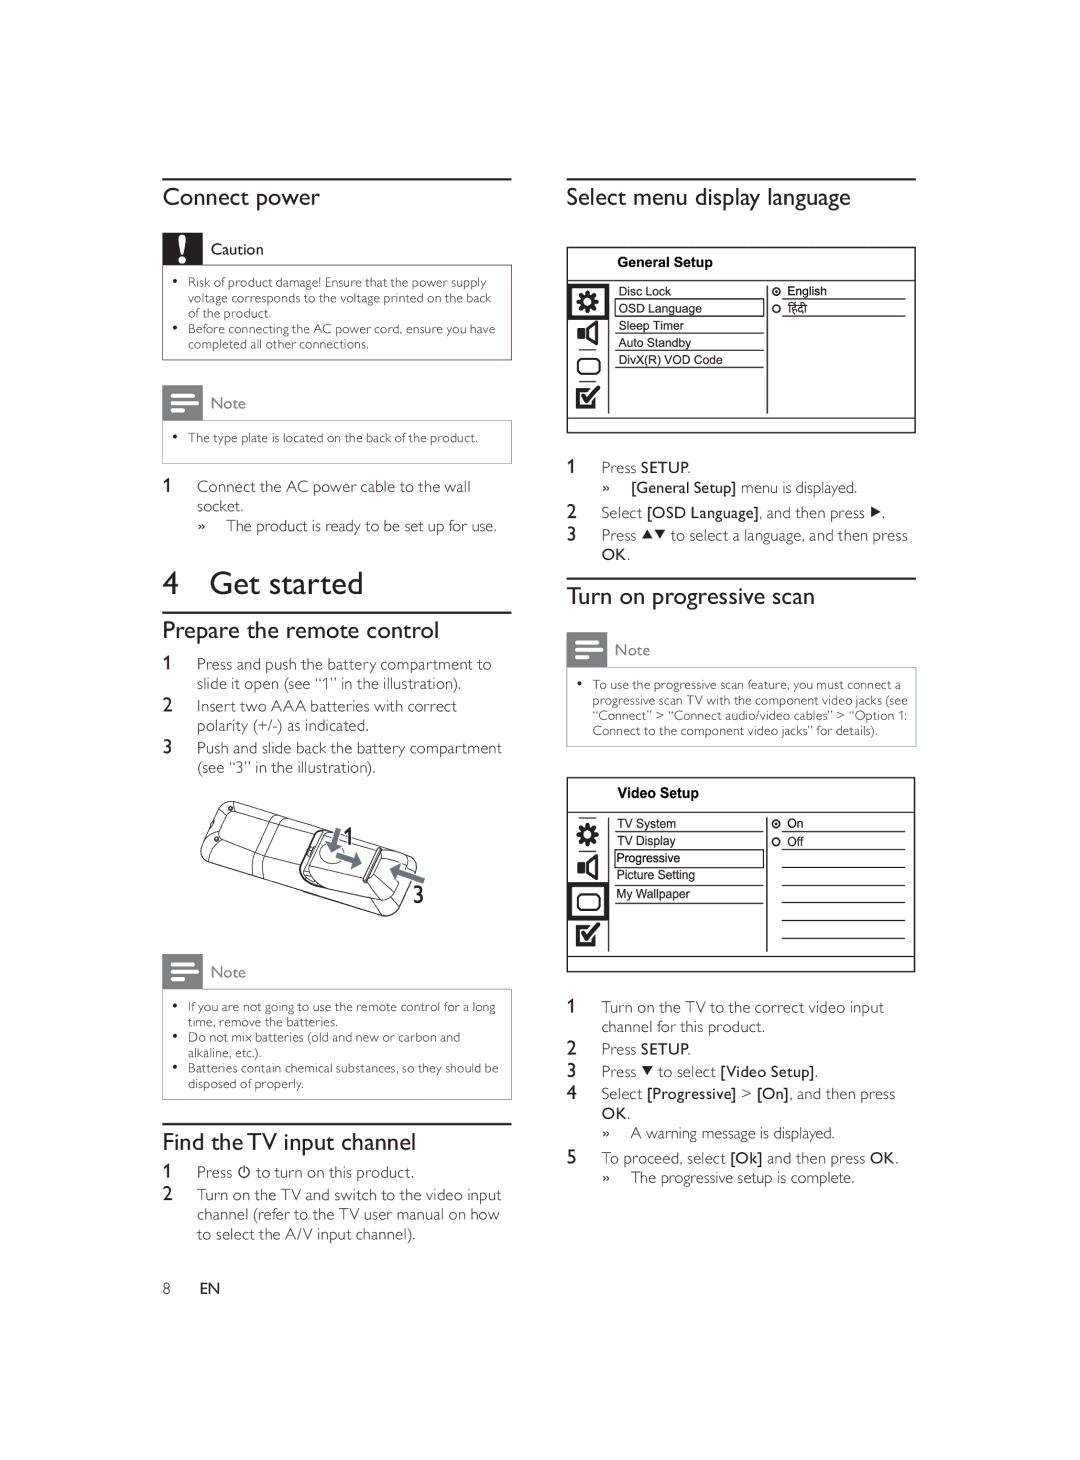
1Press and push the battery compartment to slide it open (see “1” in the illustration).
2Insert two AAA batteries with correct polarity
3Push and slide back the battery compartment (see “3” in the illustration).
![]() Note
Note
•If you are not going to use the remote control for a long time, remove the batteries.
•Do not mix batteries (old and new or carbon and alkaline, etc.).
•Batteries contain chemical substances, so they should be disposed of properly.
Find the TV input channel
1Press ![]() to turn on this product.
to turn on this product.
2Turn on the TV and switch to the video input channel (refer to the TV user manual on how to select the A/V input channel).
Select menu display language
1Press SETUP.
» [General Setup] menu is displayed.
2Select [OSD Language], and then press ![]() .
.
3Press ![]()
![]() to select a language, and then press OK.
to select a language, and then press OK.
Turn on progressive scan
![]() Note
Note
•To use the progressive scan feature, you must connect a progressive scan TV with the component video jacks (see “Connect” > “Connect audio/video cables” > “Option 1: Connect to the component video jacks” for details).
1Turn on the TV to the correct video input channel for this product.
2Press SETUP.
3Press ![]() to select [Video Setup].
to select [Video Setup].
4Select [Progressive] > [On], and then press
OK.
» A warning message is displayed.
5To proceed, select [Ok] and then press OK. » The progressive setup is complete.
8EN
