|
|
|
| Getting Started | |||||
|
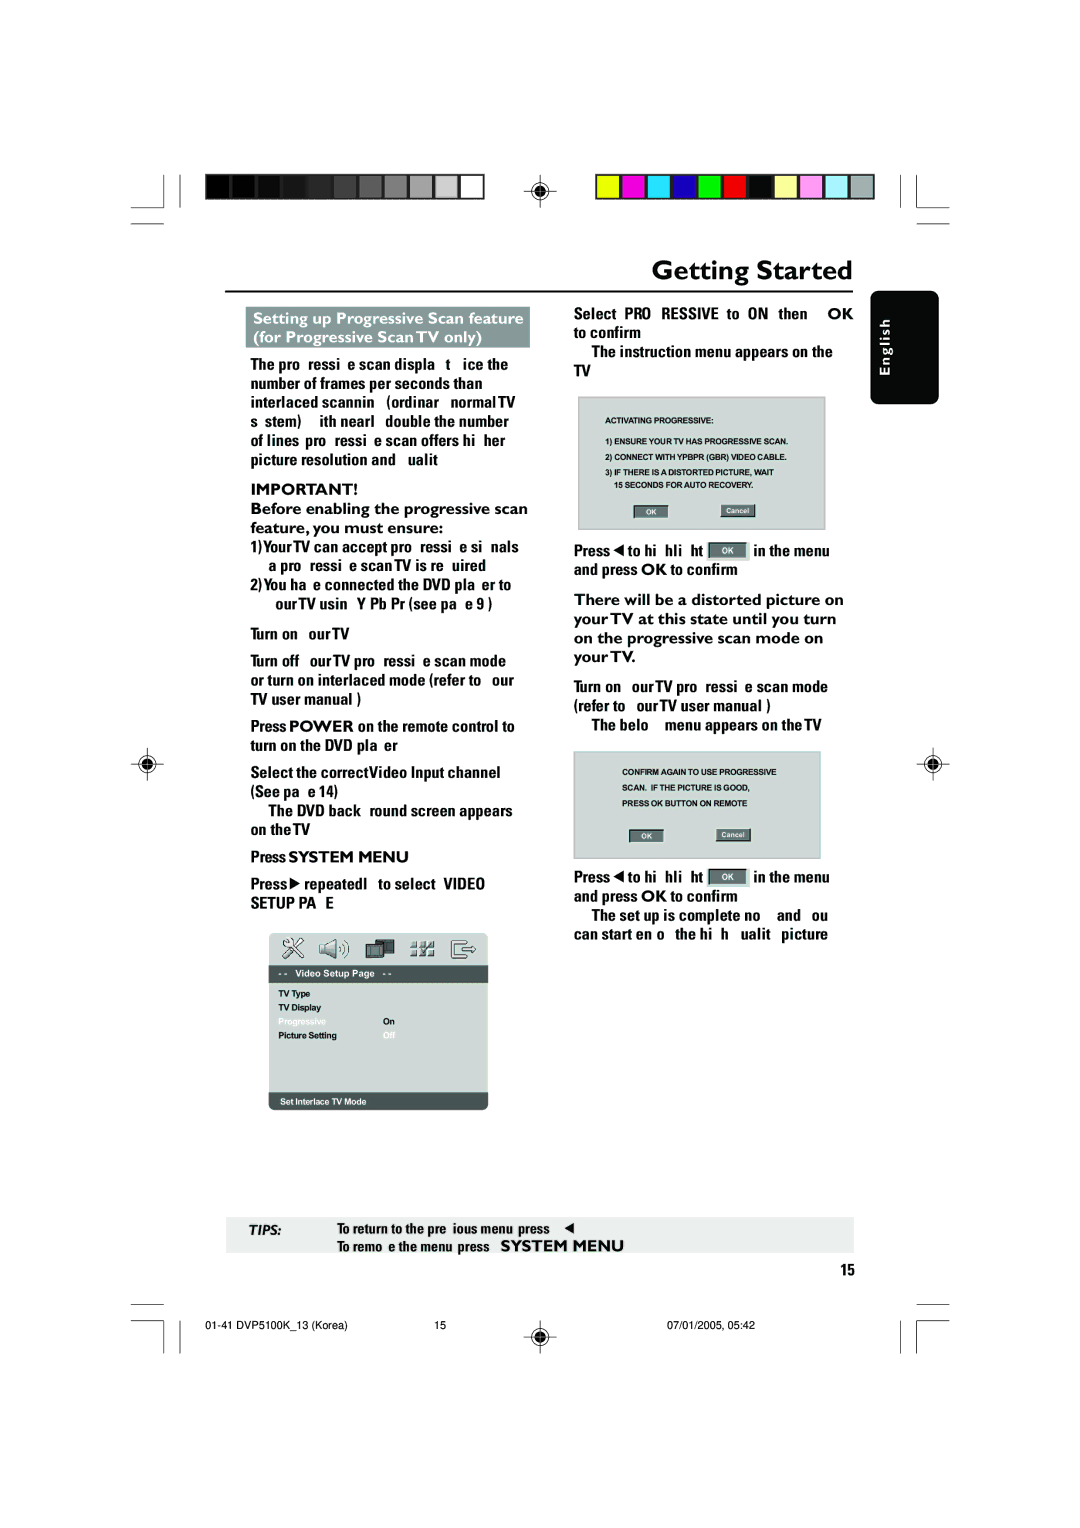
| 7 Select {PROGRESSIVE} to {ON}, then OK | |||||||
| Setting up Progressive Scan feature | ||||||||
| (for Progressive Scan TV only) |
| to confirm. |
|
|
| |||
| The progressive scan display twice the |
| ➜ The instruction menu appears on the | ||||||
|
| TV. |
|
|
| ||||
| number of frames per seconds than |
|
|
|
| ||||
|
|
|
|
|
|
|
|
| |
| interlaced scanning (ordinary normal TV |
|
|
|
|
|
|
|
|
|
|
|
|
|
|
|
|
| |
| system).With nearly double the number |
| ACTIVATING PROGRESSIVE: |
|
|
| |||
|
|
|
|
|
|
|
|
| |
| of lines, progressive scan offers higher |
| 1) ENSURE YOUR TV HAS PROGRESSIVE SCAN. |
| |||||
| picture resolution and quality. |
| 2) CONNECT WITH YPBPR (GBR) VIDEO CABLE. |
| |||||
|
|
|
|
|
|
|
|
| |
|
|
| 3) IF THERE IS A DISTORTED PICTURE, WAIT |
| |||||
| IMPORTANT! |
| 15 SECONDS FOR AUTO RECOVERY. |
|
| ||||
|
|
|
|
|
|
|
|
| |
| Before enabling the progressive scan |
|
|
|
|
|
|
|
|
|
|
| OK |
|
| Cancel |
|
| |
| feature, you must ensure: |
|
|
|
|
|
|
|
|
|
|
|
|
|
|
|
|
| |
| 1) Your TV can accept progressive signals, | 8 Press 1 to highlight |
|
| in the menu | ||||
|
| OK | |||||||
| a progressive scan TV is required. |
|
|
|
|
|
|
|
|
| and press OK to confirm. |
|
| ||||||
| 2) You have connected the DVD player to | There will be a distorted picture on | |||||||
| your TV using Y Pb Pr (see page 9.) | ||||||||
1 Turn on your TV. | your TV at this state until you turn | ||||||||
on the progressive scan mode on | |||||||||
2 Turn off your TV progressive scan mode | your TV. |
|
|
| |||||
| or turn on interlaced mode (refer to your | 9 Turn on your TV progressive scan mode | |||||||
| TV user manual.) |
| (refer to your TV user manual.) | ||||||
|
|
| |||||||
3 Press POWER on the remote control to |
| ➜ The below menu appears on the TV. | |||||||
| turn on the DVD player. |
|
|
|
|
|
|
|
|
| Select the correct Video Input channel. |
| CONFIRM AGAIN TO USE PROGRESSIVE |
| |||||
|
|
|
|
|
|
|
|
| |
| (See page 14). |
| SCAN. IF THE PICTURE IS GOOD, |
|
| ||||
|
| PRESS OK BUTTON ON REMOTE |
|
| |||||
| ➜ The DVD background screen appears |
|
|
| |||||
|
|
|
|
|
|
|
|
| |
| on the TV. |
|
|
|
|
|
|
| |
|
|
| OK |
|
| Cancel |
|
| |
5 Press SYSTEM MENU. |
|
|
|
|
|
|
|
| |
0 Press 1 to highlight |
|
| in the menu | ||||||
6 Press 2 repeatedly to select {VIDEO |
| OK | |||||||
|
|
|
|
|
|
|
| ||
and press OK to confirm. |
|
| |||||||
| SETUP PAGE}. |
|
| ||||||
| ➜ The set up is complete now and you | ||||||||
|
| ||||||||
|
| can start enjoy the high quality picture. | |||||||
TV Type |
|
TV Display |
|
Progressive | On |
Picture Setting | Off |
Set Interlace TV Mode |
|
E n g l i s h
TIPS: To return to the previous menu, press 1.
To remove the menu, press SYSTEM MENU.
15
| 15 | 07/01/2005, 05:42 |
