4
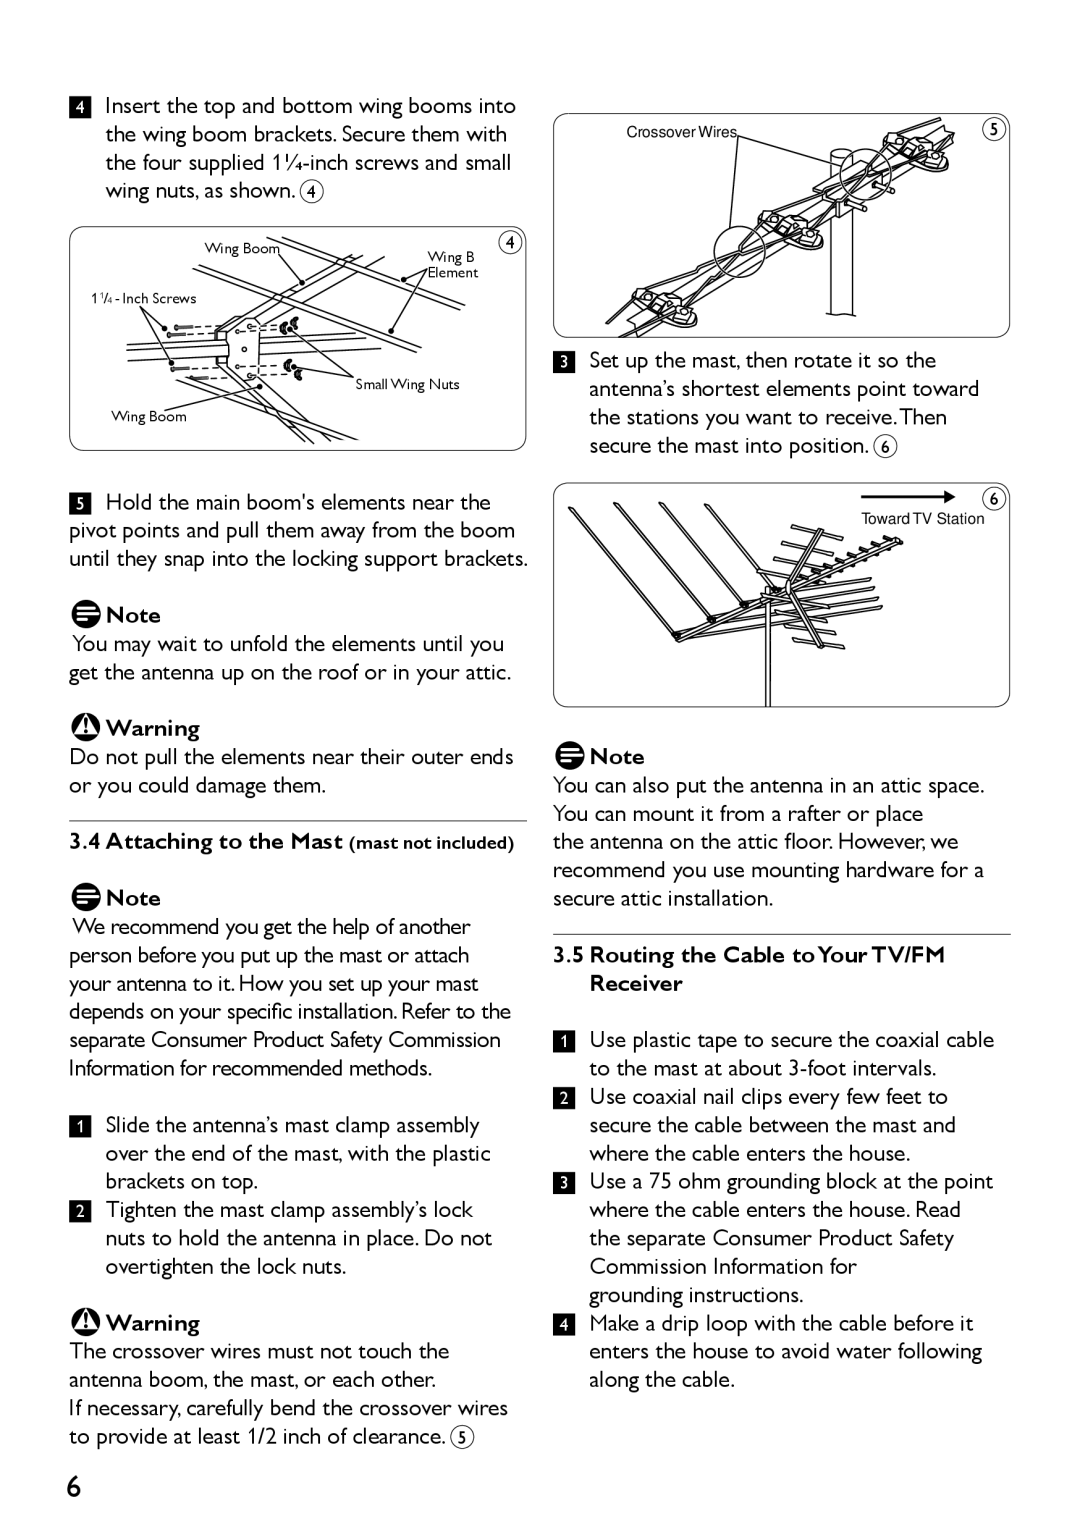
Insert the top and bottom wing booms into |
| 5 |
the wing boom brackets. Secure them with | Crossover Wires | |
the four supplied |
|
|
wing nuts, as shown. 4 |
|
|
Wing Boom | Wing B | 4 |
|
| |
| Element |
|
11/4 - Inch Screws |
|
|
| Small Wing Nuts |
|
Wing Boom |
|
|
5Hold the main boom's elements near the pivot points and pull them away from the boom until they snap into the locking support brackets.
DNote
You may wait to unfold the elements until you get the antenna up on the roof or in your attic.
BWarning
Do not pull the elements near their outer ends or you could damage them.
3.4 Attaching to the Mast (mast not included)
DNote
We recommend you get the help of another person before you put up the mast or attach your antenna to it. How you set up your mast depends on your specific installation. Refer to the separate Consumer Product Safety Commission Information for recommended methods.
1Slide the antenna’s mast clamp assembly over the end of the mast, with the plastic brackets on top.
2Tighten the mast clamp assembly’s lock nuts to hold the antenna in place. Do not overtighten the lock nuts.
BWarning
The crossover wires must not touch the antenna boom, the mast, or each other.
If necessary, carefully bend the crossover wires to provide at least 1/2 inch of clearance. 5
3Set up the mast, then rotate it so the antenna’s shortest elements point toward the stations you want to receive.Then secure the mast into position. 6
6
Toward TV Station
DNote
You can also put the antenna in an attic space. You can mount it from a rafter or place
the antenna on the attic floor. However, we recommend you use mounting hardware for a secure attic installation.
3.5Routing the Cable toYour TV/FM Receiver
1Use plastic tape to secure the coaxial cable to the mast at about
2Use coaxial nail clips every few feet to secure the cable between the mast and where the cable enters the house.
3Use a 75 ohm grounding block at the point where the cable enters the house. Read the separate Consumer Product Safety Commission Information for
grounding instructions.
4Make a drip loop with the cable before it enters the house to avoid water following along the cable.
