|
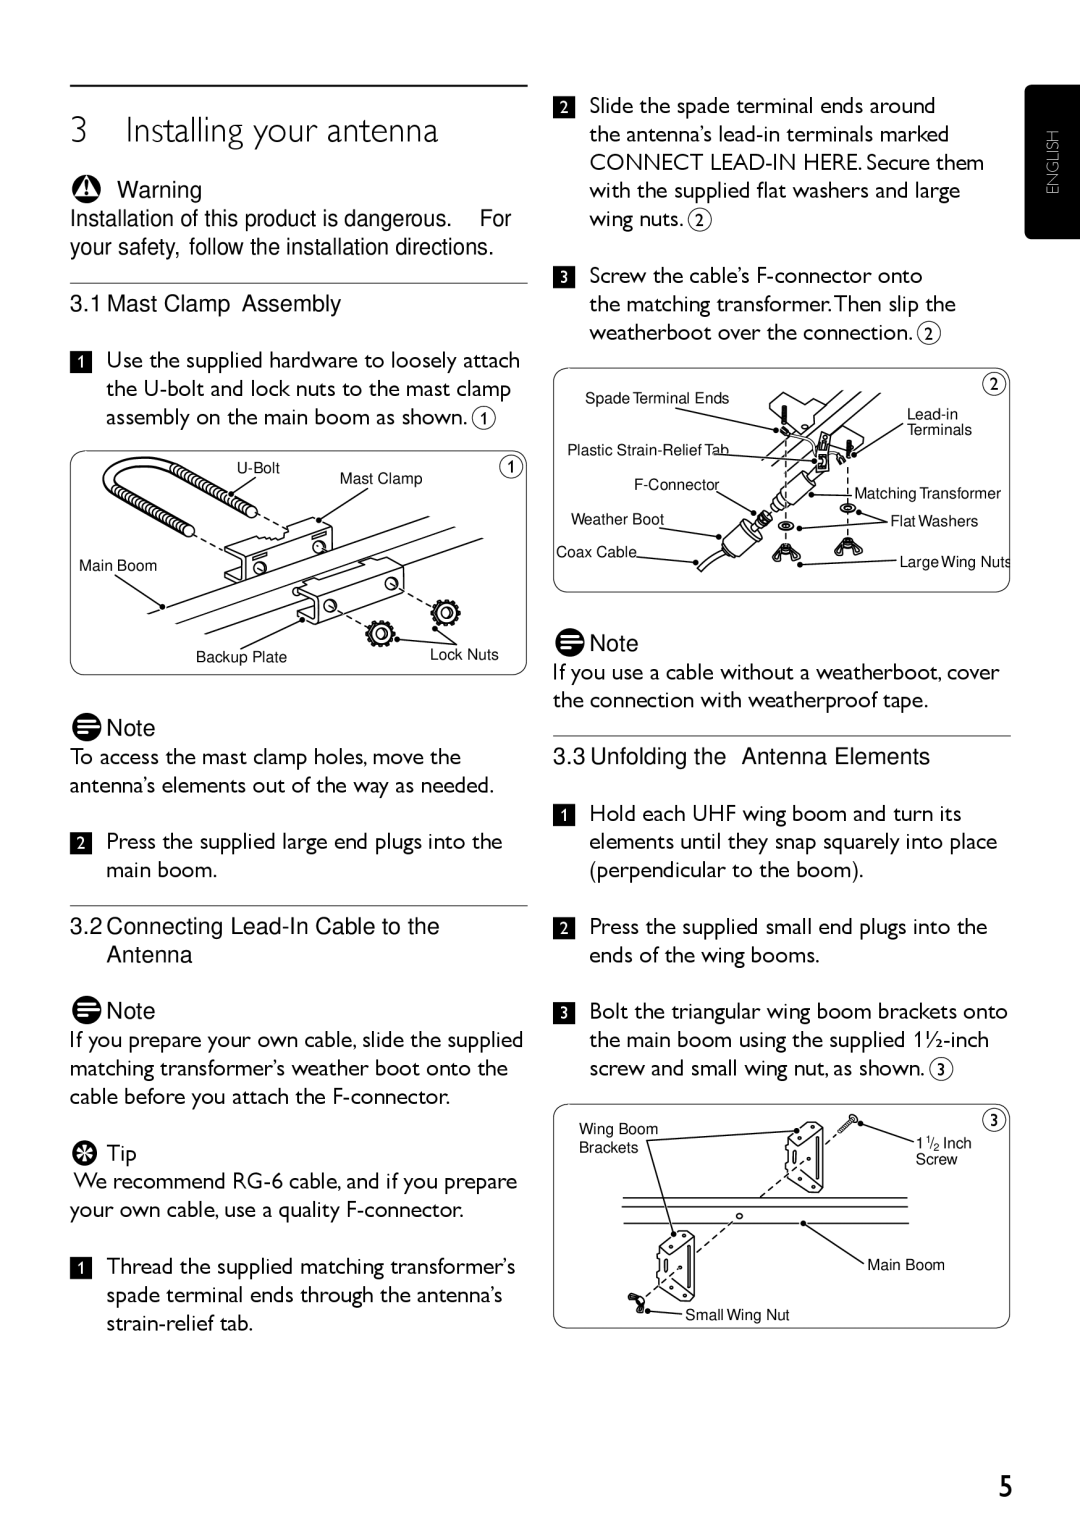
| Slide the spade terminal ends around |
3 Installing your antenna | 2 | |
| the antenna’s | |
|
| CONNECT |
B Warning |
| with the supplied flat washers and large |
Installation of this product is dangerous. For |
| wing nuts. 2 |
your safety, follow the installation directions. |
|
|
3 Screw the cable’s
3.1 Mast Clamp Assemblythe matching transformer.Then slip the weatherboot over the connection. 2
1Use the supplied hardware to loosely attach
the | Spade Terminal Ends | 2 | ||
assembly on the main boom as shown. 1 |
|
| ||
|
|
| Plastic | Terminals |
| 1 |
| ||
Mast Clamp |
| |||
|
| Matching Transformer | ||
|
|
| ||
|
|
|
| |
|
|
| Weather Boot | Flat Washers |
Main Boom |
|
| Coax Cable | Large Wing Nuts |
|
|
| ||
ENGLISH
Backup Plate | Lock Nuts |
DNote
To access the mast clamp holes, move the antenna’s elements out of the way as needed.
2Press the supplied large end plugs into the main boom.
3.2Connecting Lead-In Cable to the Antenna
DNote
If you prepare your own cable, slide the supplied matching transformer’s weather boot onto the cable before you attach the
ETip
We recommend
1Thread the supplied matching transformer’s spade terminal ends through the antenna’s
DNote
If you use a cable without a weatherboot, cover the connection with weatherproof tape.
3.3 Unfolding the Antenna Elements
1Hold each UHF wing boom and turn its elements until they snap squarely into place (perpendicular to the boom).
2Press the supplied small end plugs into the ends of the wing booms.
3Bolt the triangular wing boom brackets onto the main boom using the supplied
Wing Boom |
| 3 | |
1 1/2 | Inch | ||
Brackets | |||
| Screw | ||
![]() Main Boom
Main Boom
![]()
![]() Small Wing Nut
Small Wing Nut
