3With the help of another person, place the mount against the wall and level it using the bubble guide.
4While another person holds the mount in place, mark six locations on the wall where the mount is to be installed.
5Set the mount aside and drill a 3/8” (10
mm)pilot hole at each marked location. Remove any excess dust from the holes.
6Insert a concrete anchor (P) into each hole so that it is flush with the concrete surface. A hammer can be used to lightly tap the anchors into place if necessary.
7Place the mount back against the wall and secure it using the lag bolts (Q) and lag bolt washers (R) provided. Do not
2
8Once all (6) lag bolts are in place you must tighten each one. Be sure not to over tighten.
DNote
If the concrete wall is covered by a layer of plaster or drywall, the concrete anchor must pass completely through the layer to rest flush with the concrete surface.
3.3 Attaching the arms to the display
BWarning
Use extra care during this part of the installation.Avoid laying your display face down if possible as it may damage the viewing surface.
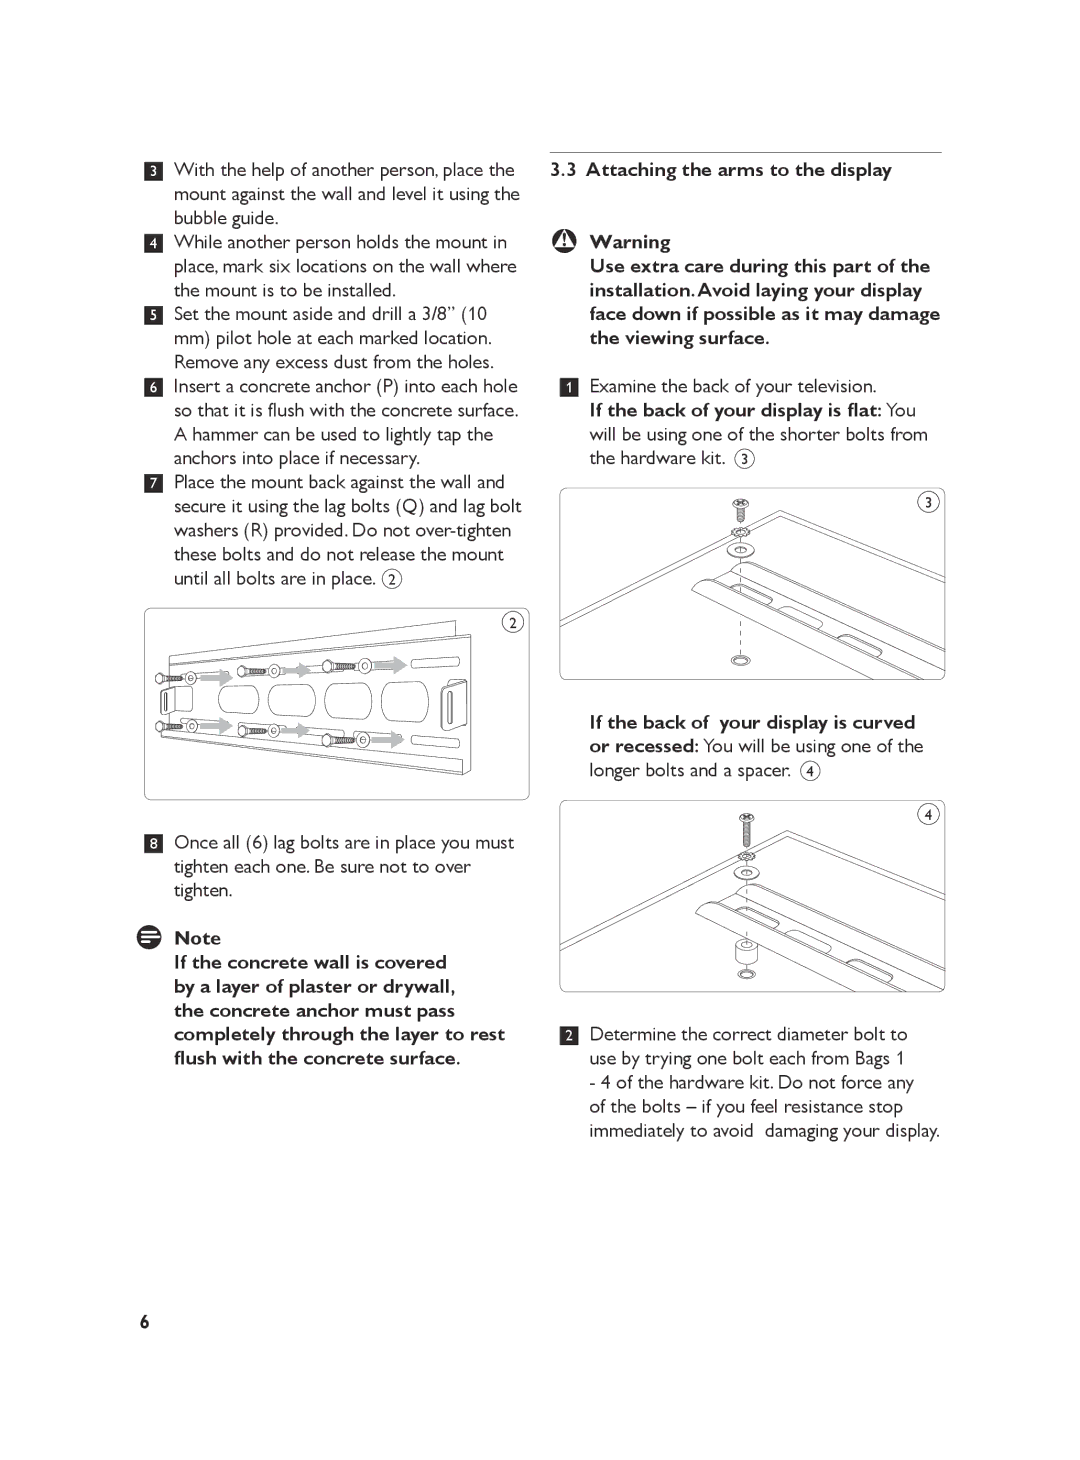
1Examine the back of your television.
If the back of your display is flat: You will be using one of the shorter bolts from the hardware kit. 3
3
If the back of your display is curved or recessed: You will be using one of the longer bolts and a spacer. 4
4
2Determine the correct diameter bolt to use by trying one bolt each from Bags 1 - 4 of the hardware kit. Do not force any of the bolts – if you feel resistance stop immediately to avoid damaging your display.
6