Getting Started
Unpacking
Carefully remove units from packaging. If there is any visible damage, DO NOT attempt to operate the equipment. Notify your dealer or shipping carrier immediately. Keep this guide for future use.
System Contents
• Base Unit
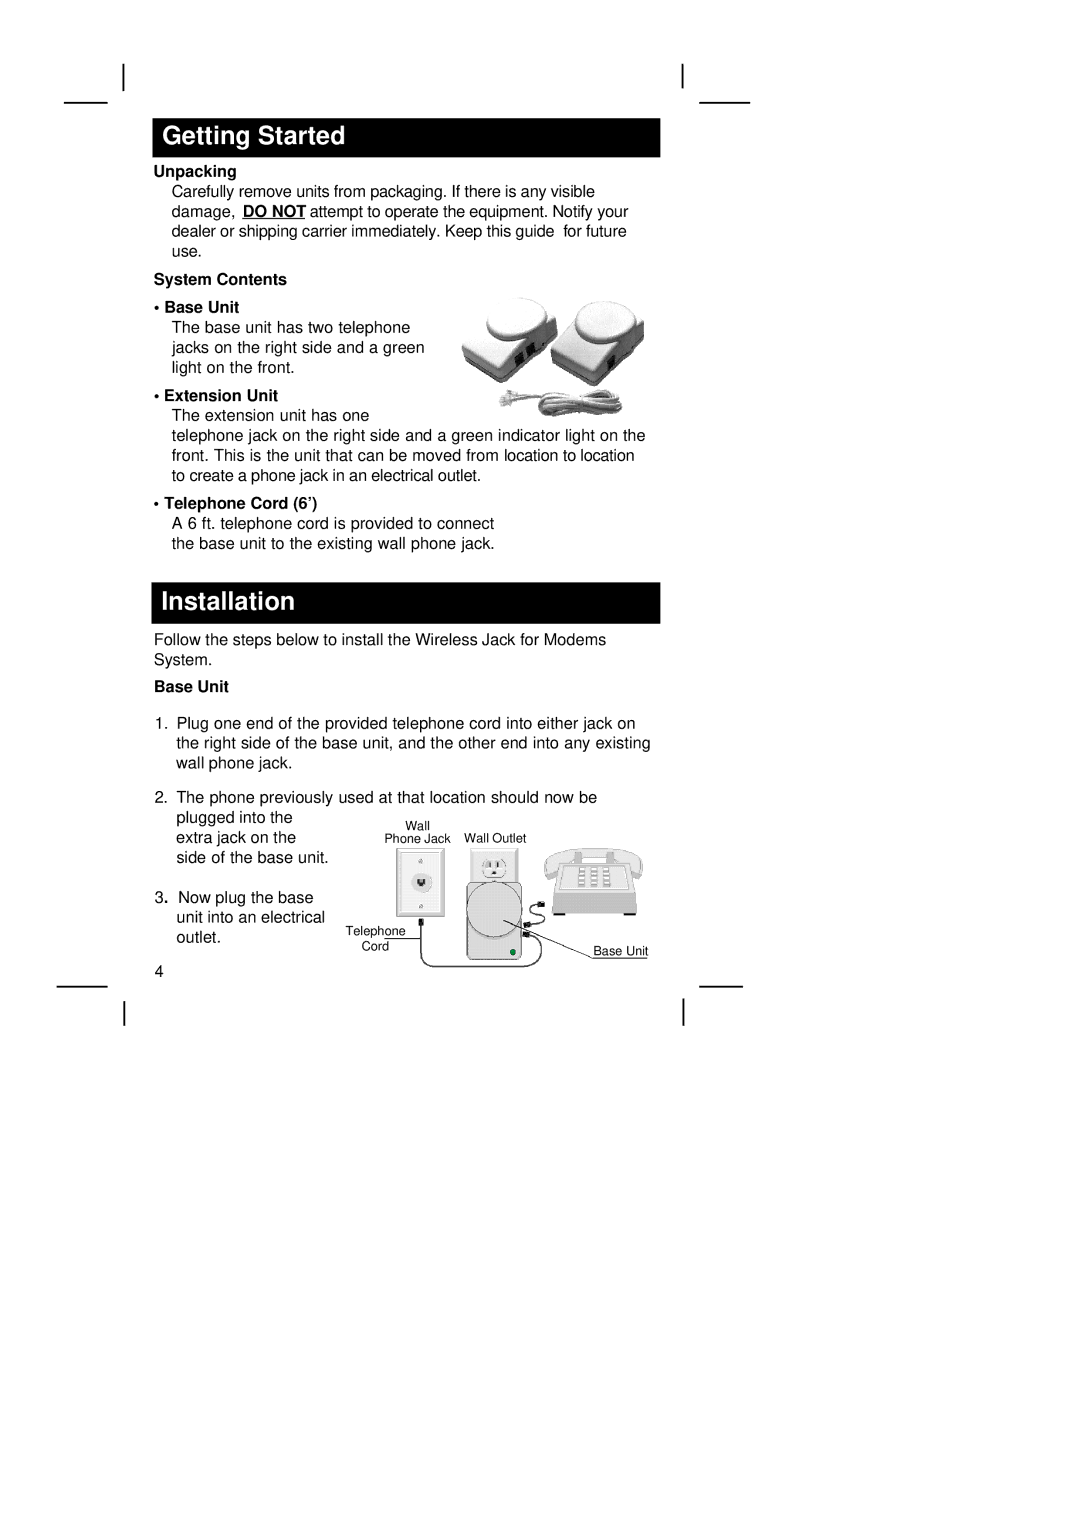
The base unit has two telephone jacks on the right side and a green light on the front.
• Extension Unit
The extension unit has one
telephone jack on the right side and a green indicator light on the front. This is the unit that can be moved from location to location to create a phone jack in an electrical outlet.
• Telephone Cord (6’)
A 6 ft. telephone cord is provided to connect the base unit to the existing wall phone jack.
Installation
Follow the steps below to install the Wireless Jack for Modems System.
Base Unit
1. Plug one end of the provided telephone cord into either jack on the right side of the base unit, and the other end into any existing wall phone jack.
2. The phone previously used at that location should now be plugged into the
extra jack on the side of the base unit.
3. Now plug the base unit into an electrical outlet.
4
Telephone |
|
Cord | Base Unit |
|