A HARDWARE TOUR
Illustrations are provided in this chapter as a visual introduction to the Drive.
Please Familiarize yourself with these illustrations and refer to them when necessary to complete the installation and operation of the unit.
FRONT VIEW
7 |
|
|
| |
|
|
|
| |
PHONES |
|
|
|
|
|
| DVD | BUSY |
|
6 | 5 | 4 | 3 | 2 |
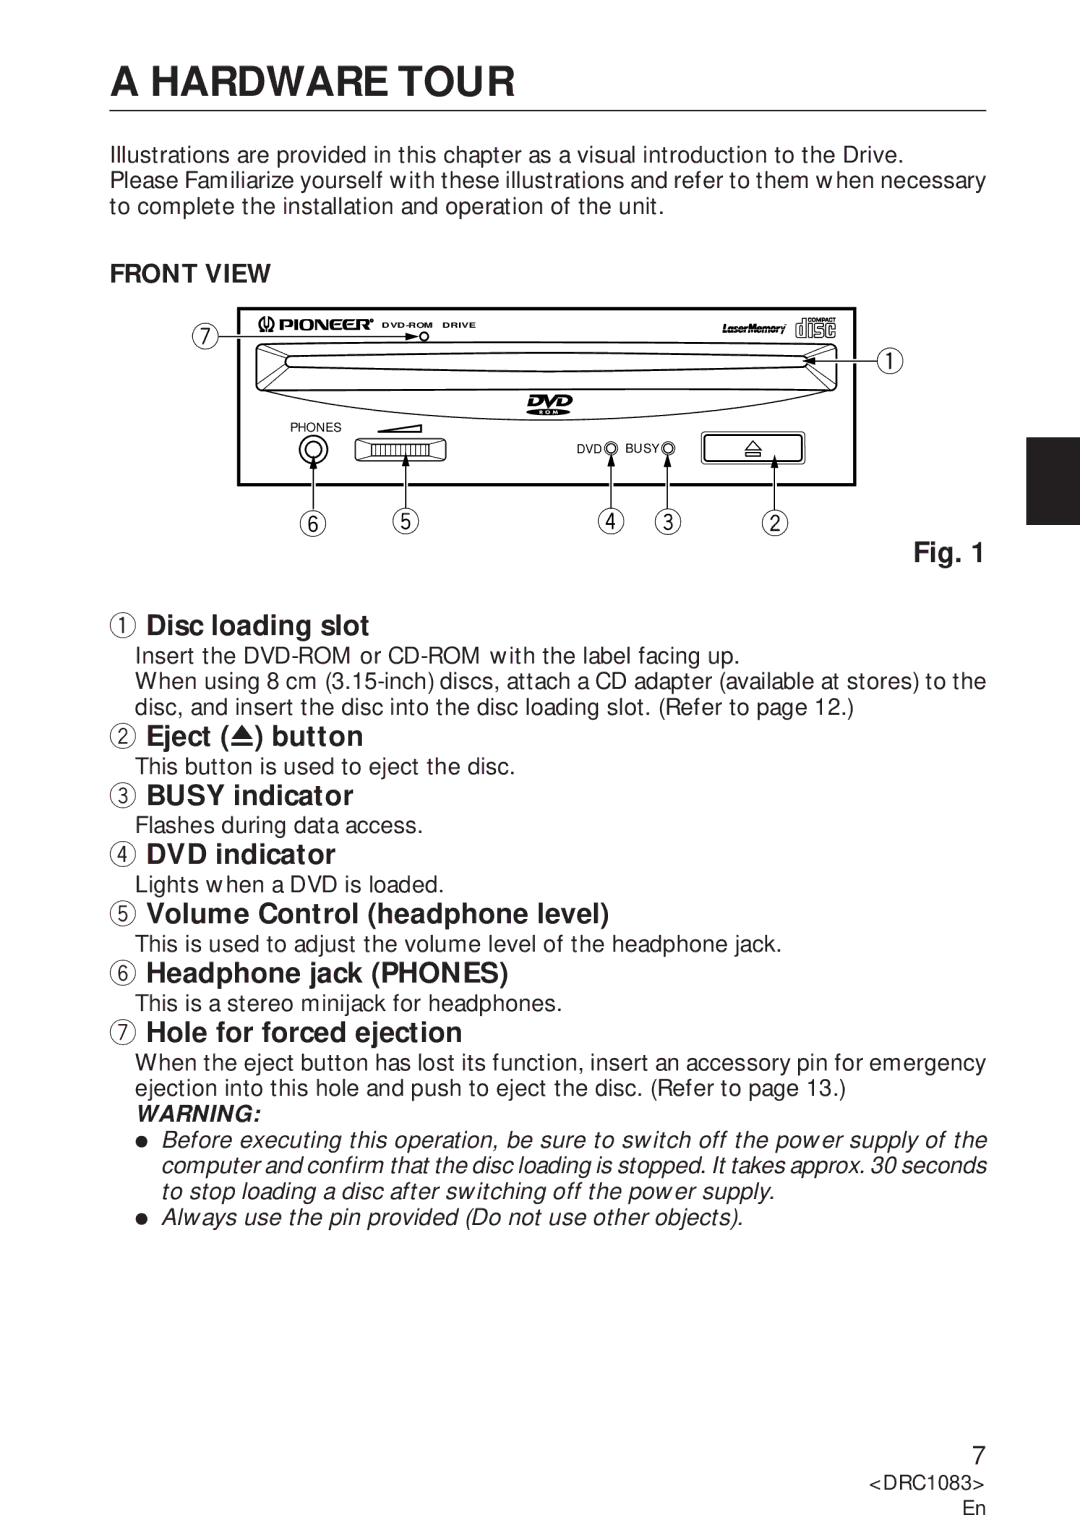
1Disc loading slot
1
Fig. 1
Insert the
When using 8 cm
2Eject (0) button
This button is used to eject the disc.
3BUSY indicator
Flashes during data access.
4DVD indicator
Lights when a DVD is loaded.
5Volume Control (headphone level)
This is used to adjust the volume level of the headphone jack.
6Headphone jack (PHONES)
This is a stereo minijack for headphones.
7Hole for forced ejection
When the eject button has lost its function, insert an accessory pin for emergency ejection into this hole and push to eject the disc. (Refer to page 13.)
WARNING:
ÖBefore executing this operation, be sure to switch off the power supply of the computer and confirm that the disc loading is stopped. It takes approx. 30 seconds to stop loading a disc after switching off the power supply.
ÖAlways use the pin provided (Do not use other objects).
7
<DRC1083> En